
Read below documentations
How to Download Our Product? Downloaded Product Folder StructureSee Plugin Base Layout Product Folder Structure
Go to “Bricks Woocommerce Layouts Pack” Folder and once you click on that folder see below Go to “Woo-Settings” Folder and once you click on that folder see below

For example
I want to import “Bricks Fashion Shop Template Pack”
Import Regular and Woo Plugin Base Layouts Pack within 15 min
Step 1
Go to Plugins and add below plugins
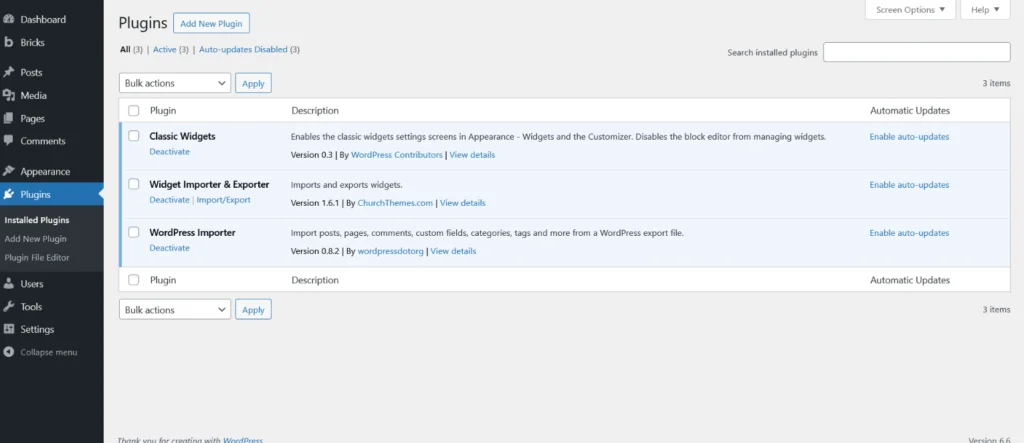
Step 2
Installing Woocommerce plugins and setup .
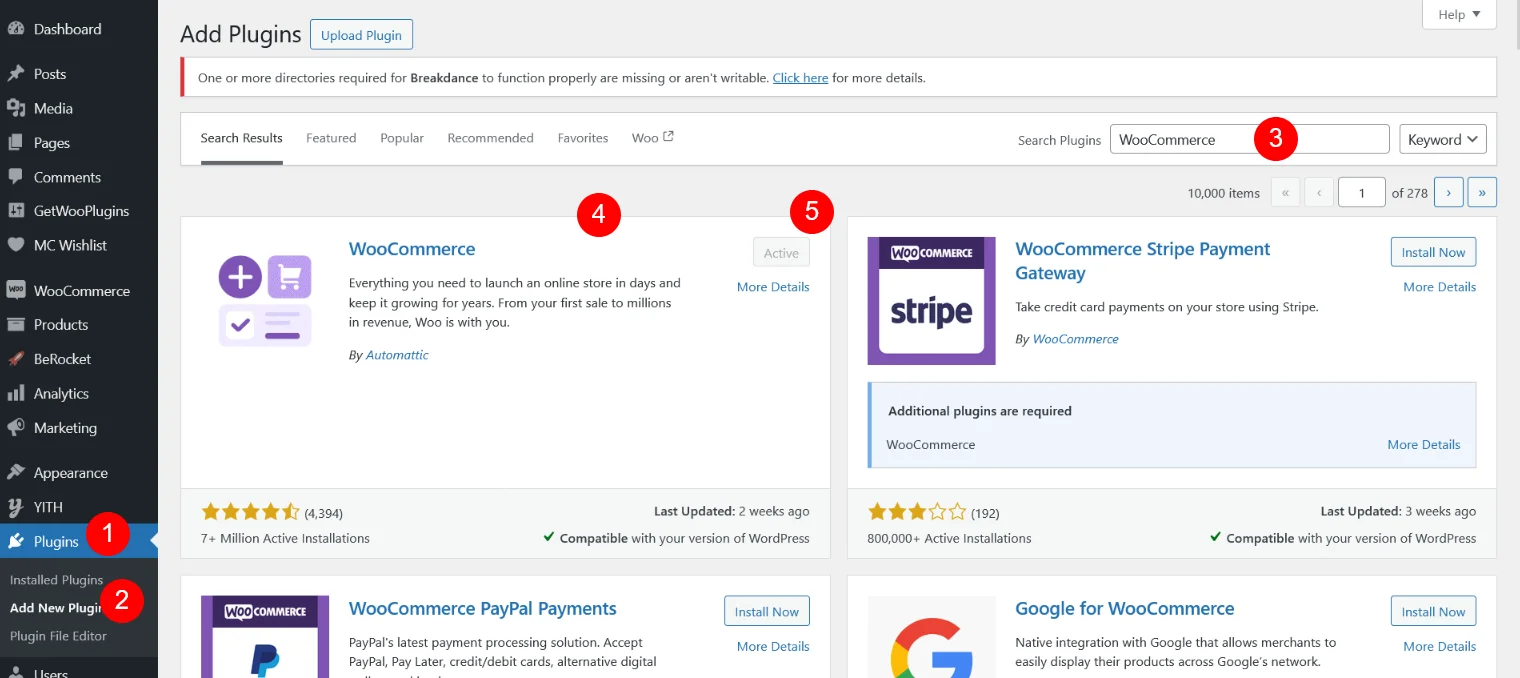
Go to Dashboard > 1. Plugins > 2. Add New Plugin > 3. Search Plugins > 4. Woocommerce > 5. Click on Active
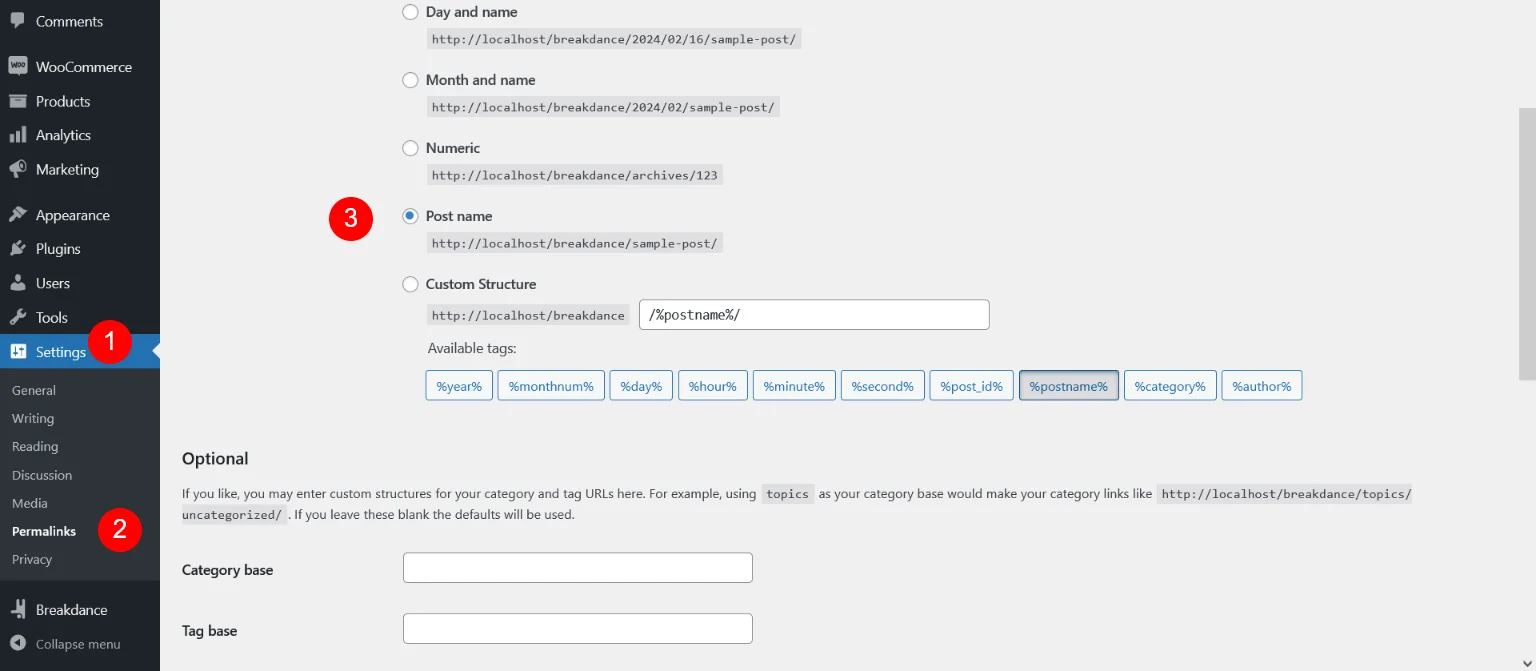
Step 2.1 : After Install Woocommerce Plugin Set below permalink
Go to Dashboard > 1. Settings > 2. Permalink > 3. Click on Post Name > 4. Save Changes
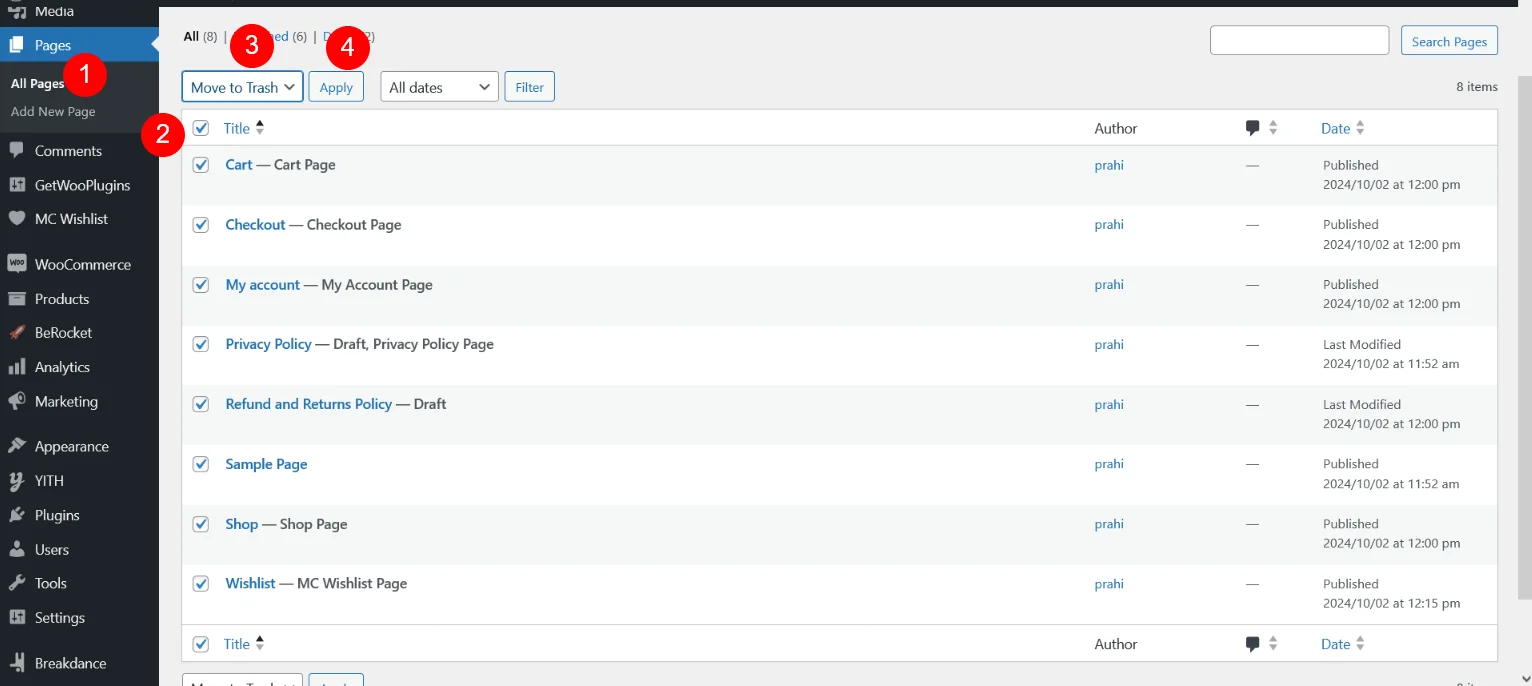
Step 2.2 : Remove All Woocommerce Pages to avoid duplication ?
Go to Dashboard > 1. Pages > 2. Remove All Woocommerce Pages [Shop,Cart,Checkout,My Account]
Step 2.3 : Make Shop Live
Go to 1. Dashboard > 2. WooCommerce > 3. Settings > 4. Site Visibility > 5. Click on Live > 6. Save Changes

Step 3
Most Important Step – Installing other plugins ?
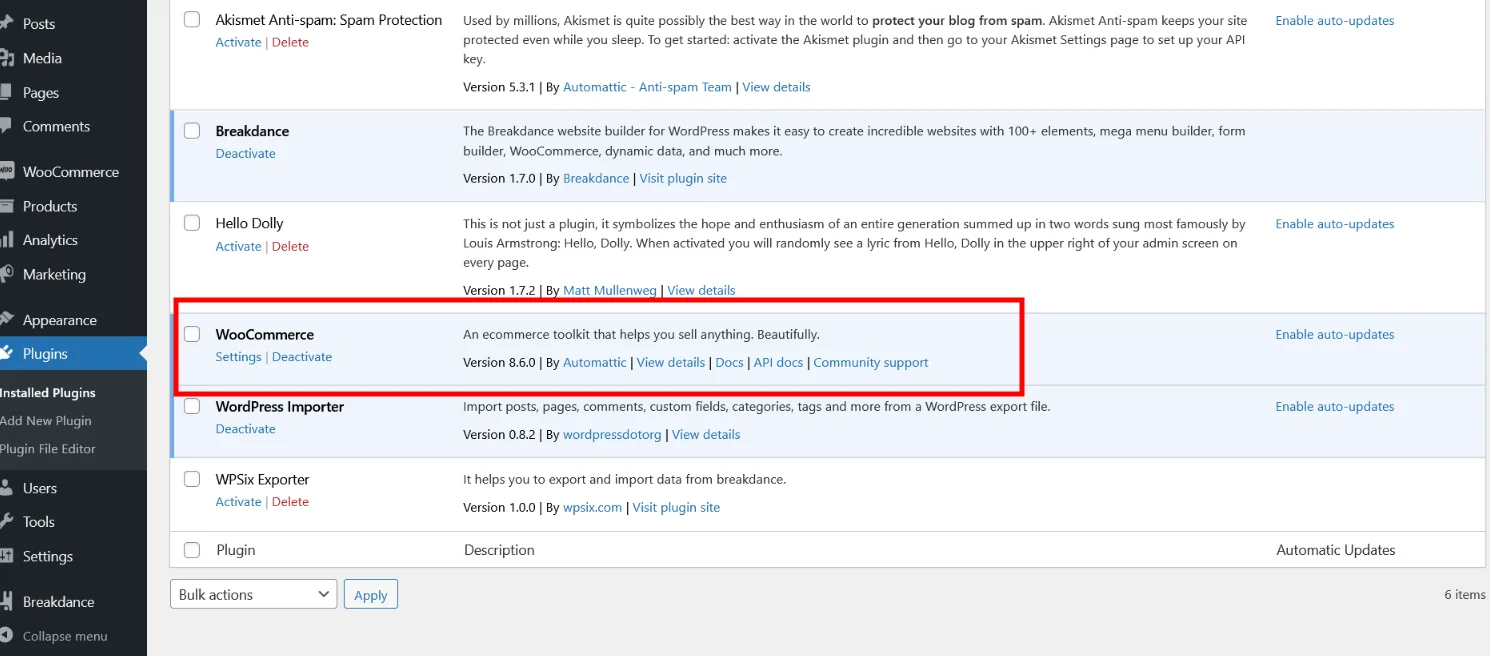
You must first install and activate “WooCommerce” Plugin in order to work other plugins. if you are forget to install “WooCommerce” Plugin then go through Step 2
The plugins that we used for Bricks Builder are optional and will give you some extra features for your shop. These are the plugins that we have used:- FiboSearch – AJAX Search for WooCommerce
- Advanced AJAX Product Filters for WooCommerce
- MC Woocommerce Wishlist
- Variation Swatches for WooCommerce
- WPC Fly Cart for WooCommerce
- YITH WooCommerce Quick View
Step 3.1 –> Install “FiboSearch – AJAX Search for WooCommerce” Plugin and activate
Plugin Link : https://wordpress.org/plugins/ajax-search-for-woocommerce/
Step 3.2 –> Install “Advanced AJAX Product Filters” Plugin and activate
Plugin Link : https://wordpress.org/plugins/woocommerce-ajax-filters/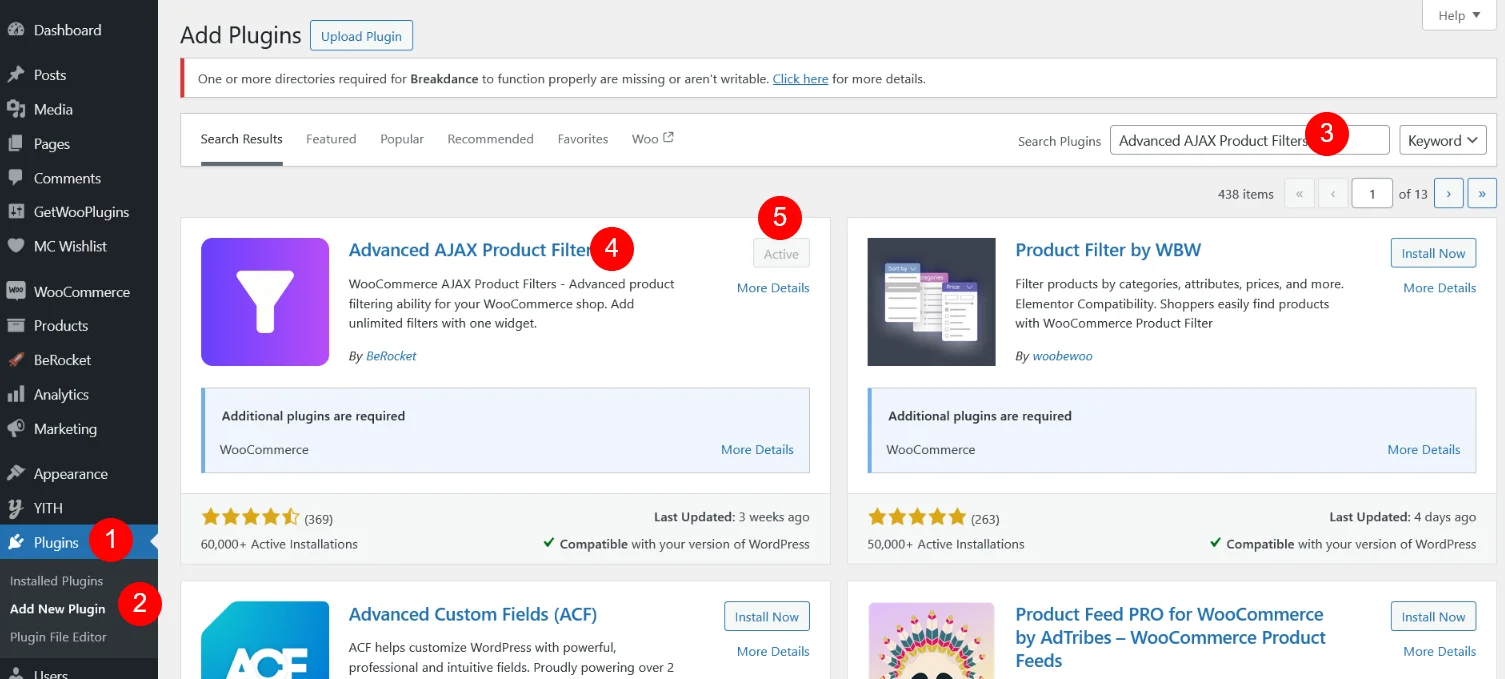
Step 3.3 –> Install “MC Woocommerce Wishlist” Plugin and activate
Plugin Link : https://wordpress.org/plugins/smart-wishlist-for-more-convert/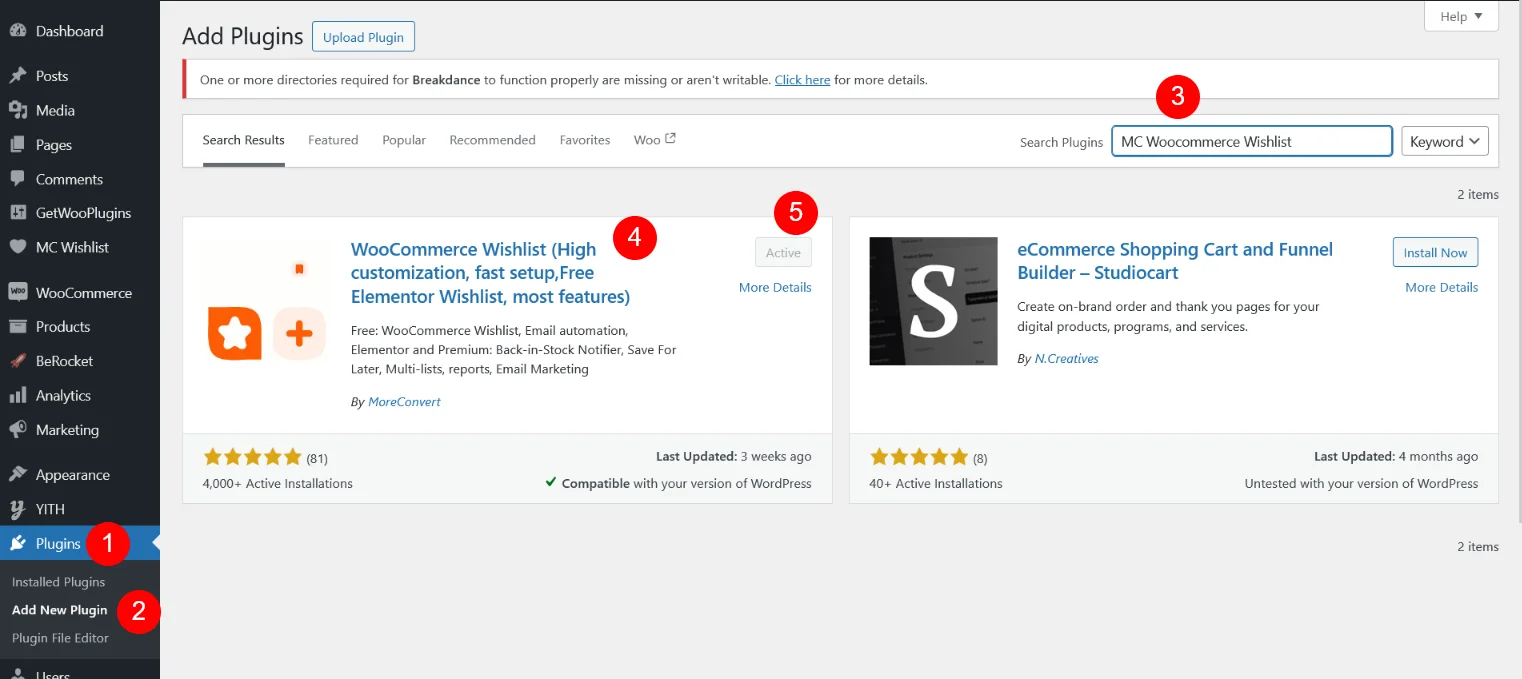
Step 3.4 –> Install “Variation Swatches for WooCommerce” Plugin and activate
Plugin Link : https://wordpress.org/plugins/woo-variation-swatches/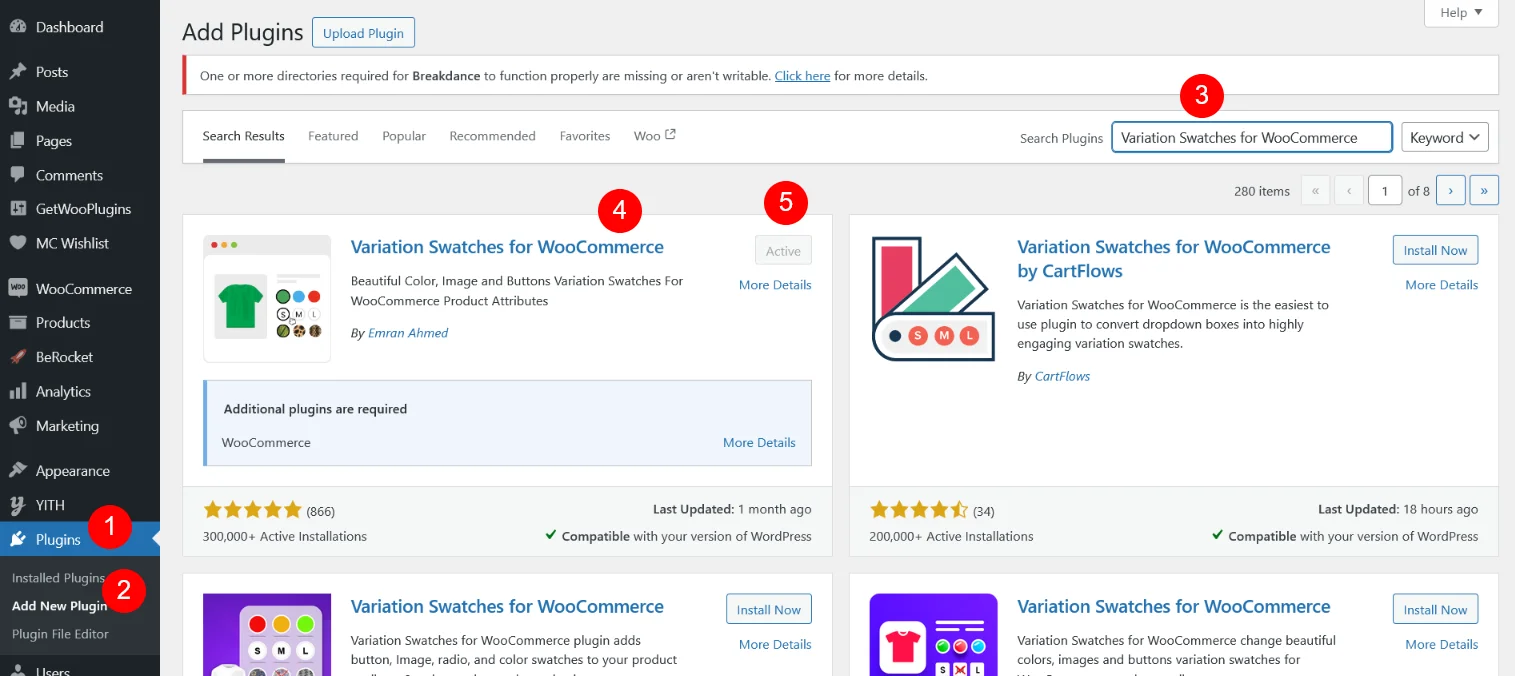
Step 3.5 –> Install “YITH WooCommerce Quick View” Plugin and activate
Plugin Link : https://wordpress.org/plugins/yith-woocommerce-quick-view/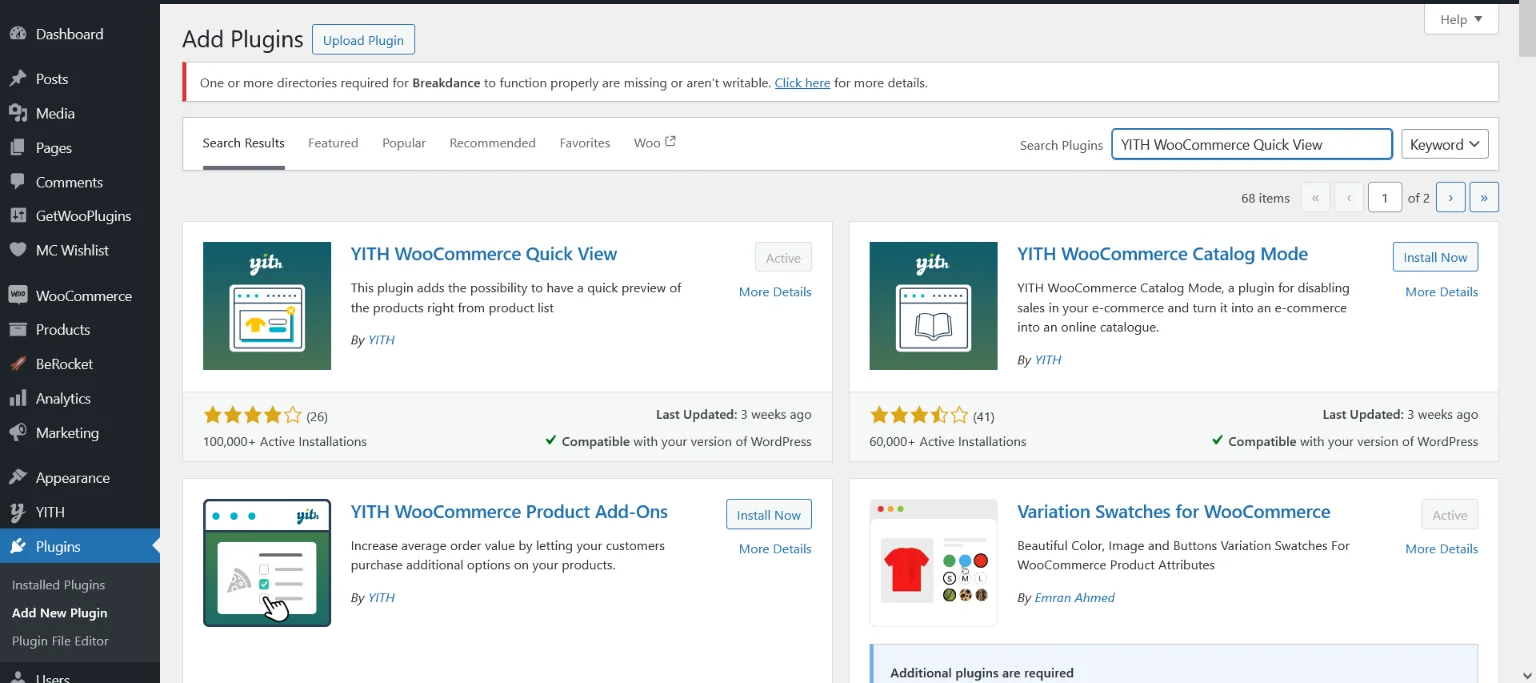
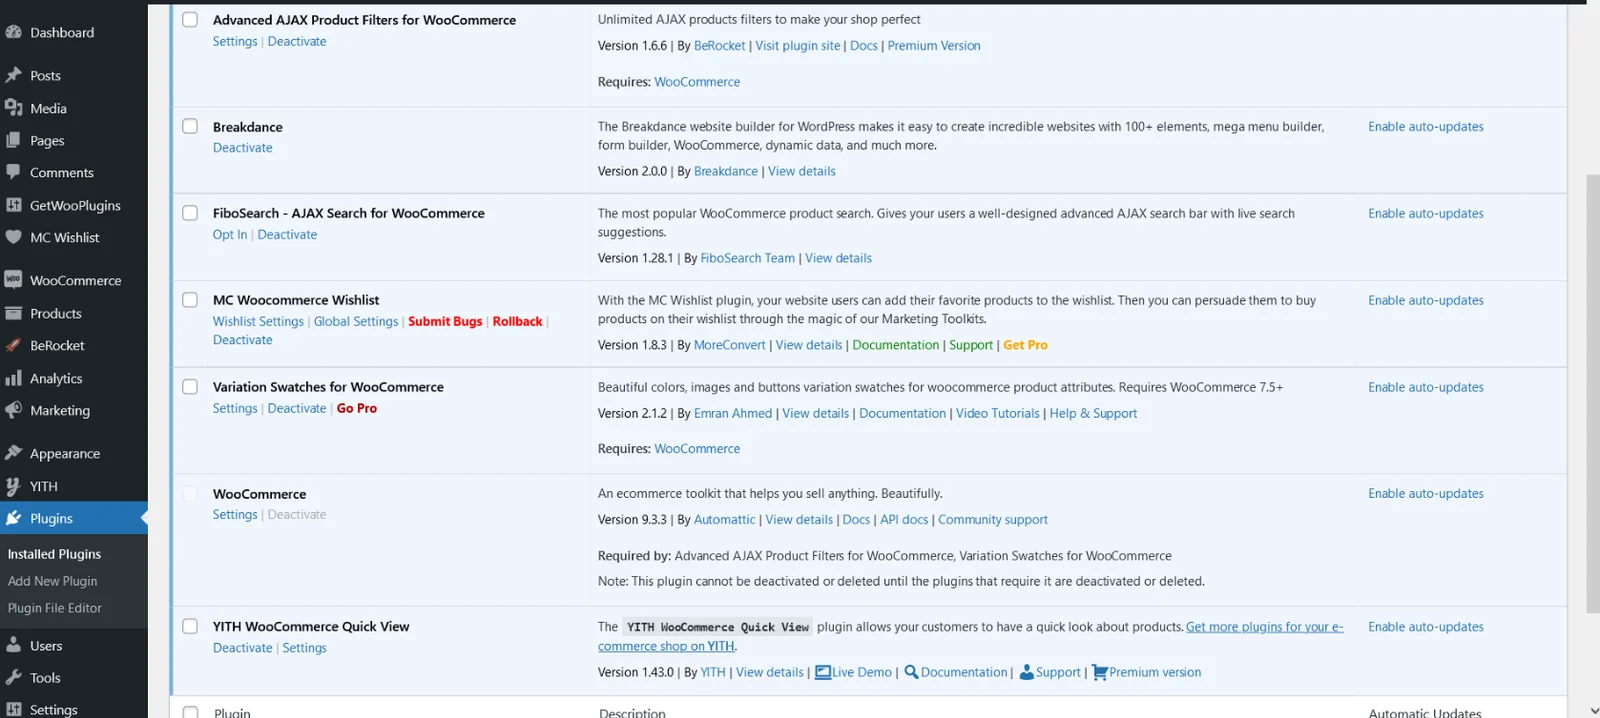
Step 3.6 –> Kindly check whether all above plugins activated or not if any missing then go through above step to fix it.
Step 4
How to Install XML File ?
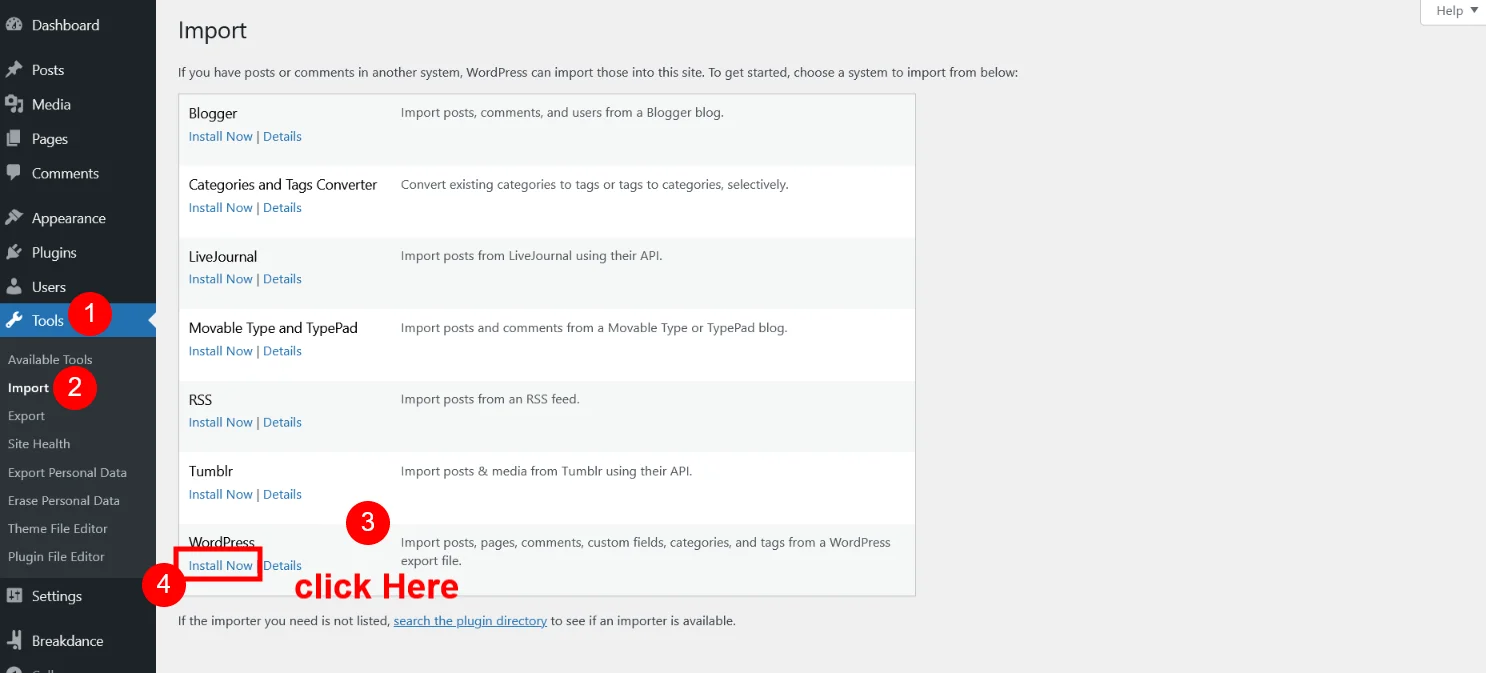
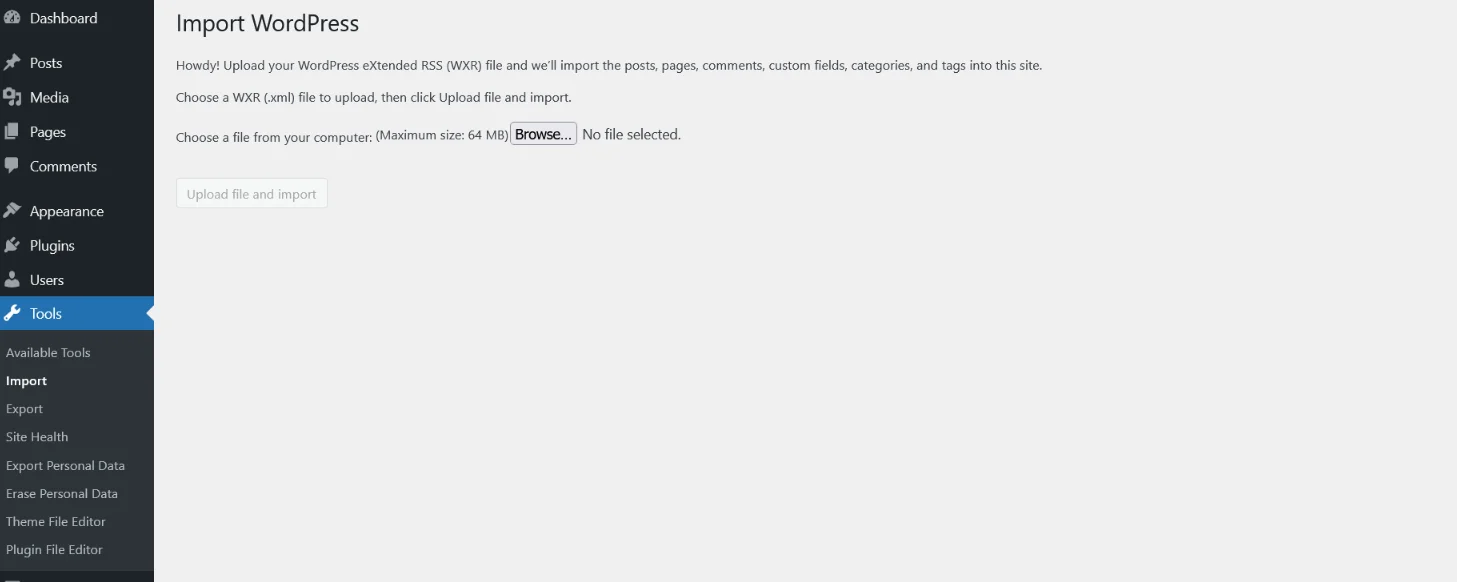
Step 4.1 -> Go to Dashboard > Tools >Import -> WordPress -> Install Now
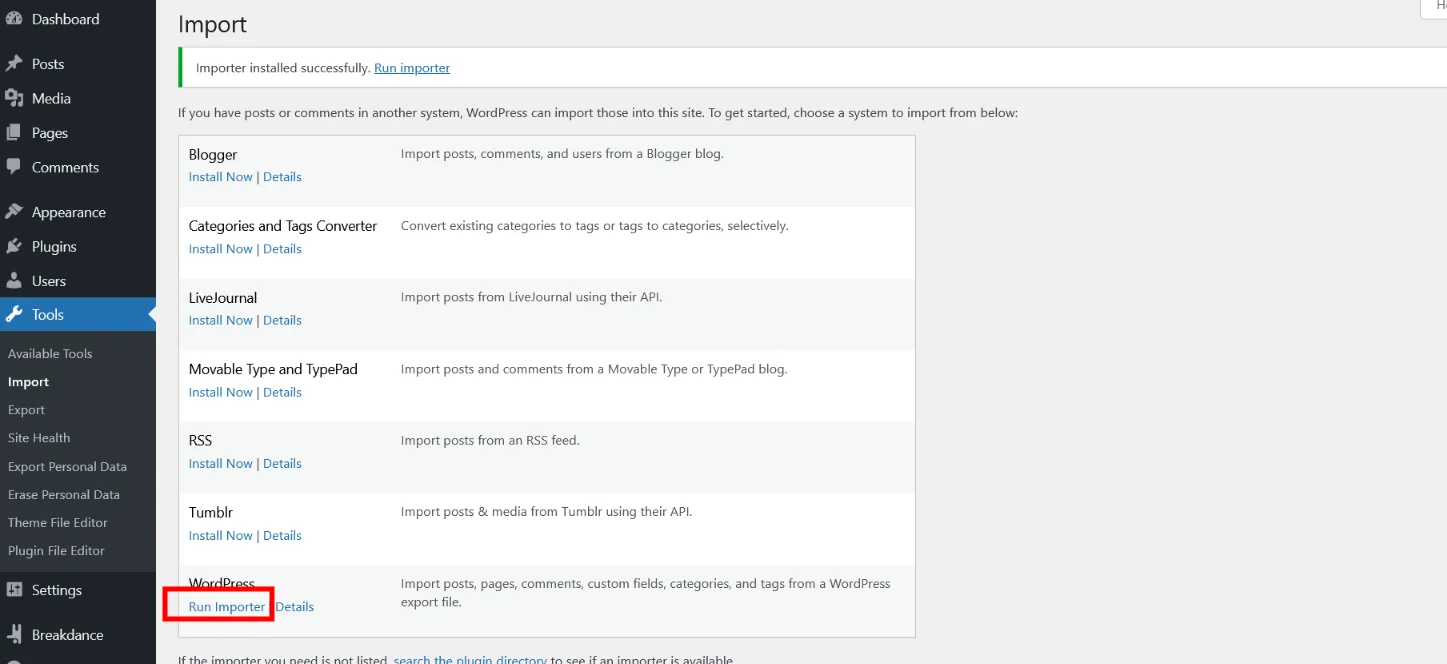
Step 4.2 -> After Install Click on “Run Importer”
Step 4.3 -> Set XML file to imports data
Step 4.4 -> Go to “Bricks Fashion Shop Template Pack” Folder and see “XML Files” Folder
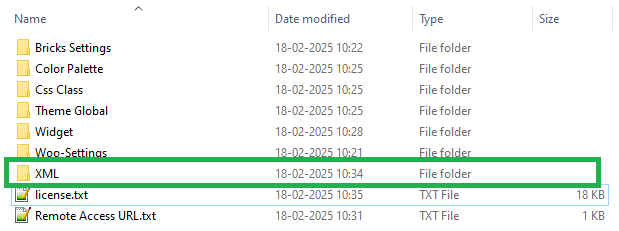
Once you open XML Files Folder you can see “bricks-fashion-shop-template-pack.xml ” file for upload to wordpress tools options. folder and you can see below files

Step 4.5 -> Now Select file “bricks-fashion-shop-template-pack.xml” [ Folder Path- Bricks Woo Layouts Pack – Bricks Fashion Shop Template Pack – XML Files ] and Click on Upload Button
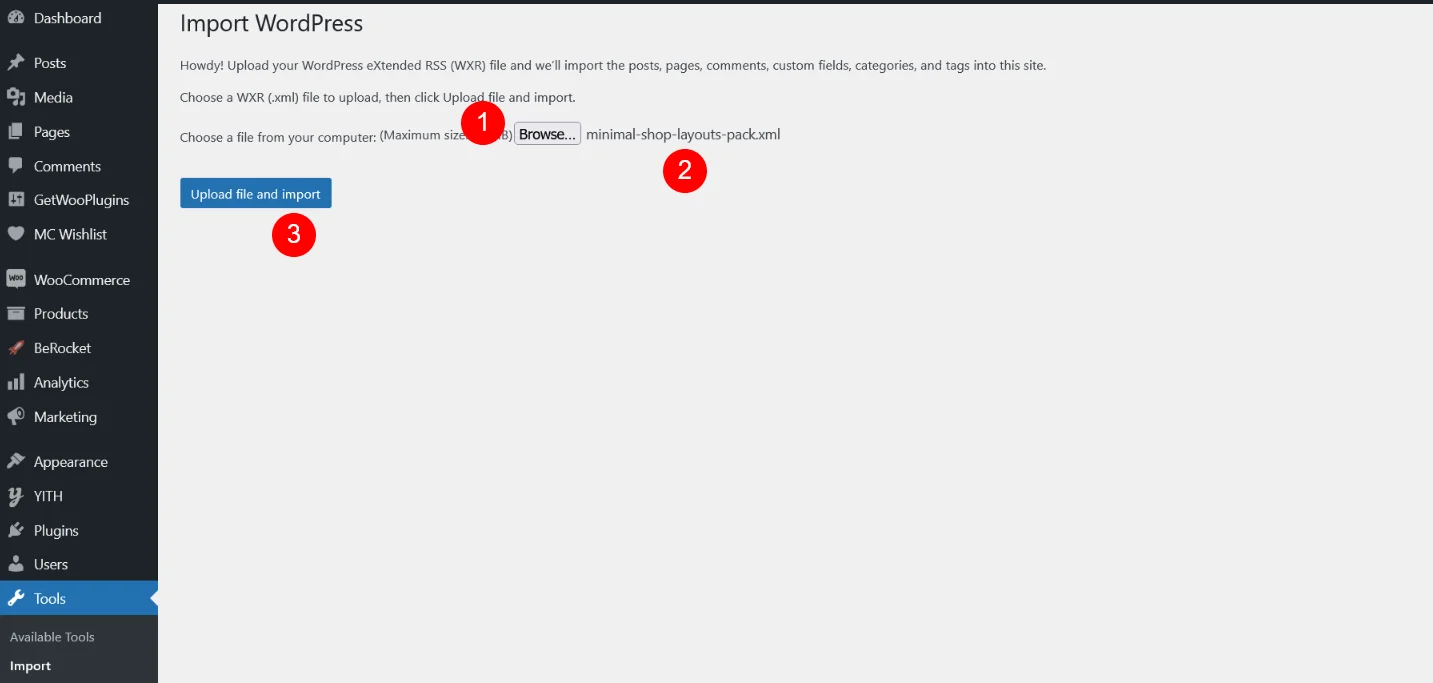
Step 4.6 -> Click On “Submit” Button
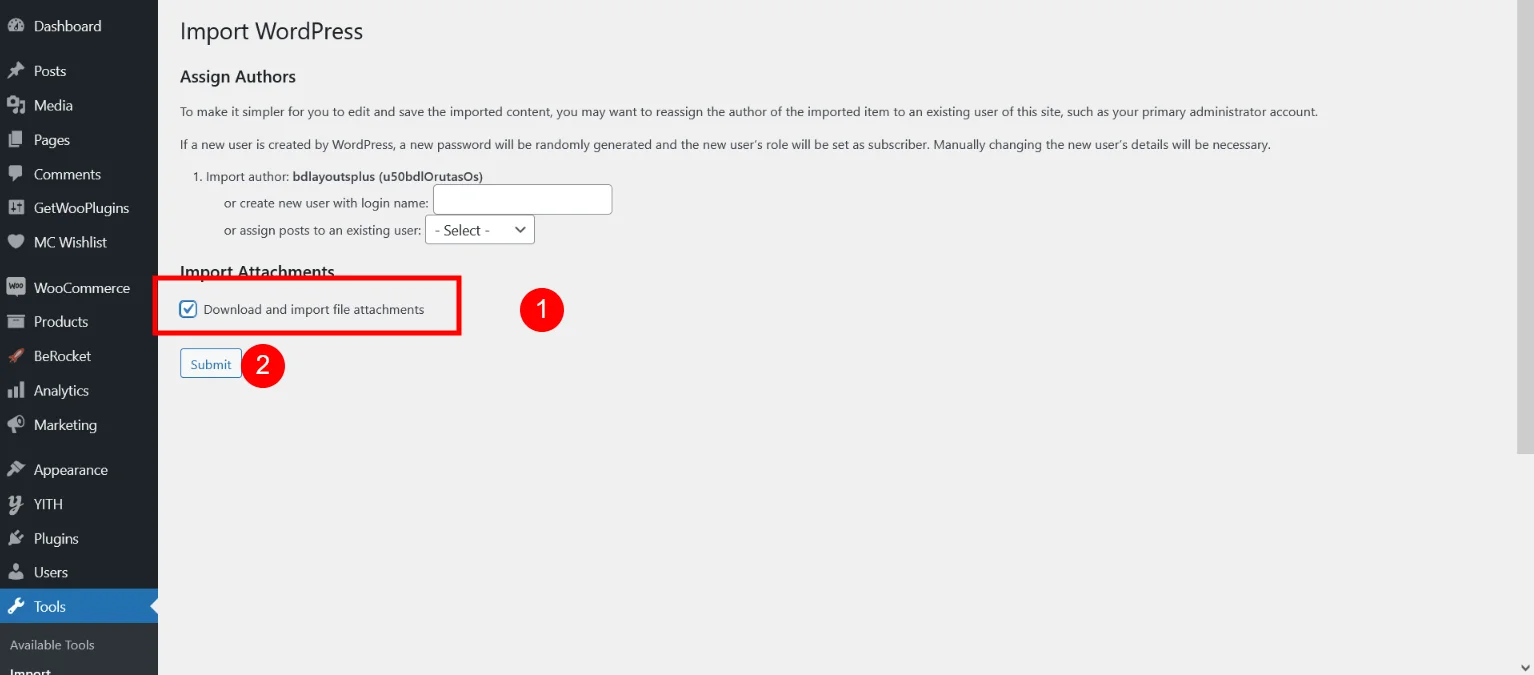
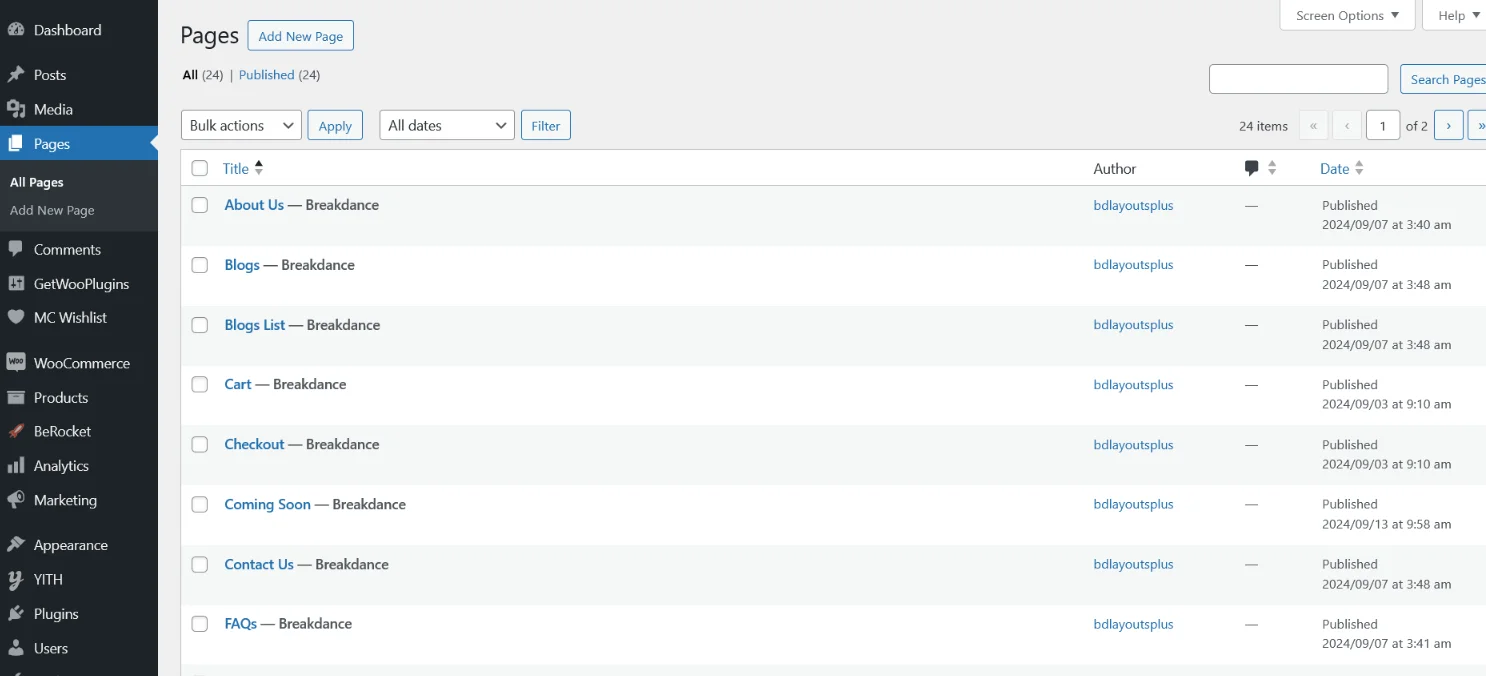
Now XML Data is Imported.
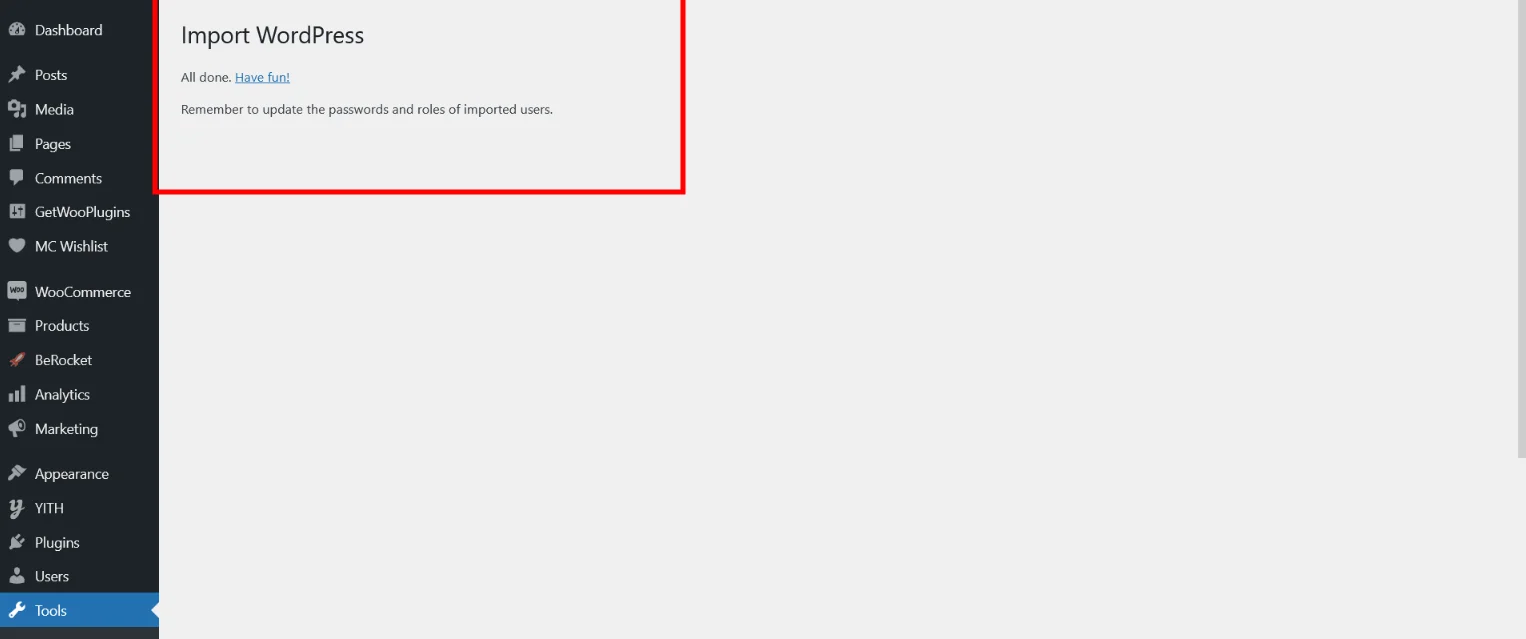
You can see all pages
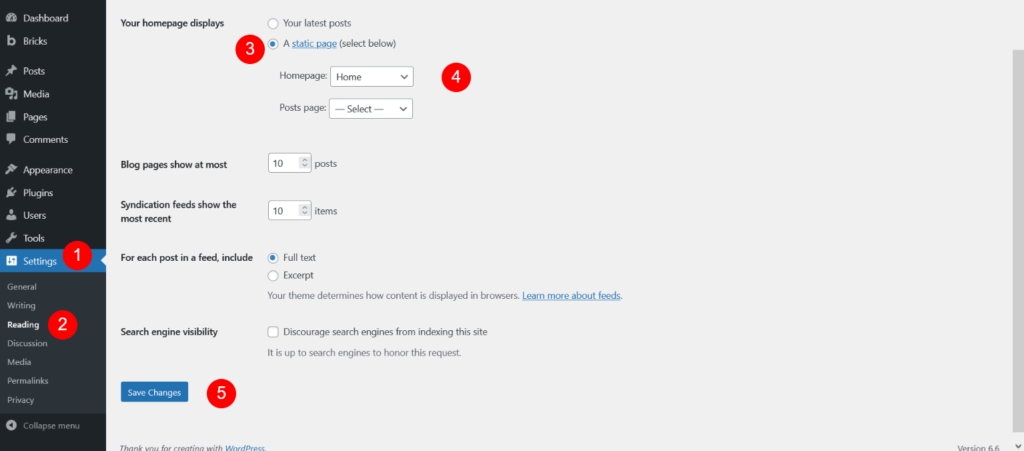
Go to Settings -> Reading and set Home Page
Now import blog detail page sidebar widget data
Step 5
Open “Bricks-Fashion-Shop-Template-Pack” Folder and see “Widget” Folder and open “Bricks-Fashion-Shop-Template-Pack-widgets.wie” file [ See Downloaded Product Folder Structure ]
Step 5.1 -> Go to Dashboard > Bricks > Sidebar > Add Sidebar Name -> Add Sidebar Description -> Click on Create New Sidebar Button
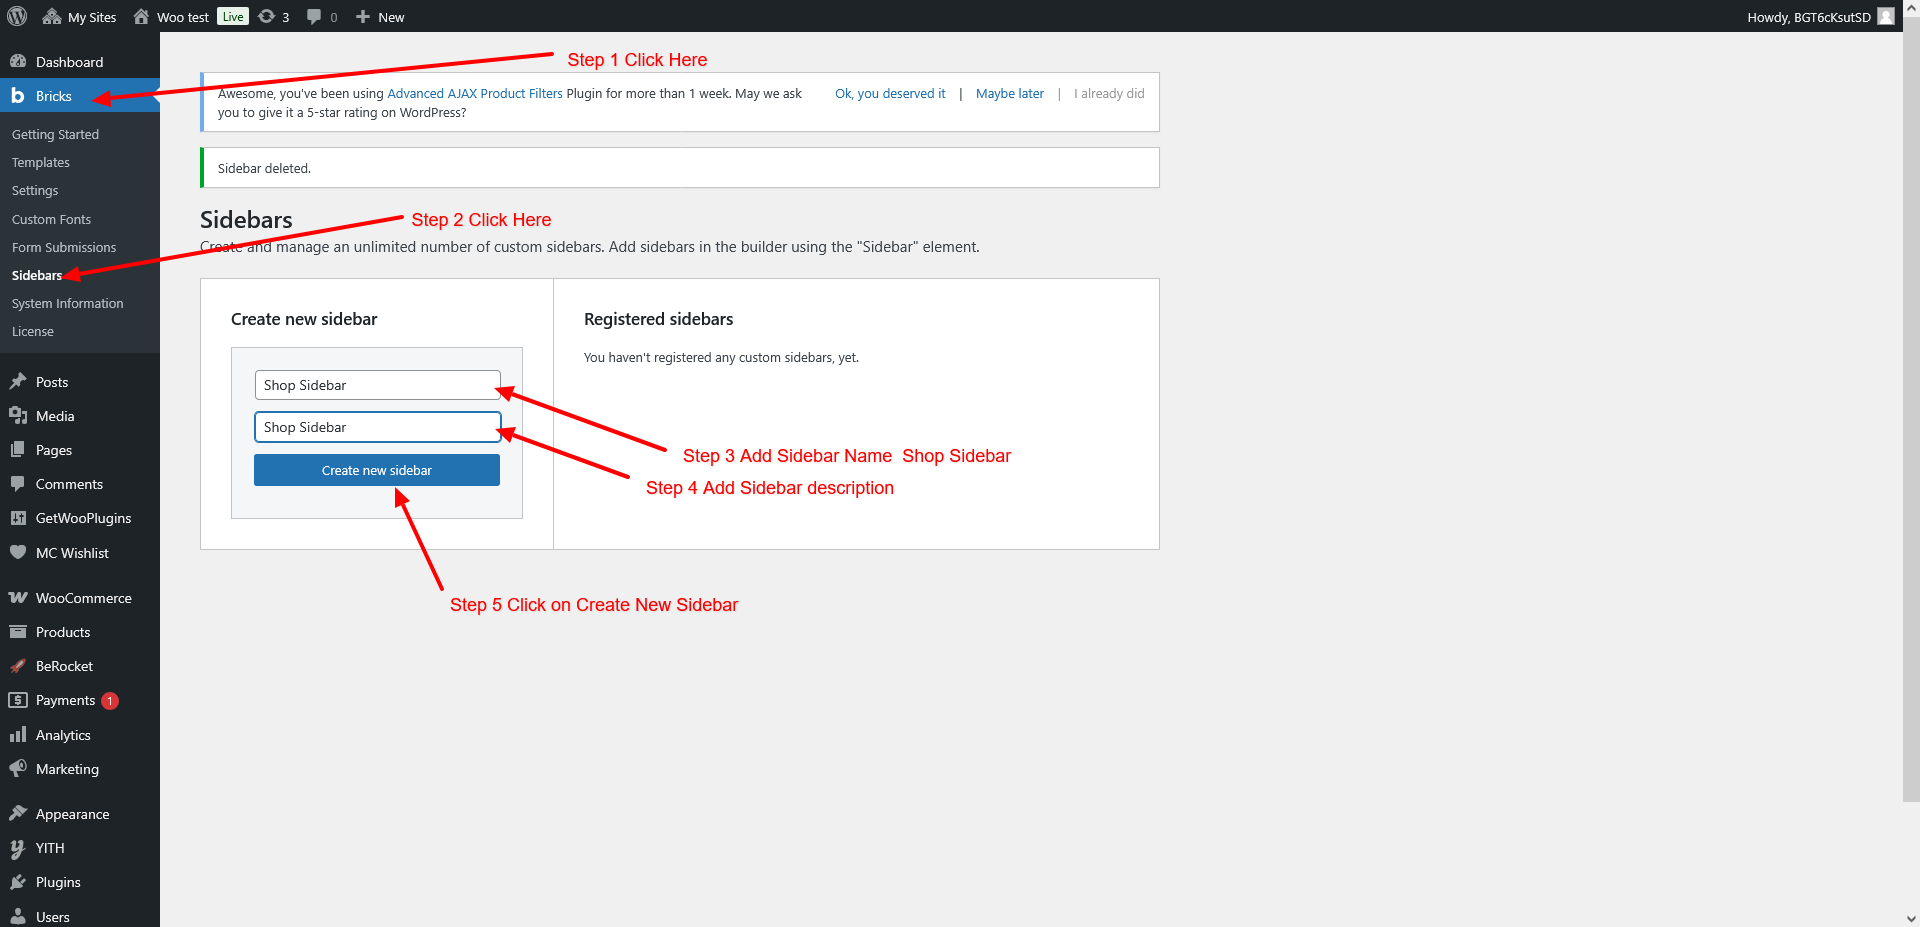
You Can See New Sidebar Here

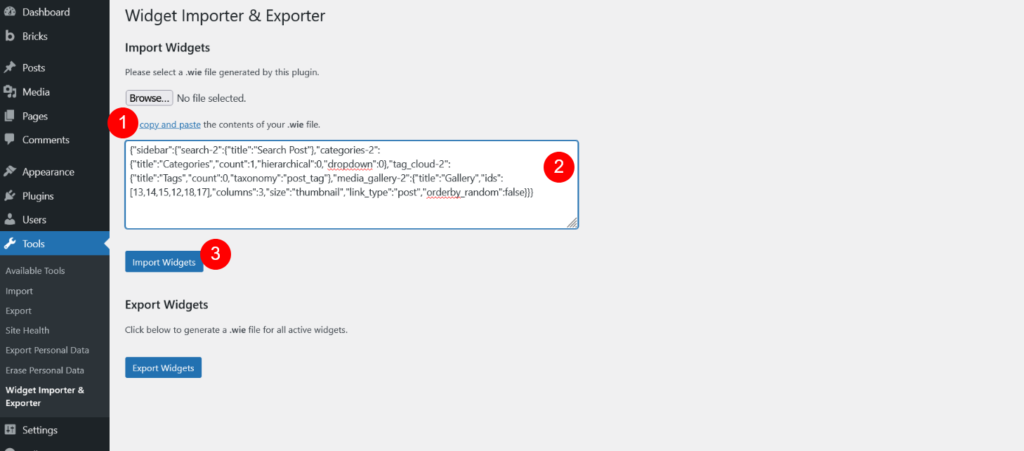
Step 5.2 -> Go to Dashboard > Tools > WordPress Importer & Expoter > Import -> Imports Widget -> Select Widget File or Copy code as mentions below image
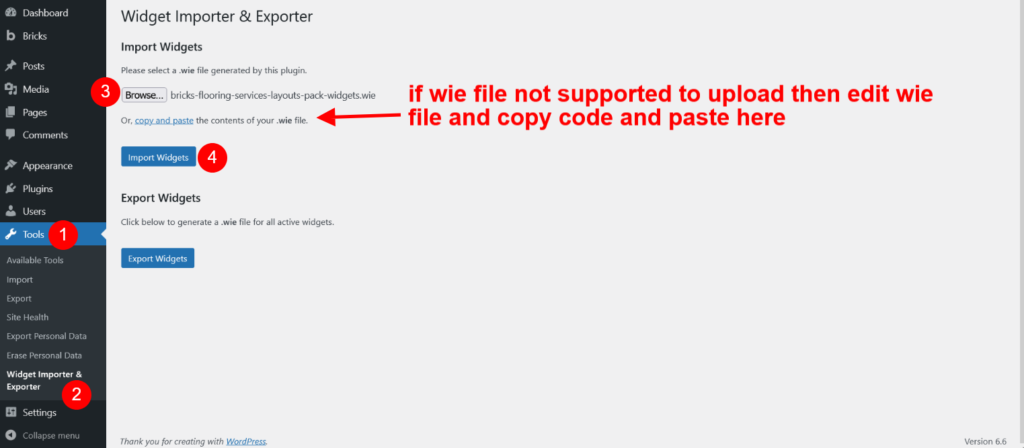
Step 5.3 -> After Copy code or upload widget file Click on “Import Widgets”
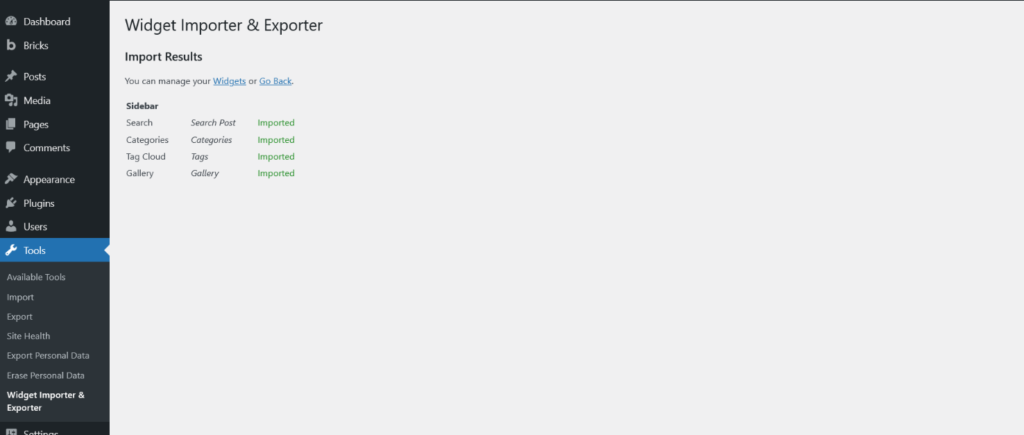
Step 5.4-> If widget data install successfully then you will get below screen
Step 6
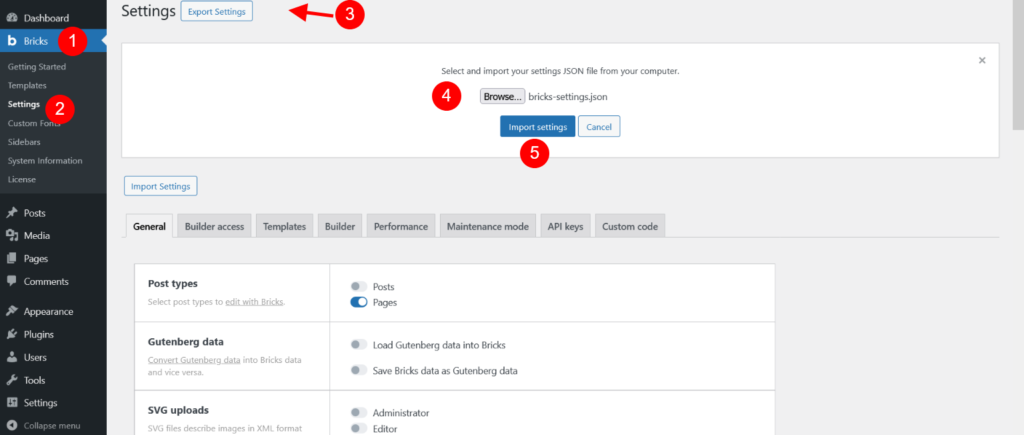
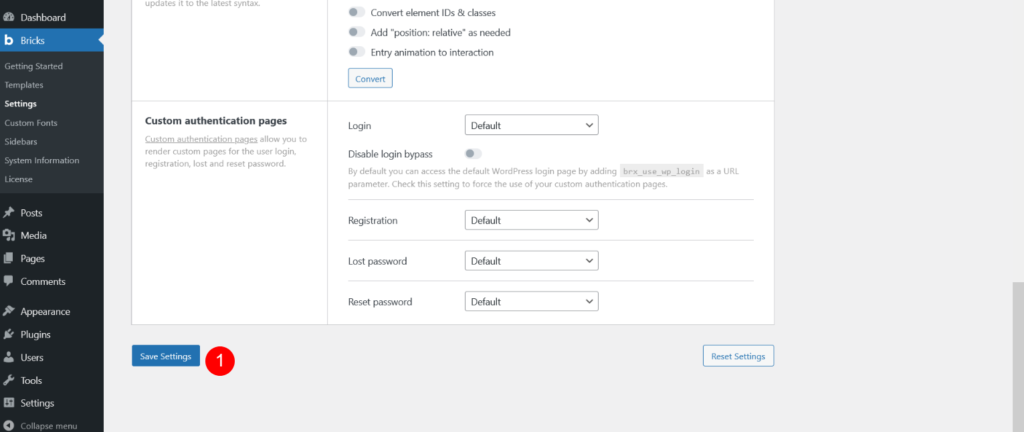
Go to Bricks -> Settings and see Import Settings button
Step 6.1 -> Open “Bricks-Fashion-Shop-Template-Pack” Folder and see “Bricks-Settings” Folder and open “bricks-settings.json” file [ See Downloaded Product Folder Structure ]
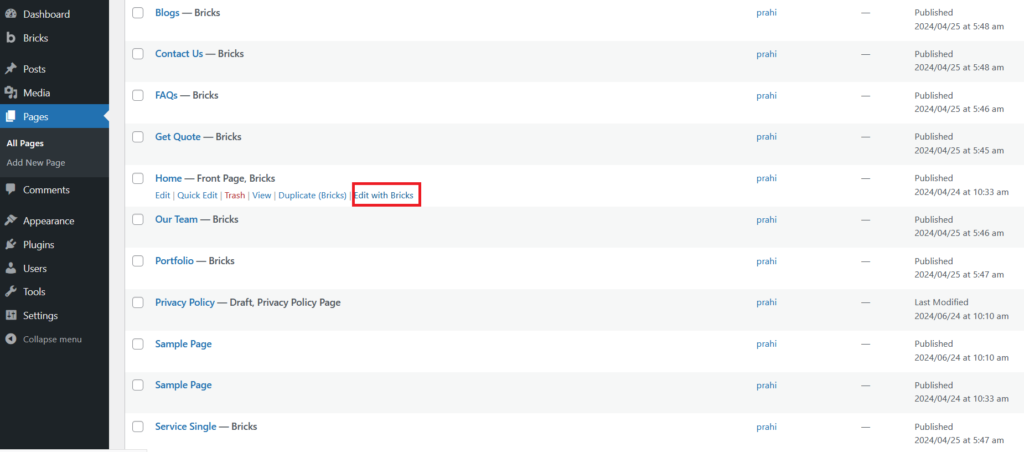
Step 6.2 -> Go to Pages and Open Home Page with bricks
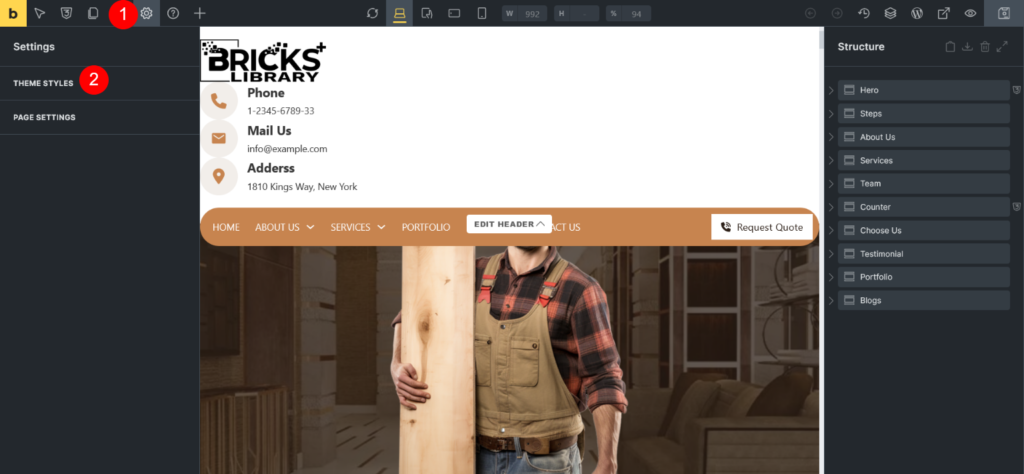
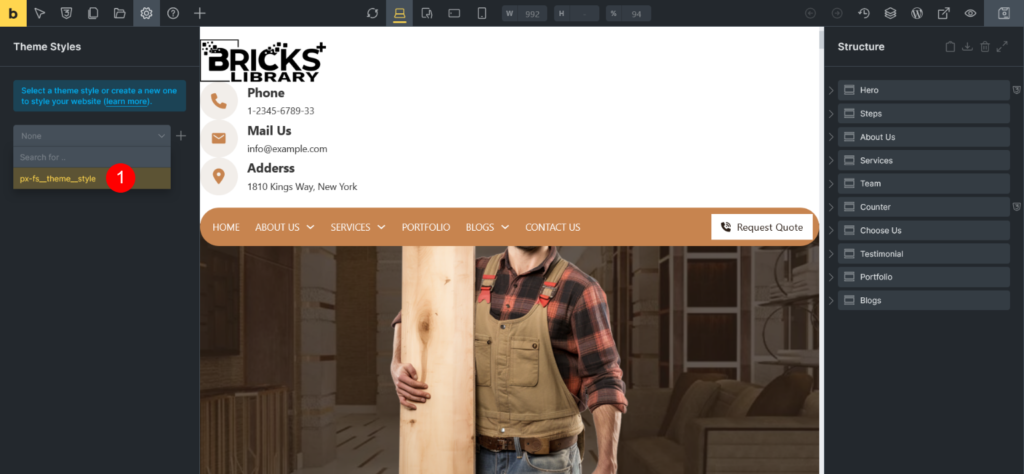
Step 6.3 -> Go to Theme Styles and click on ‘+’ Icon

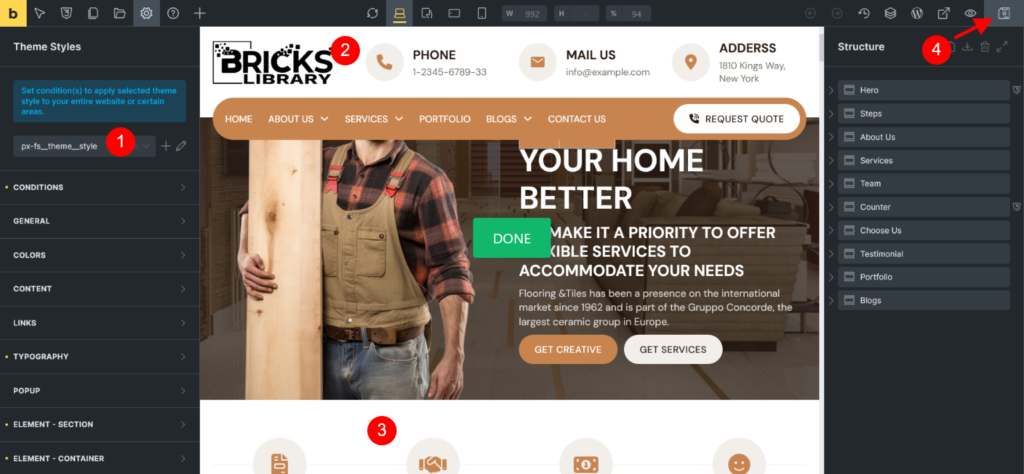
Step 6.4 -> Now Click on Import Icon
Step 6.5 -> Open “Bricks-Fashion-Shop-Template-Pack” Folder and see “Theme Global” Folder and Select “bricks-theme-style-px_fs__theme__style.json” file [ See Downloaded Product Folder Structure ]
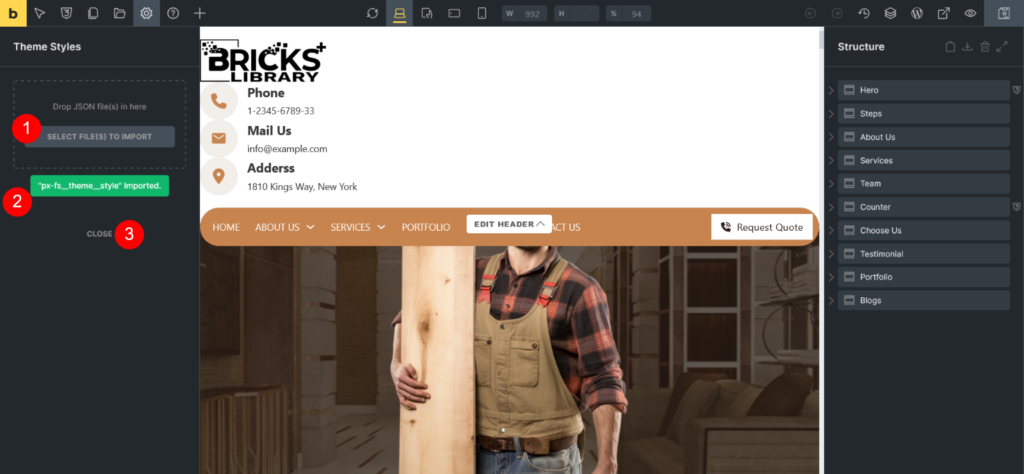
Step 6.6 -> Once file is imported then select that global style and save
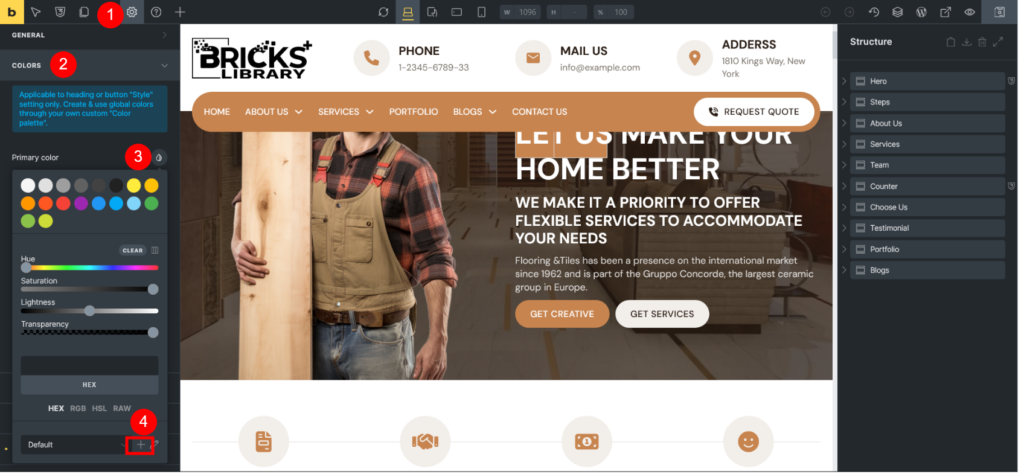
Now in theme style go to color tab
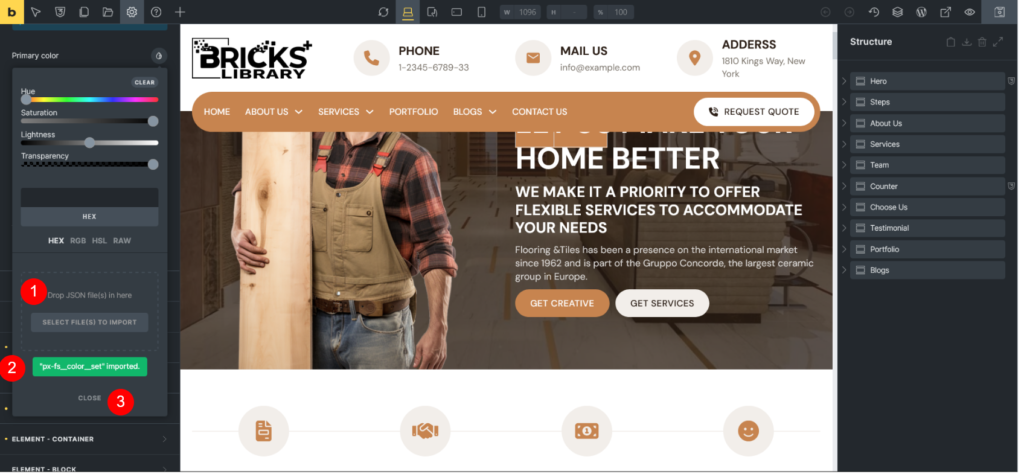
Step 7
Step 7.1 ->Now in theme style go to color tab.Open primary color and see ‘+’ Icon see Number 4
Step 7.2 -> Click on Import Icon
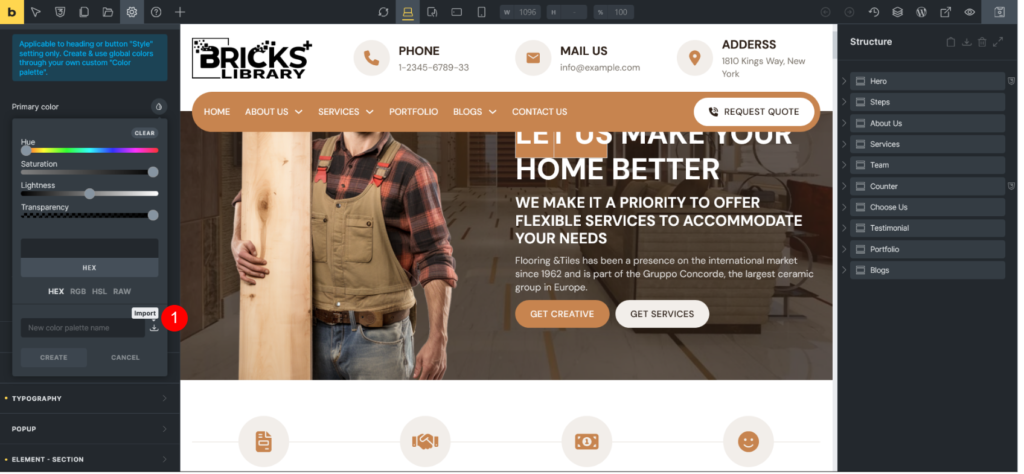
Step 7.3 -> Open “Bricks-Fashion-Shop-Template-Pack” Folder to see “Color Palette” Folder and Select “bricks-color-palette-px_fs__color__set.json” file [ See Downloaded Product Folder Structure ]
Now Save and close your website is ready.
Add css class default & variable file from Css Class Folder
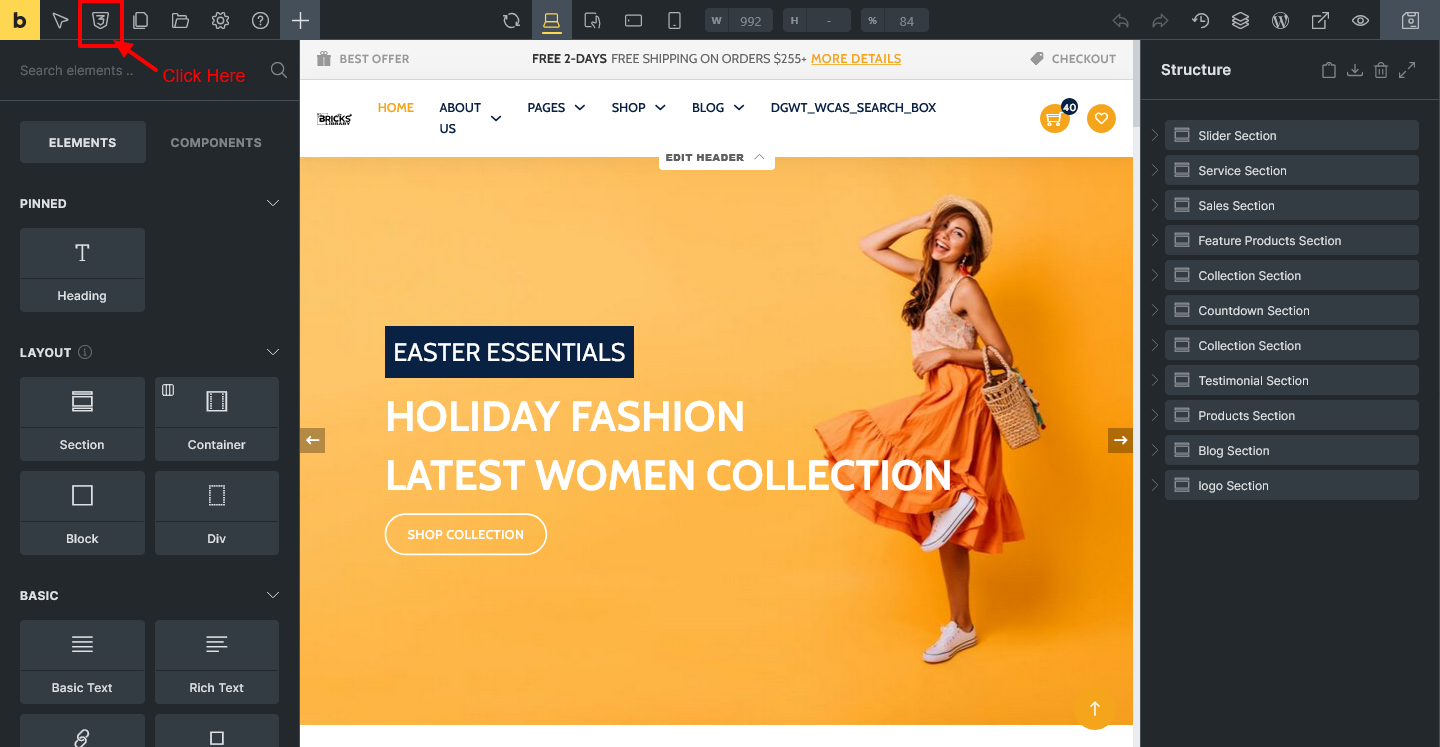
Step 8
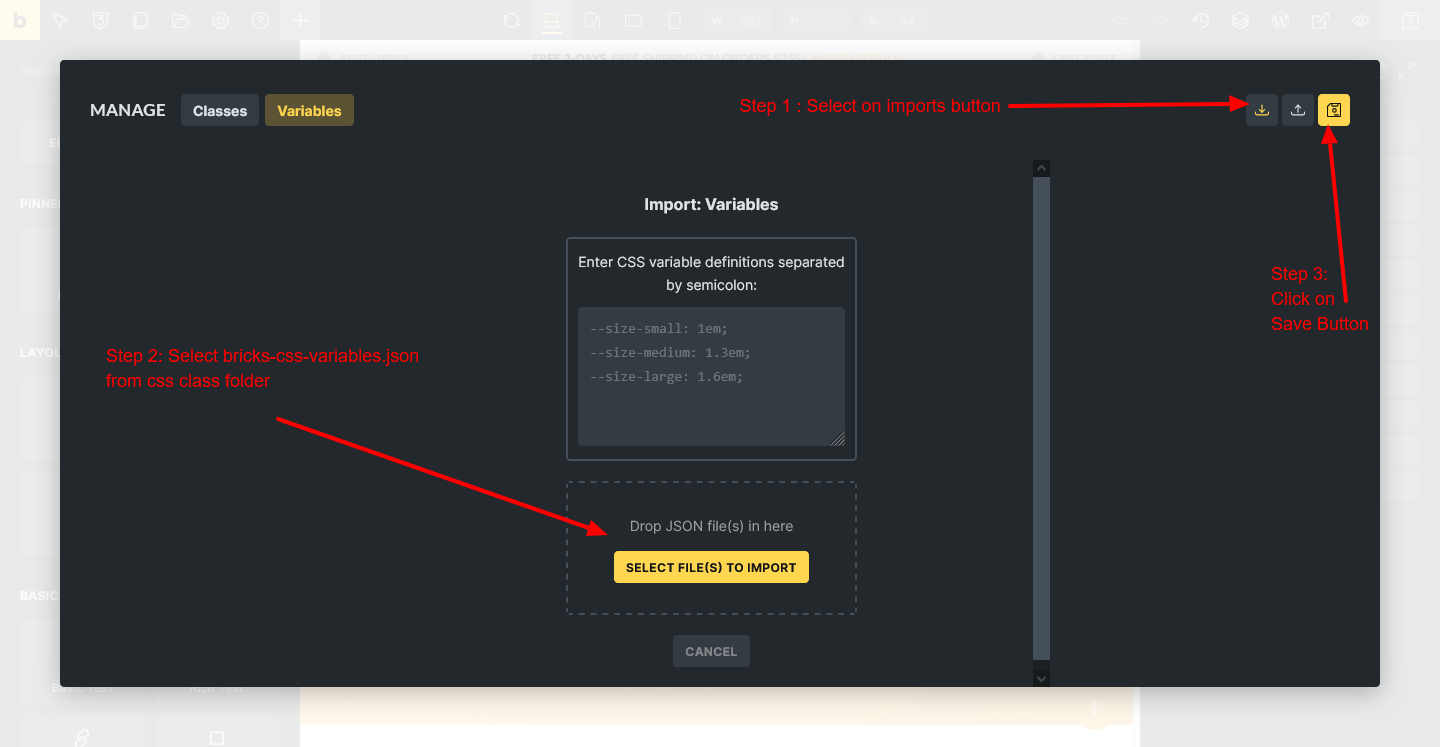
Step 8.1 ->Click on classes/variable button as mention below image
Step 8.2 -> -> Now click on Classes tab and Click on Import Icon
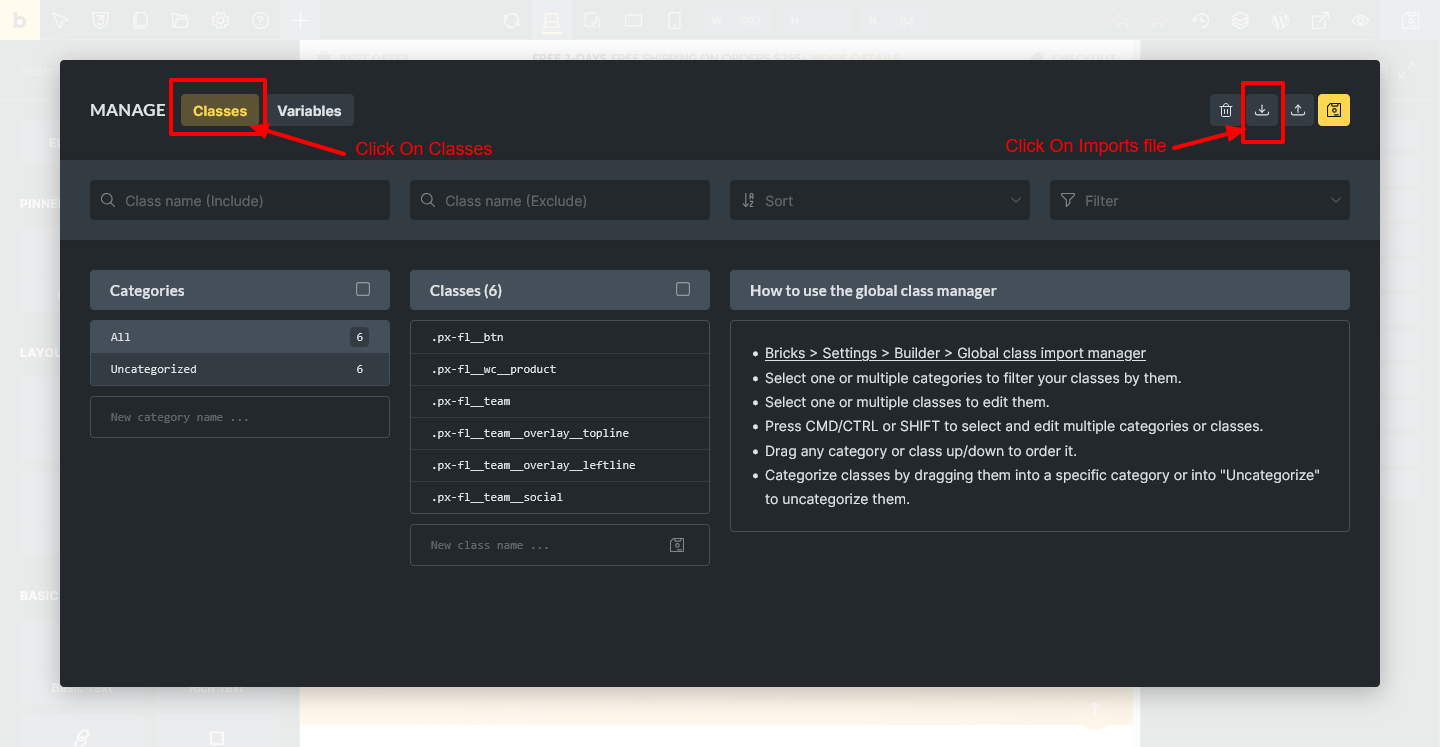
Step 8.3 -> Open “Bricks-Fashion-Shop-Template-Pack” Folder and see “Css Class” Folder and Select “bricks-css-classes.json” file [ See Downloaded Product Folder Structure ]
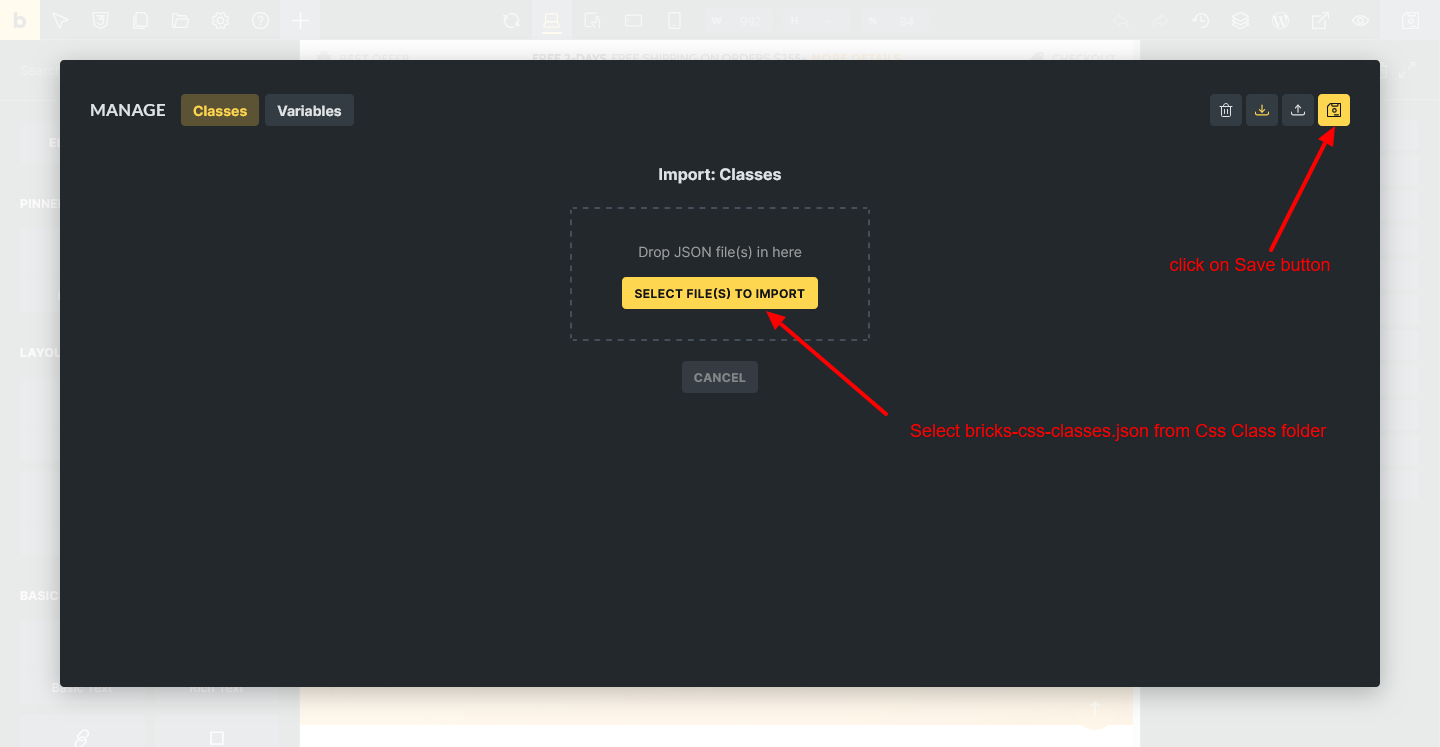
Now Save.
Step 8.4 ->Now click on variable tab and Click on Import Icon
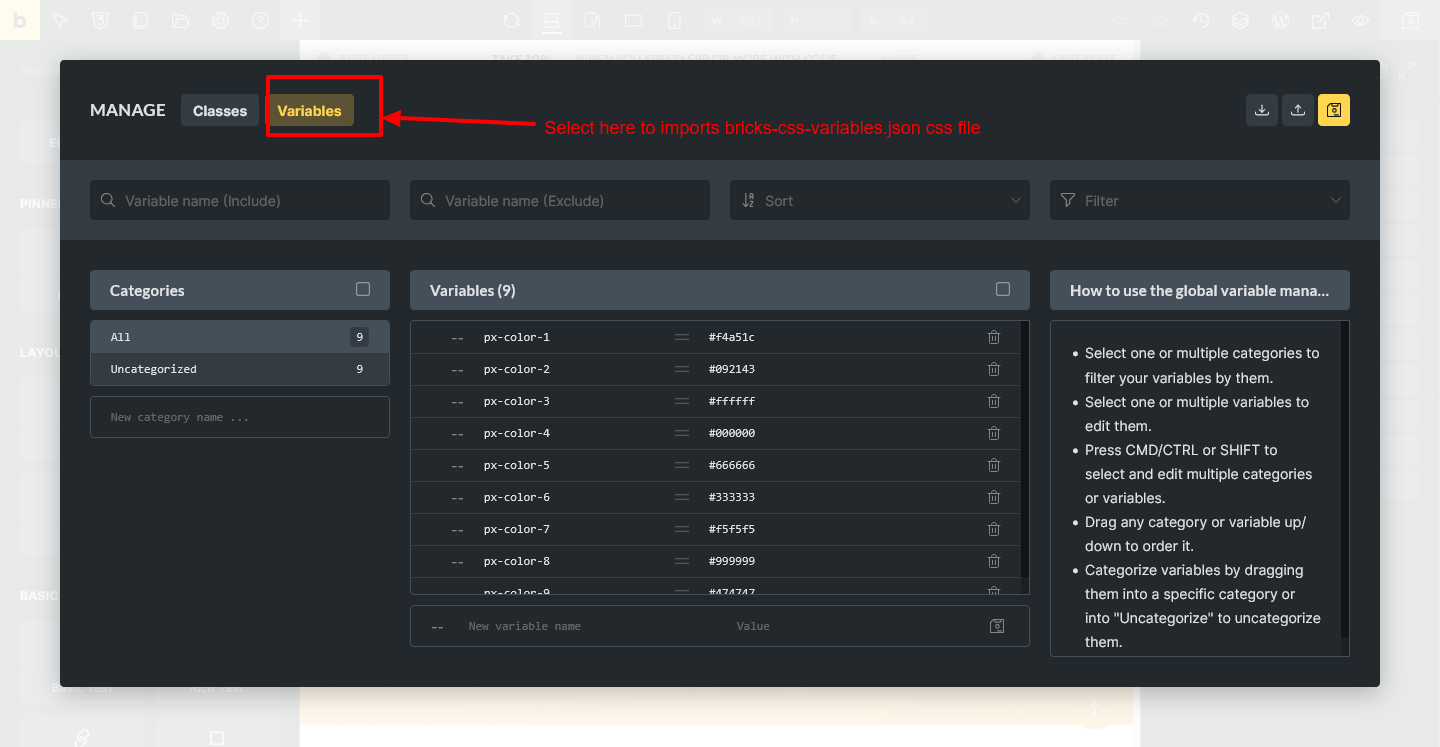
Step 8.5 -> Open “Bricks-Fashion-Shop-Template-Pack” Folder to see “Css Class” Folder and Select “bricks-css-variables.json” file [ See Downloaded Product Folder Structure ]
Now click on Save to imports variables classes .
Now you need to setup all plugin settings.
Step 9
Step 9.1 -> Go to MC Wishlist -> Global -> Functions -> Import & Export
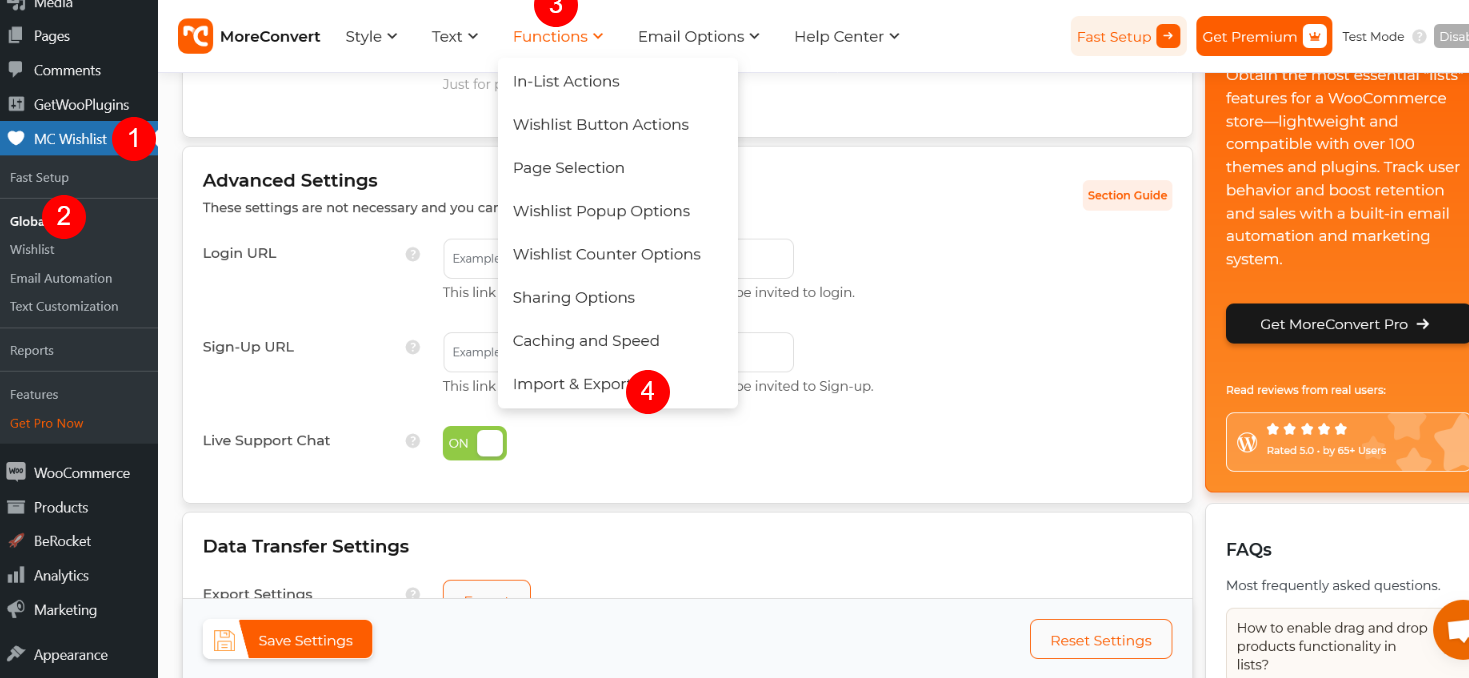
Step 9.2 -> Select and Upload “MC Wishlist.json” File [ Folder Path- Plugin Base Woo Layouts Pack – Breakdance Minimal Shop Layouts Pack ]
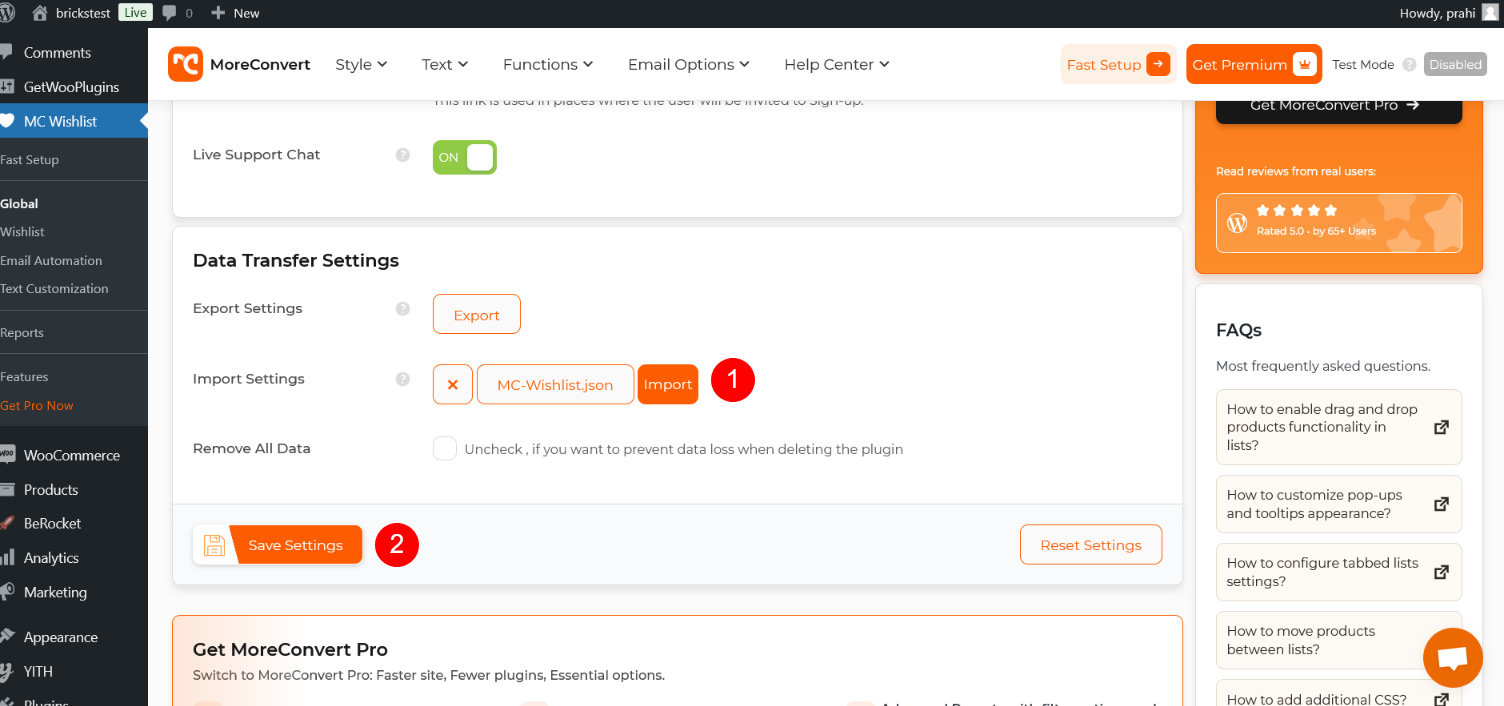
Step 9.3 -> Open “Bricks-Fashion-Shop-Template-Pack” Folder and see “Css Class” Folder and Select “bricks-css-classes.json” file [ See Downloaded Product Folder Structure ]
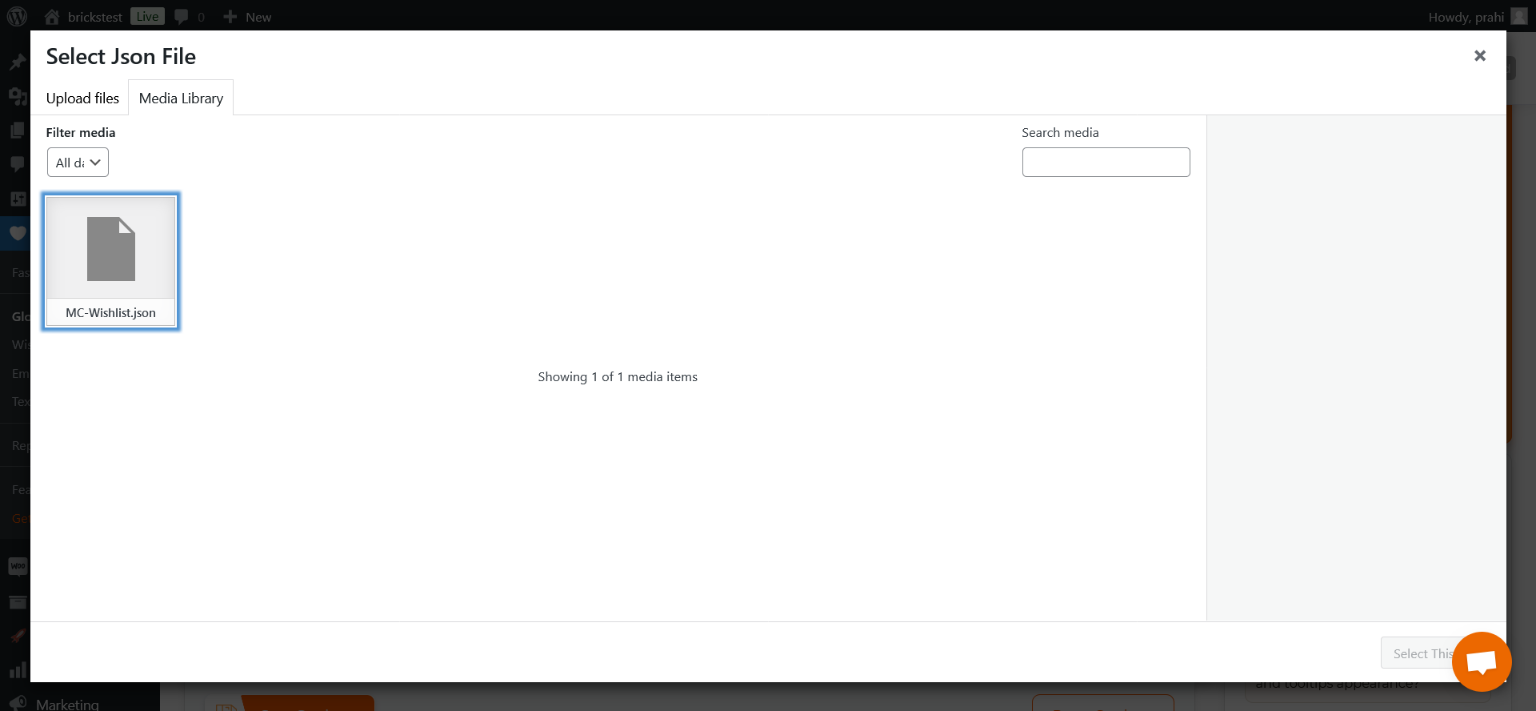
After select file click on “import” button.once data is imported please click on “Save Settings Button
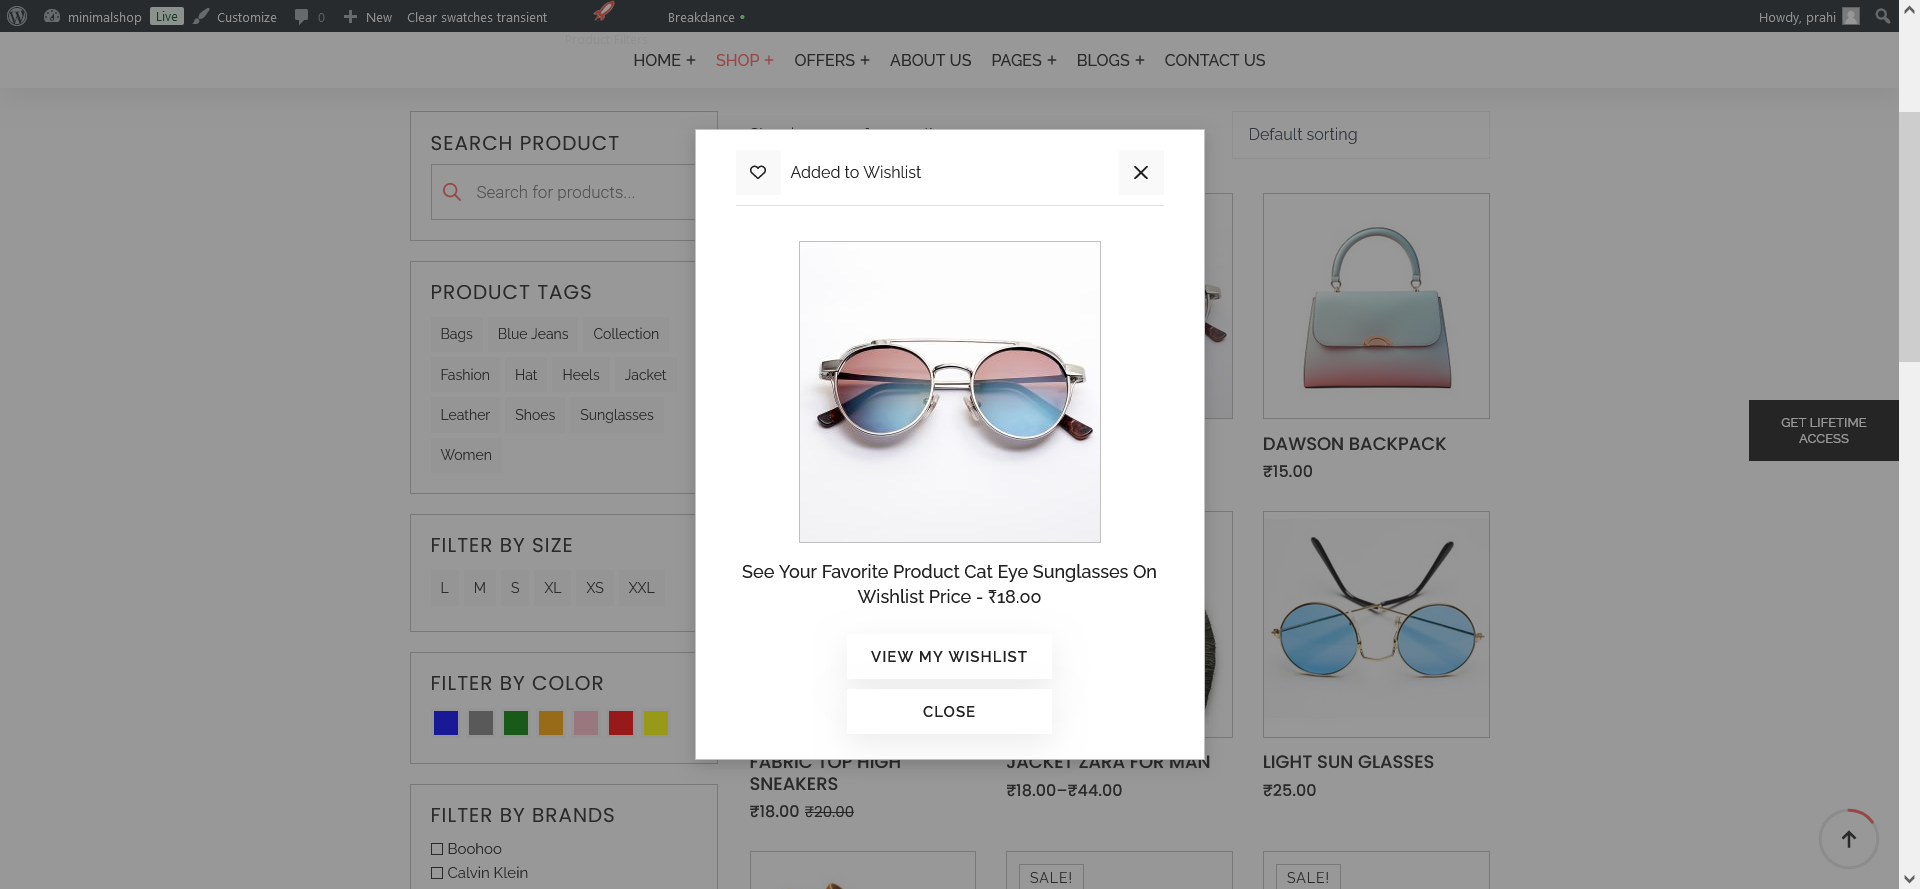
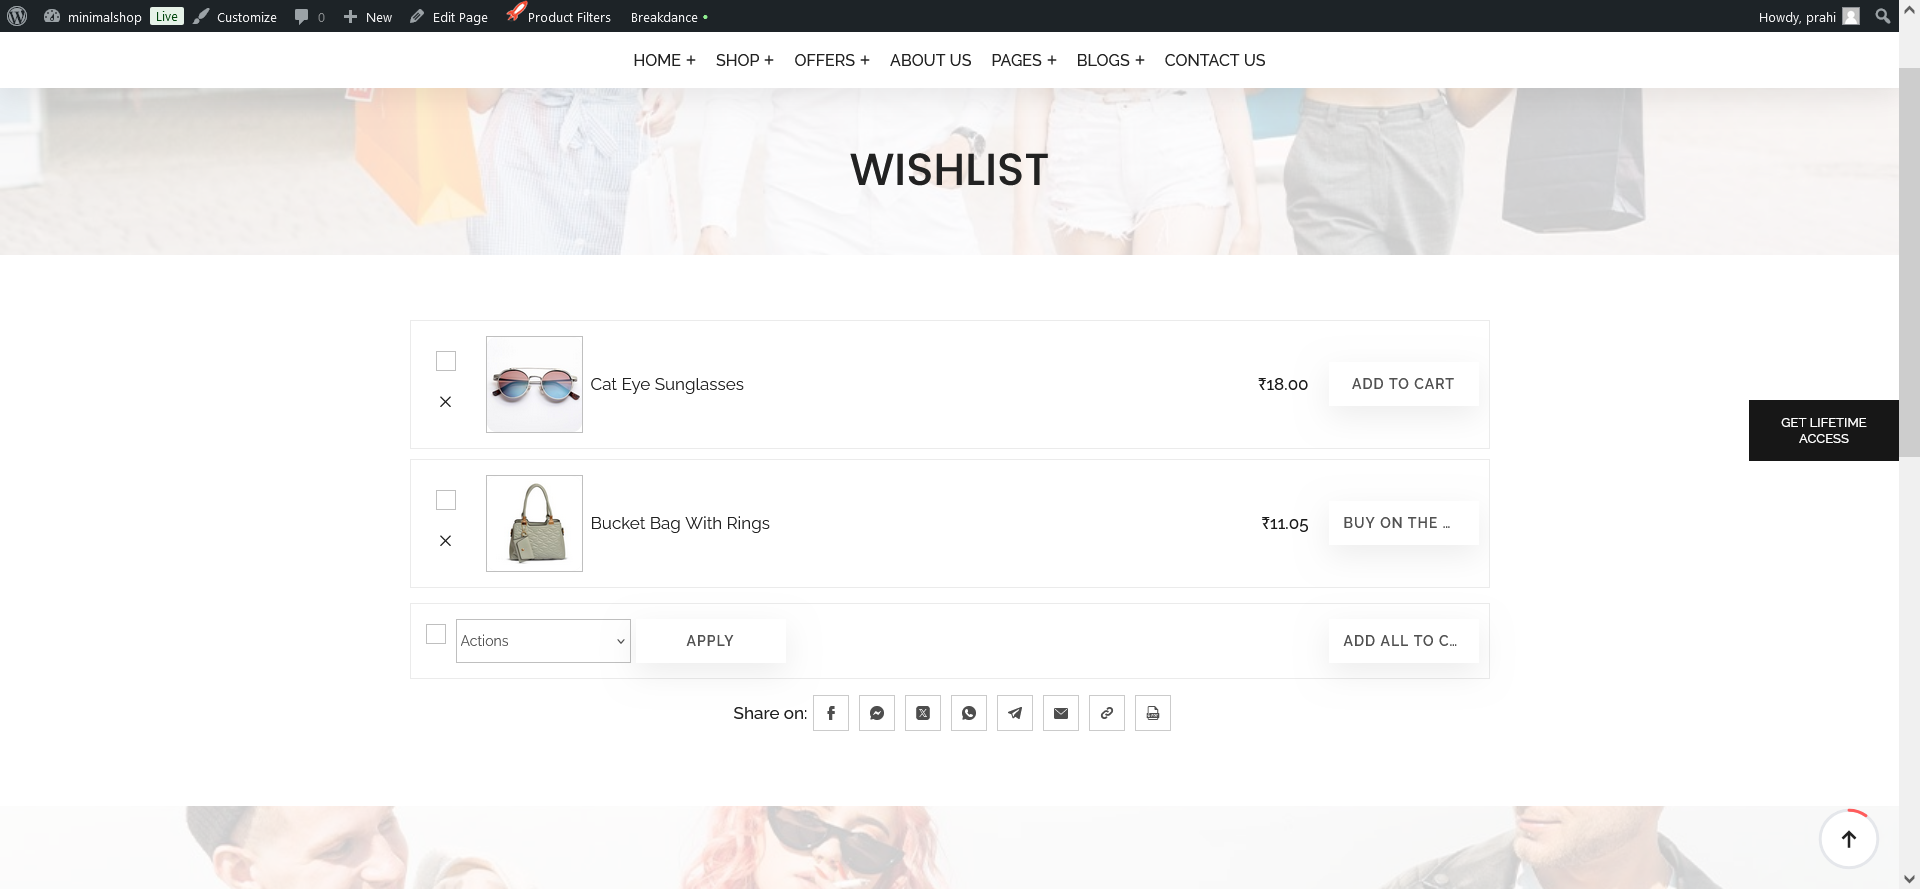
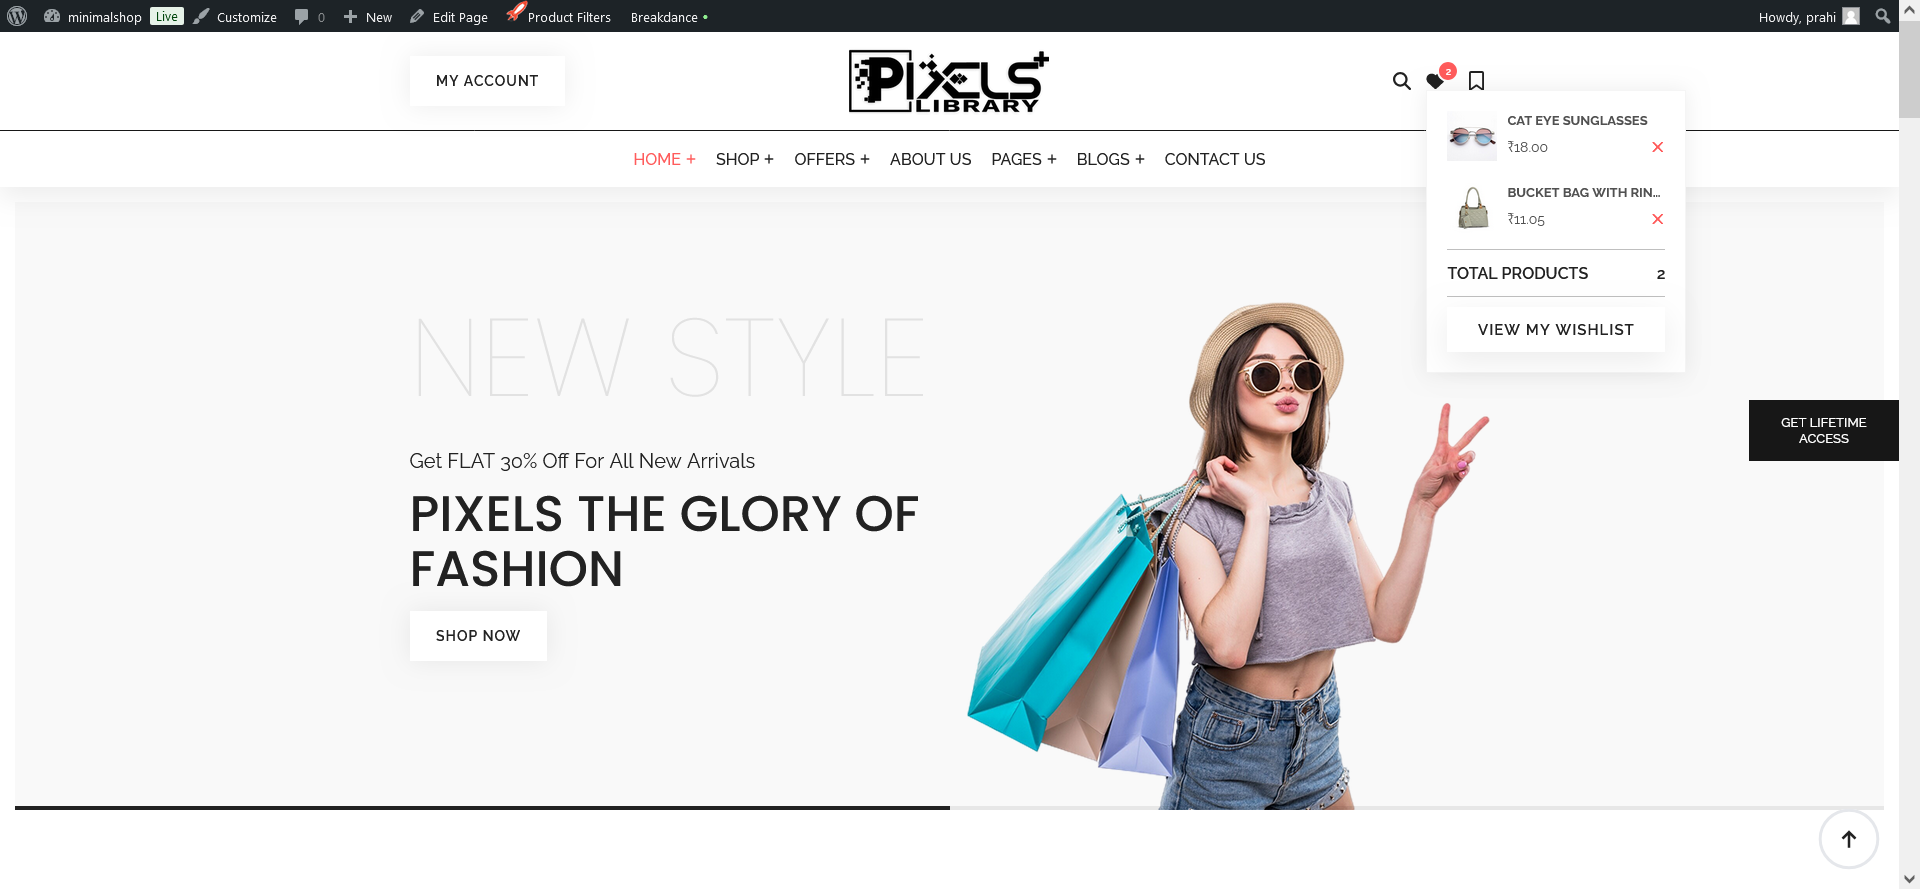
Purpose of used “MC Woocommerce Wishlist” Plugin
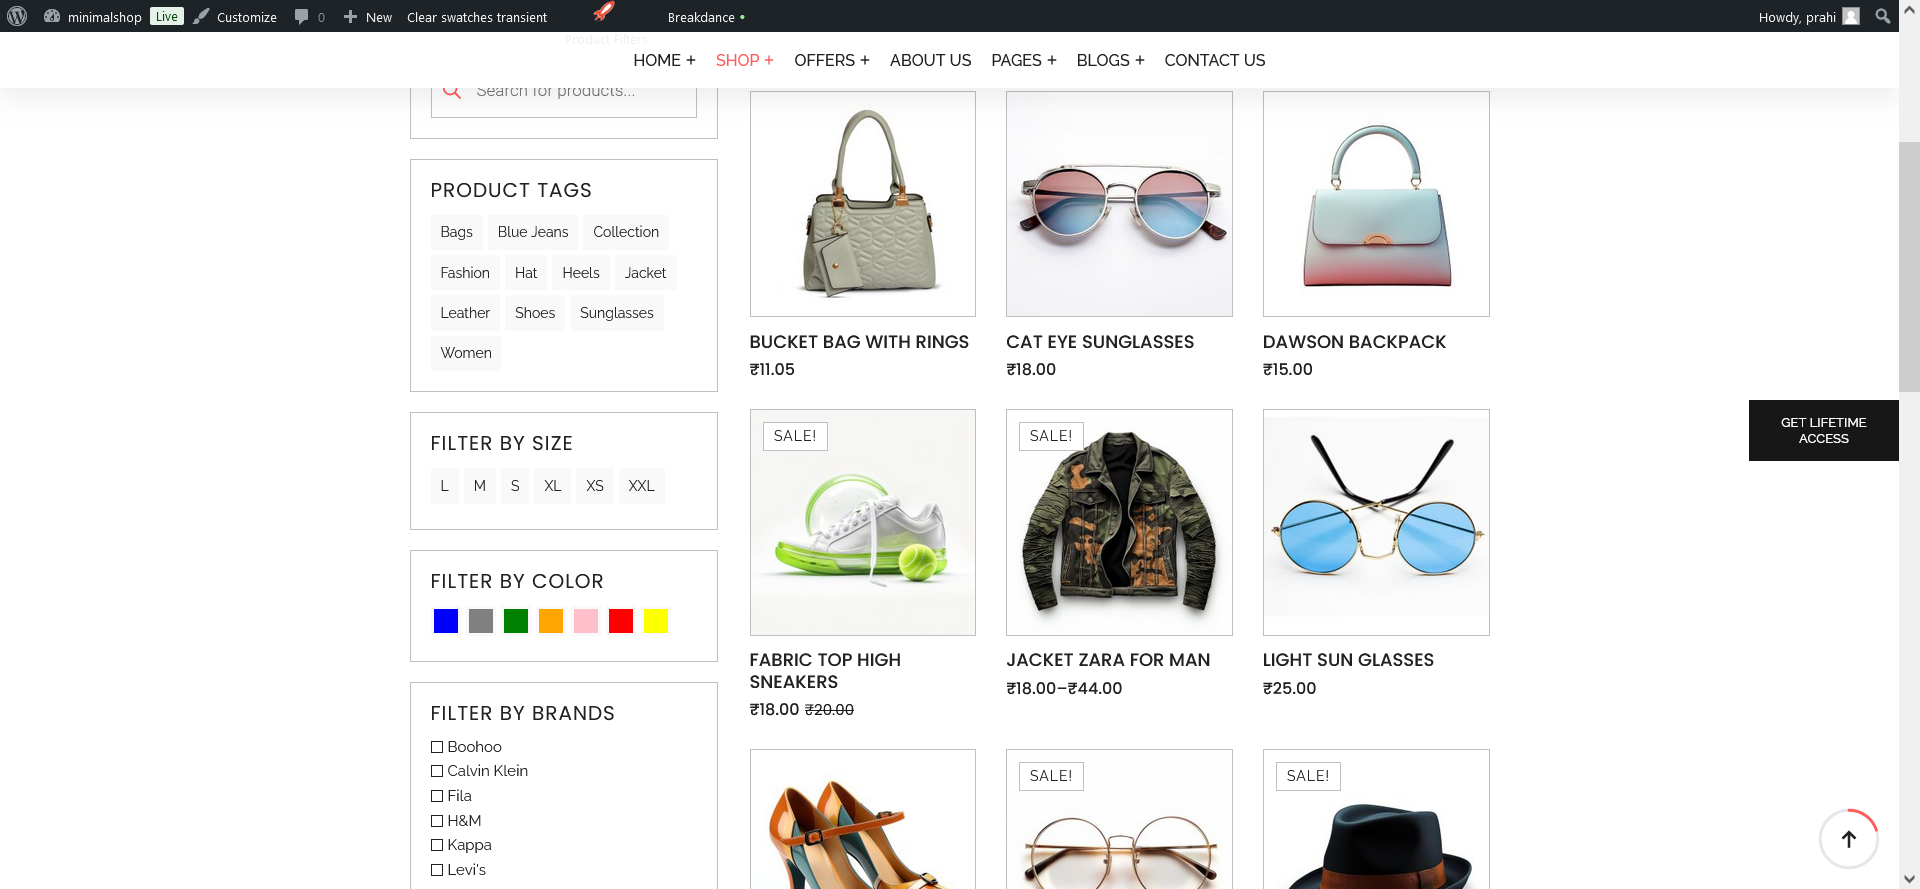
Now Need to set Product Sidebar Filter for this you need to fix “Advanced AJAX Product Filters” Plugin settings .
Step 10
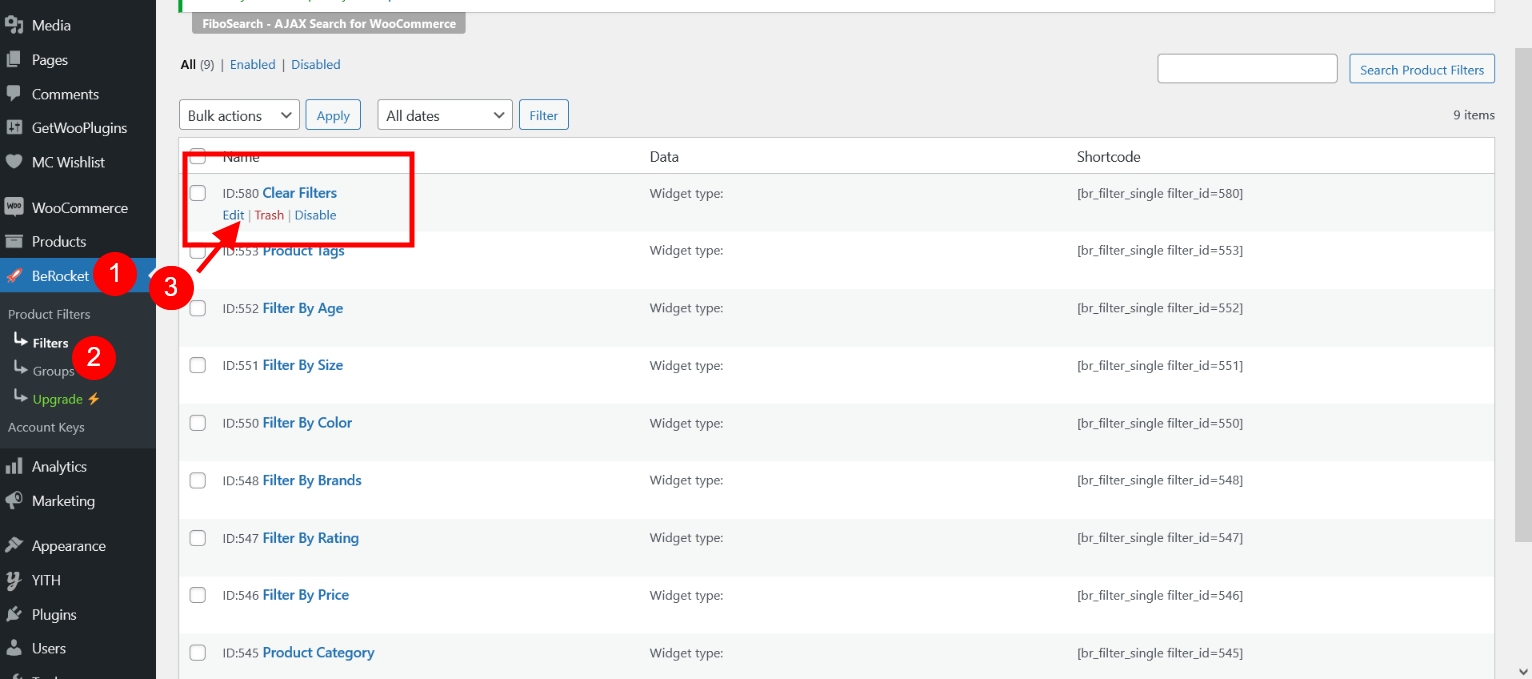
Step 10.1 -> Go to BeRocket -> Filters
Here Filters is already imported but that widget data is missing so we need to edit and do some settings.

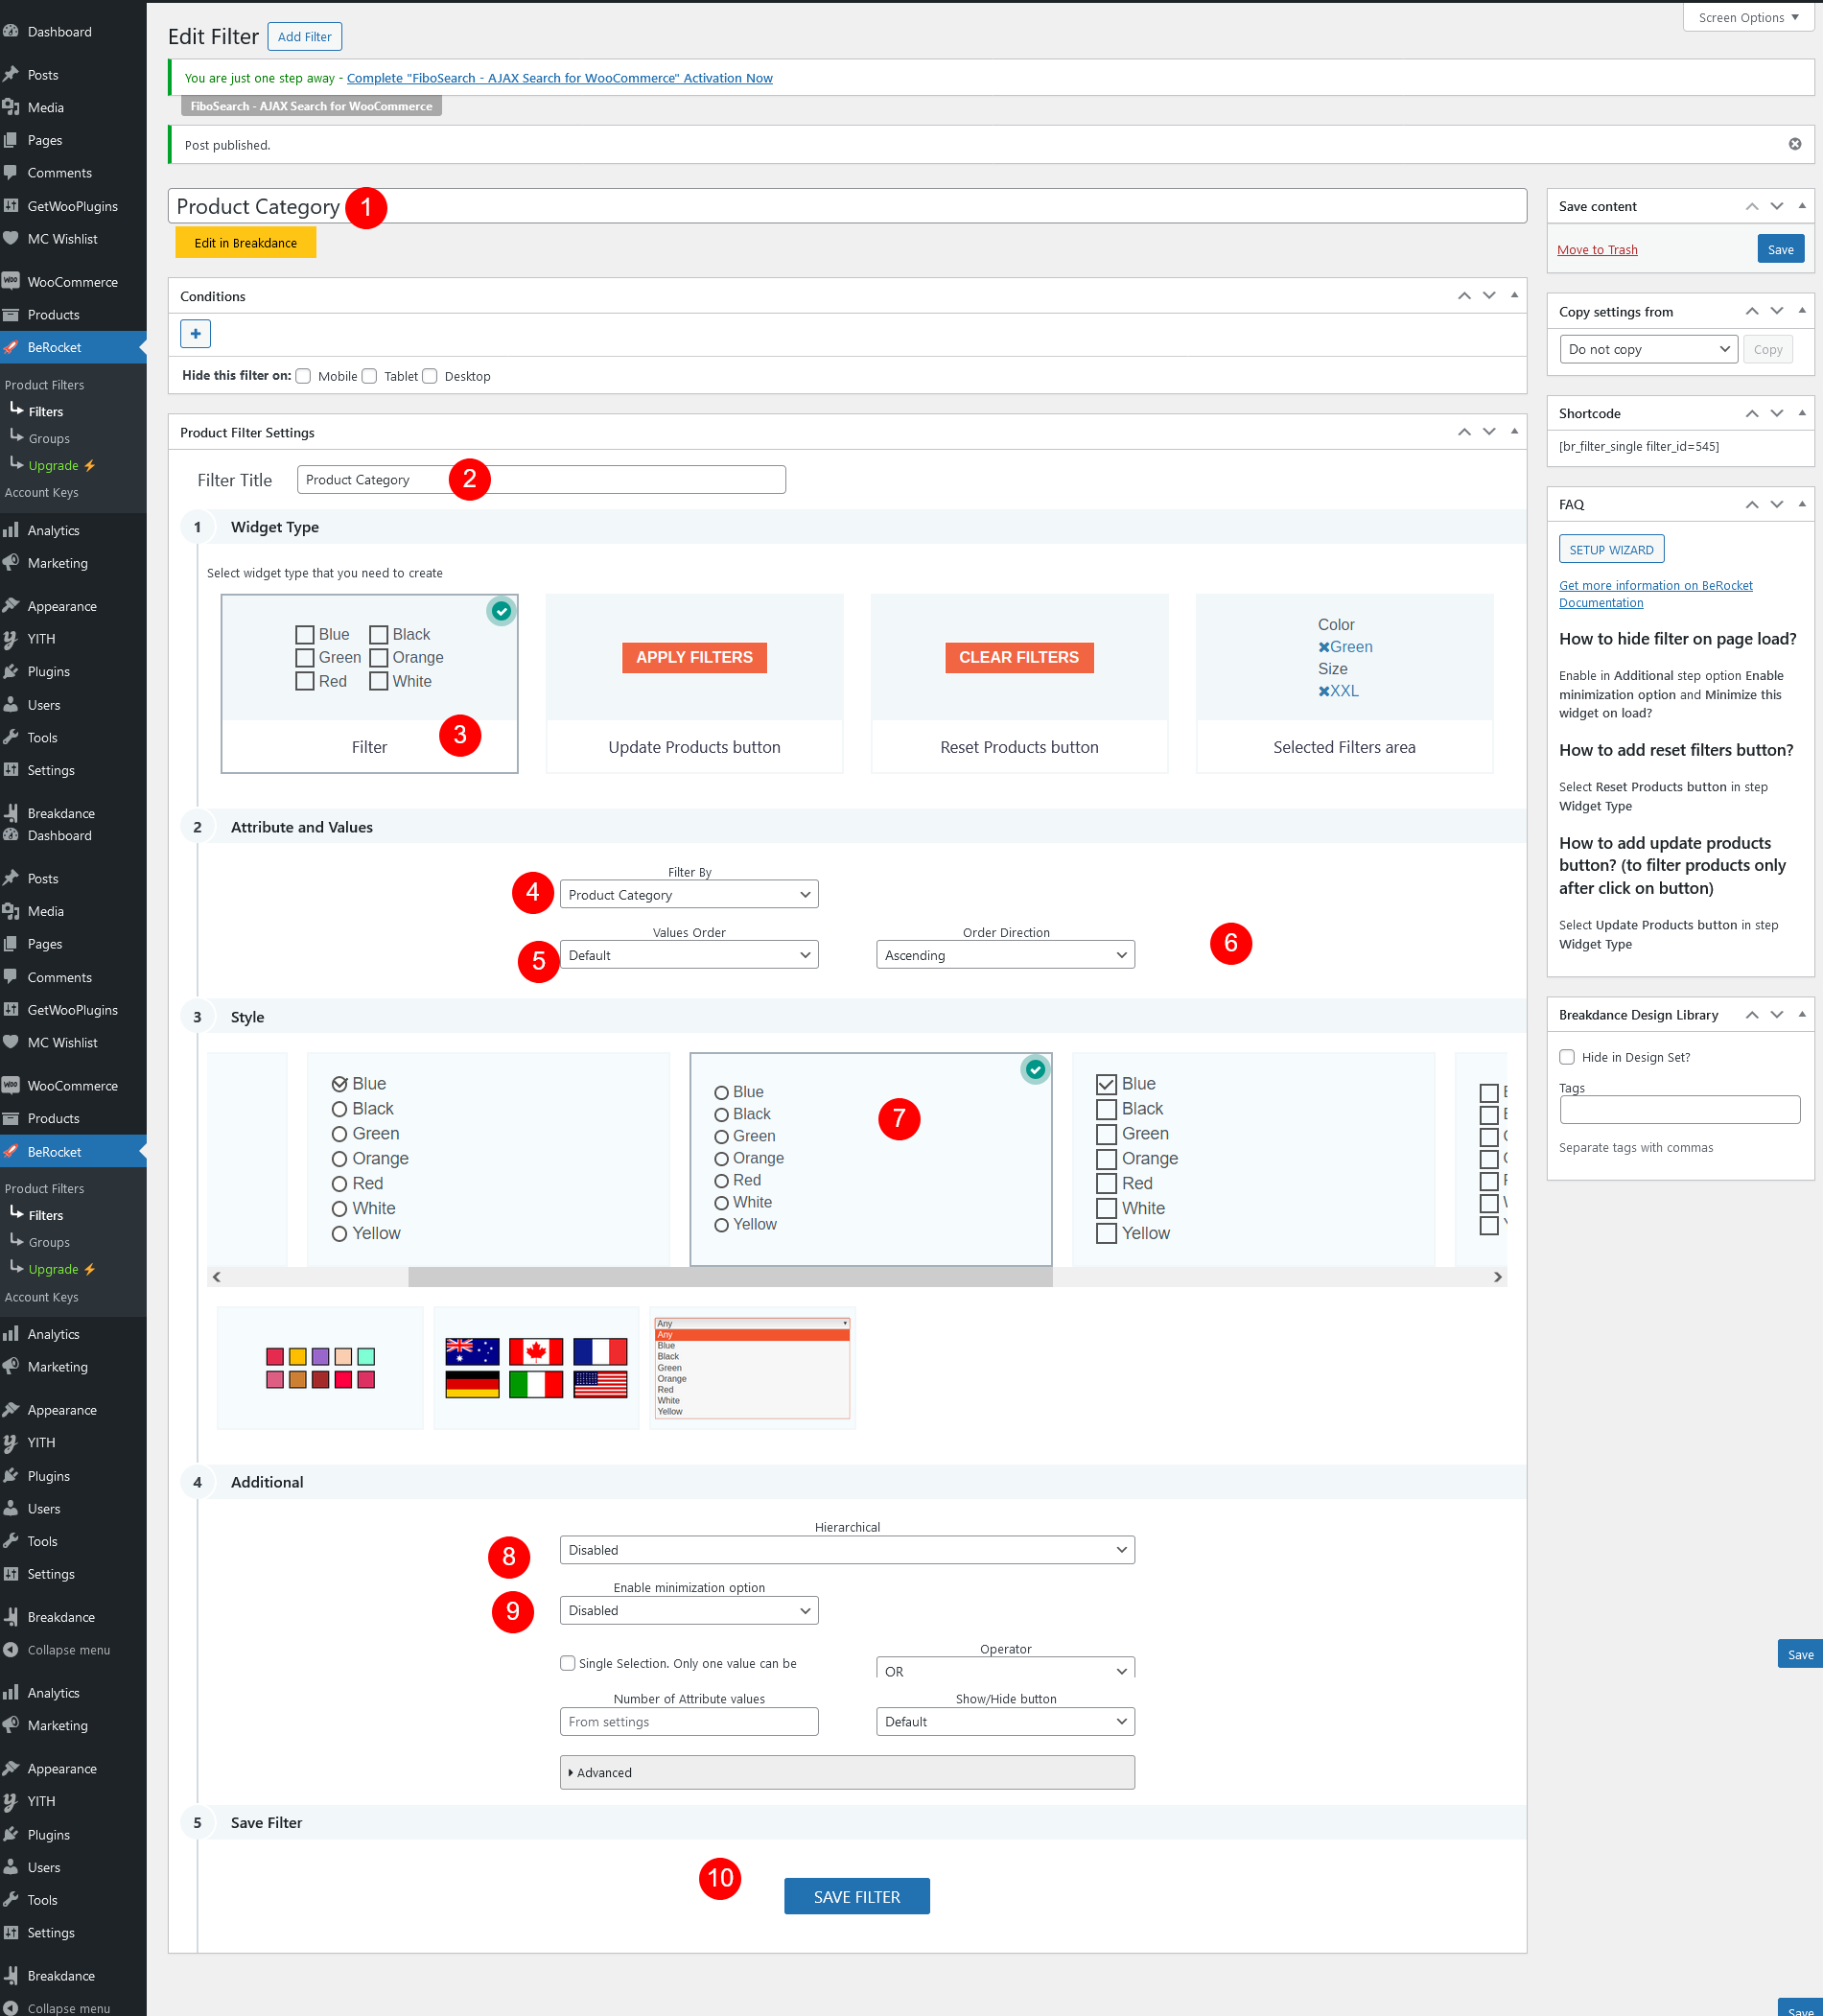
Step 10.2 -> See “Clear Filters” and click on “Edit” Link
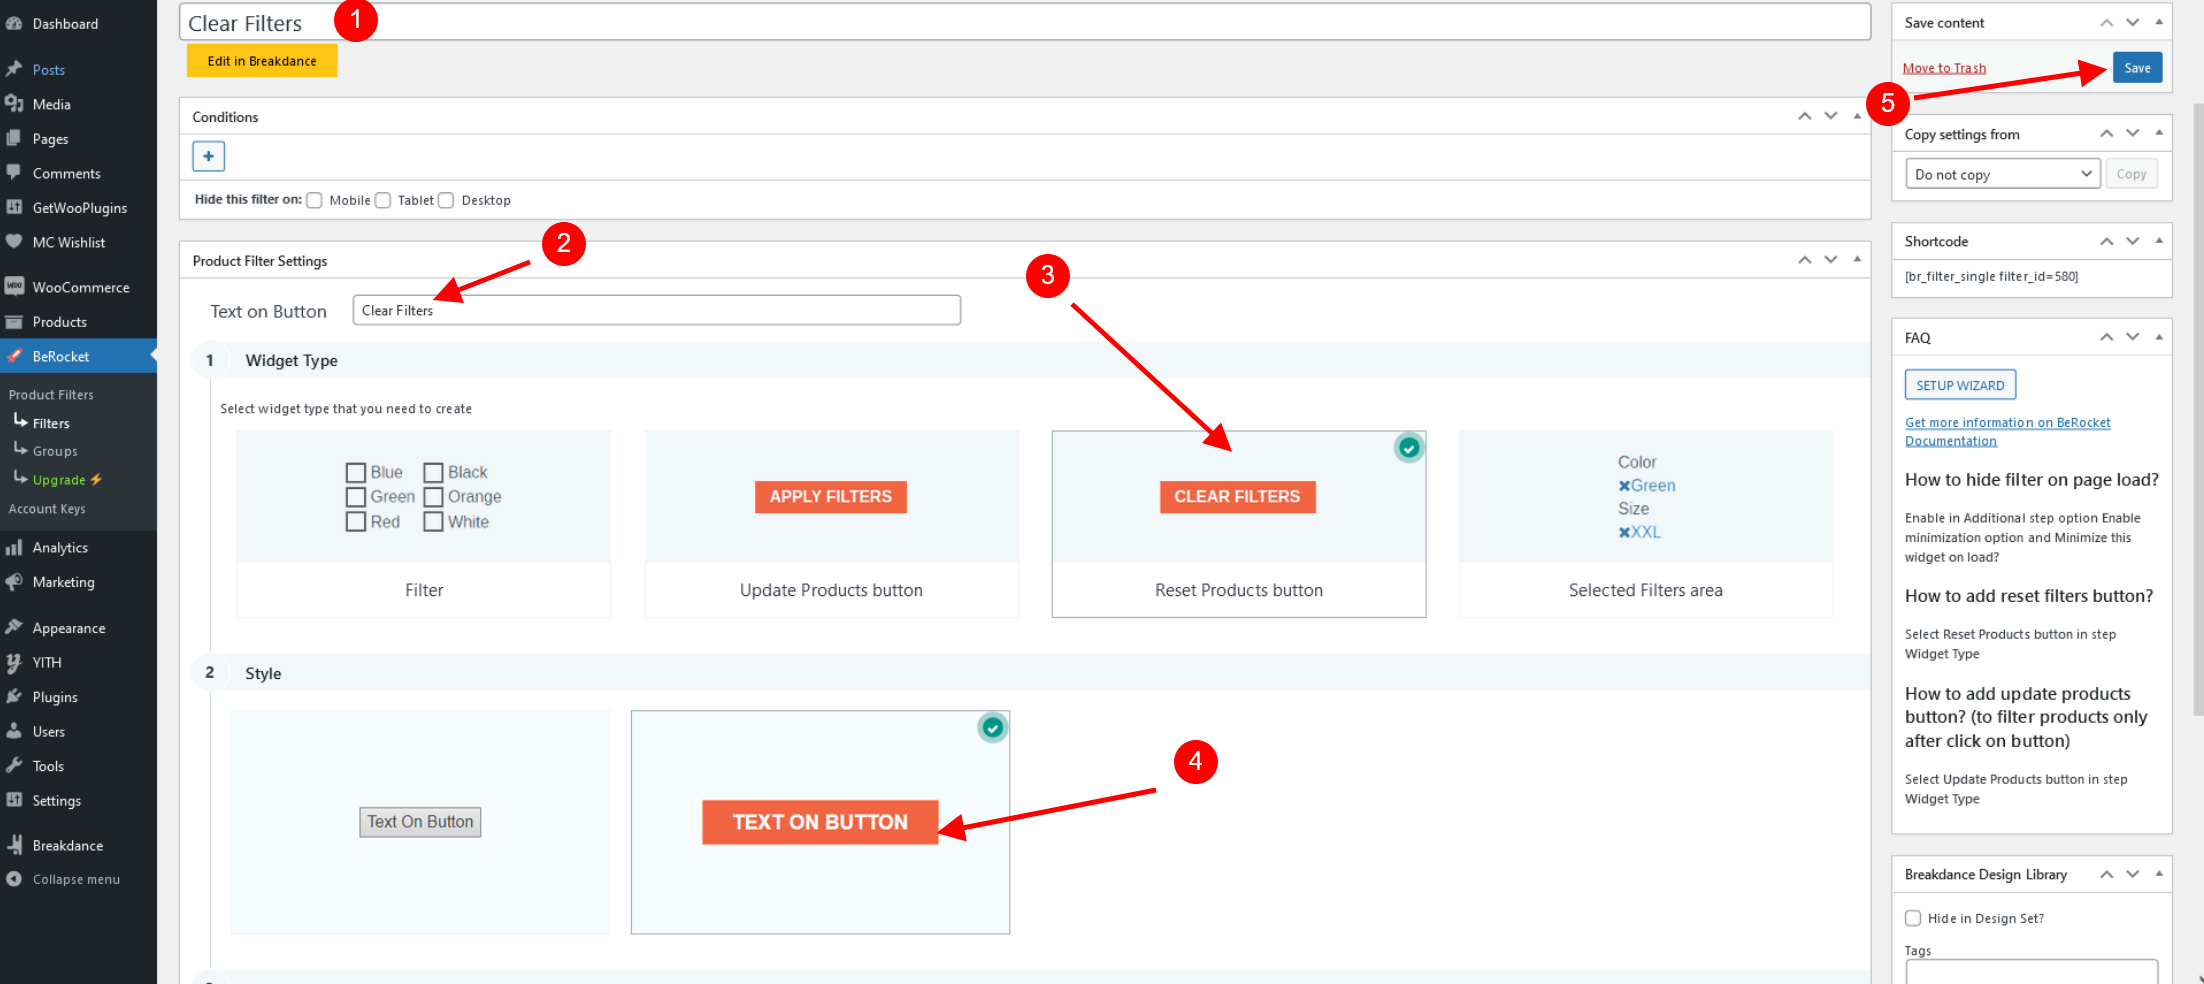
Step 10.3 -> After click on edit please do settings as per below image
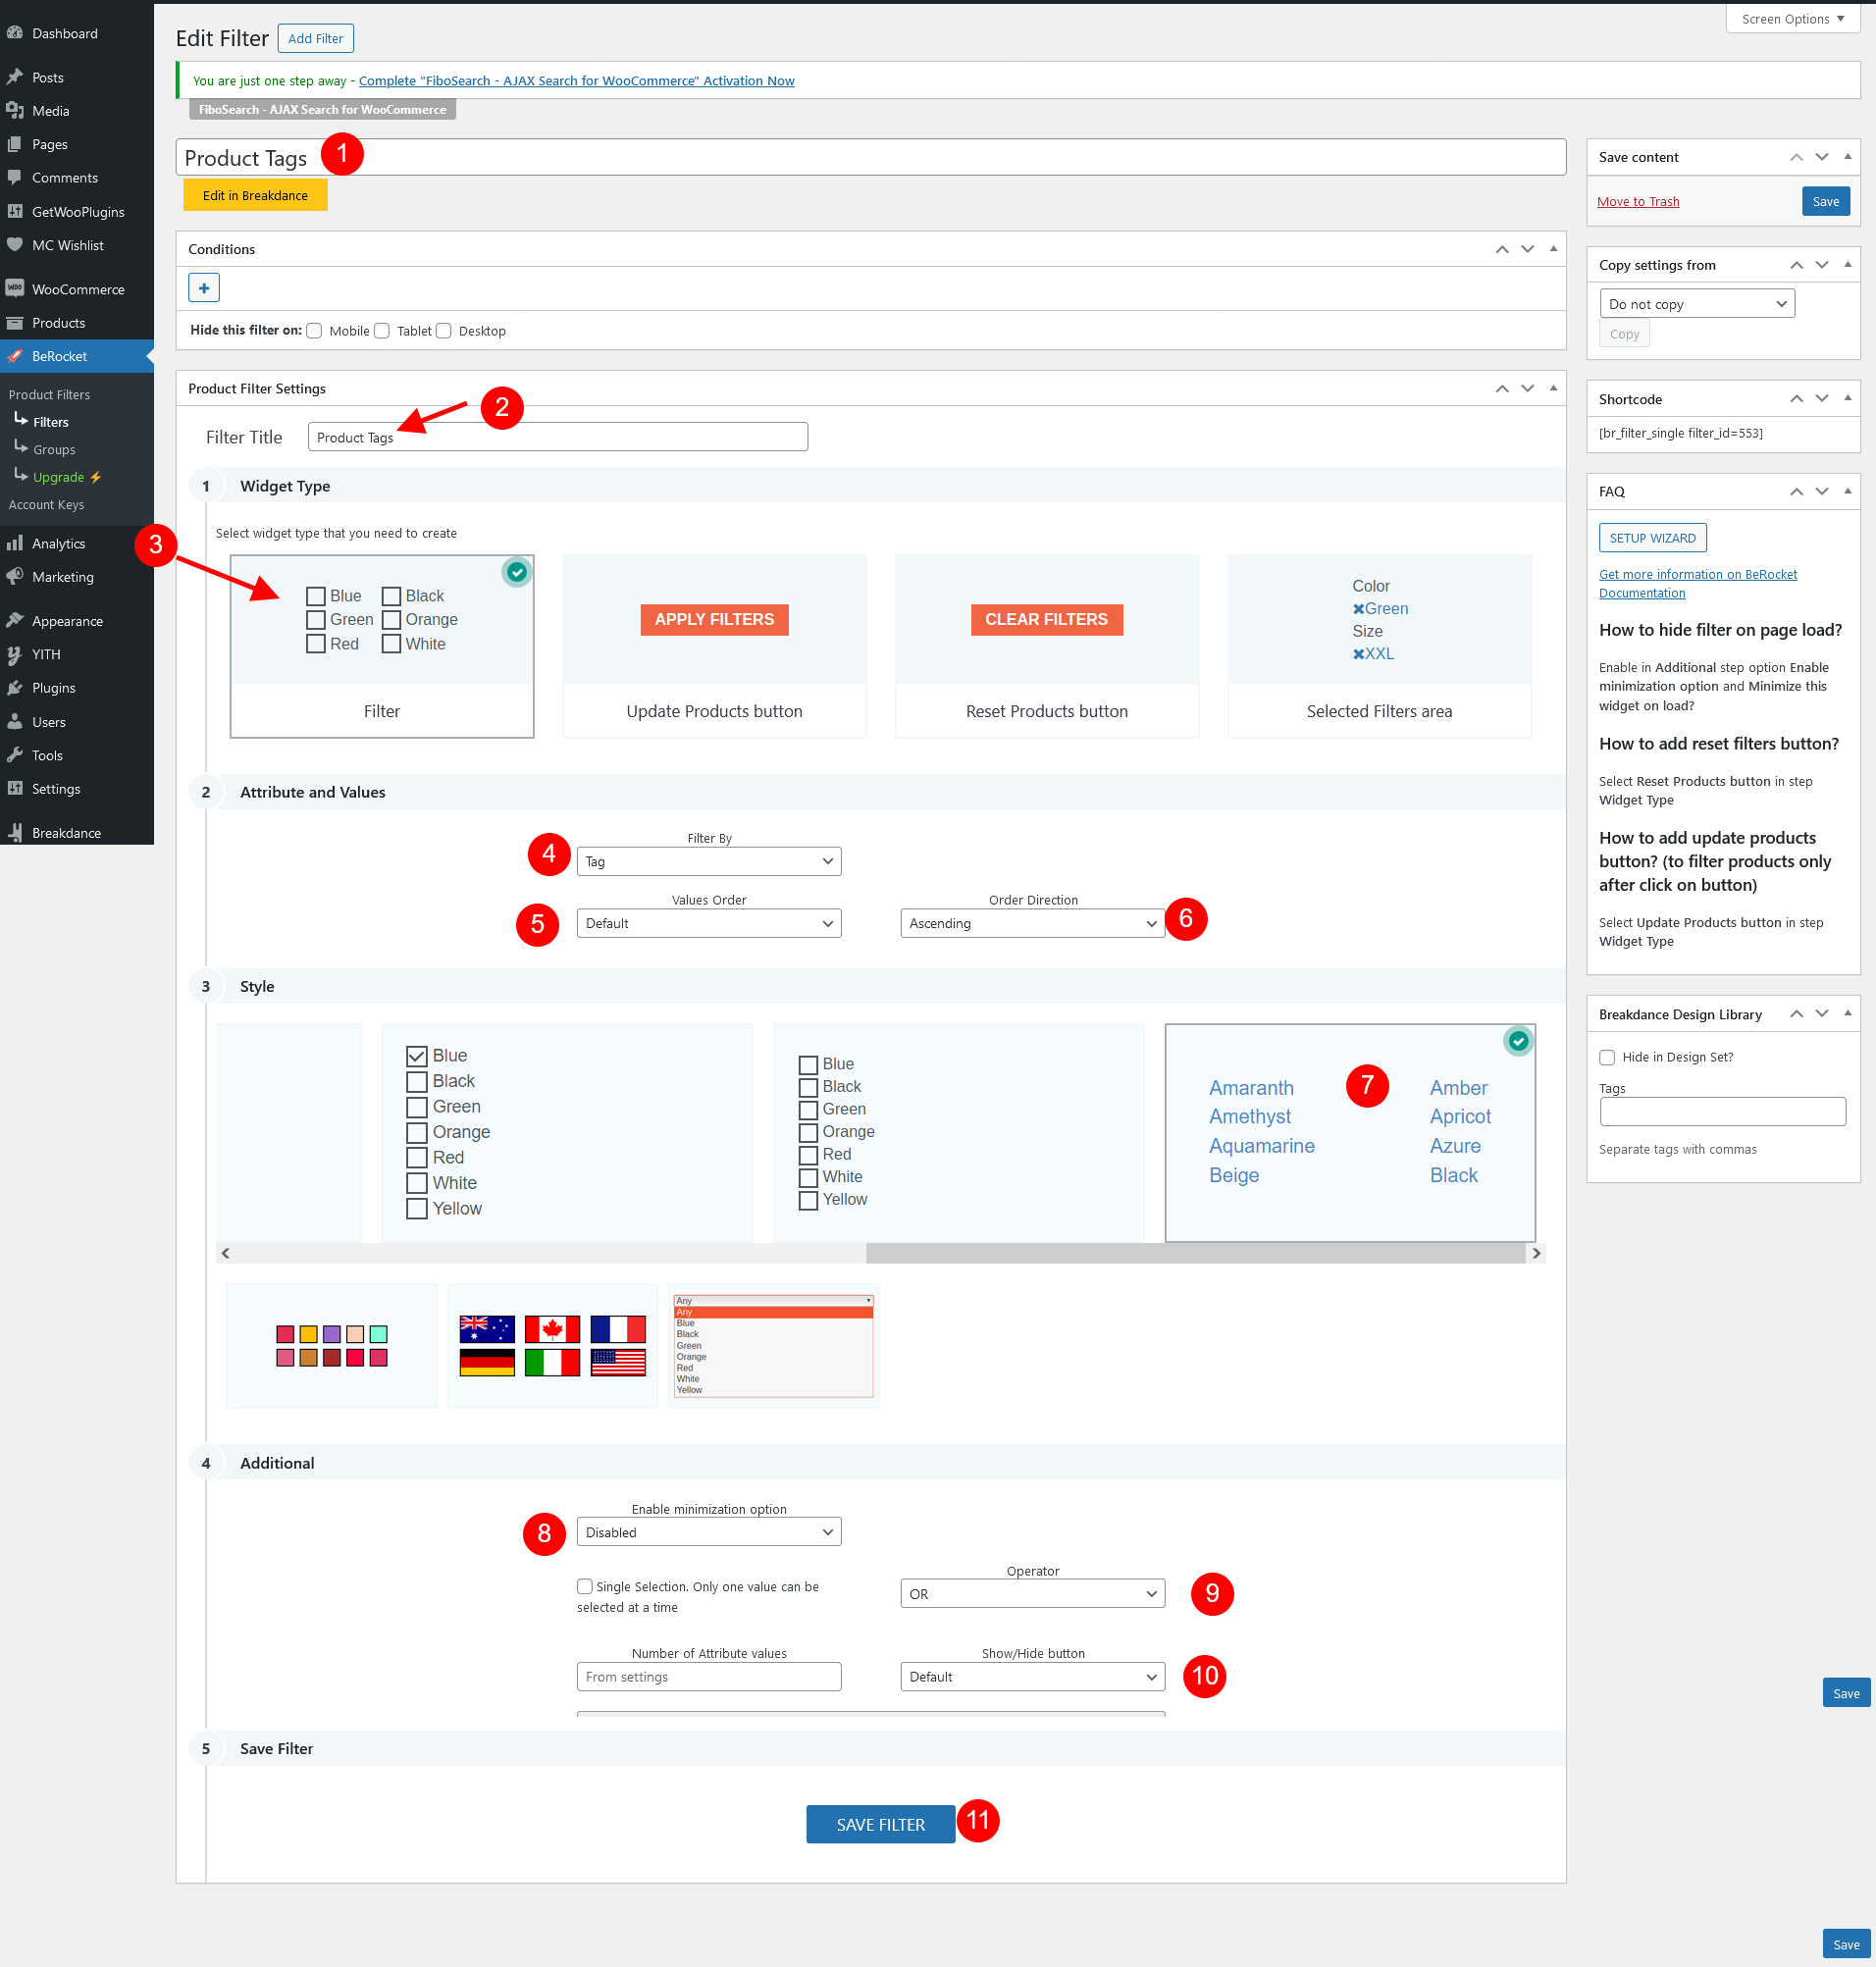
Step 10.4 -> See “Product Tags” and click on “Edit” Link.After click on edit please do settings as per below image
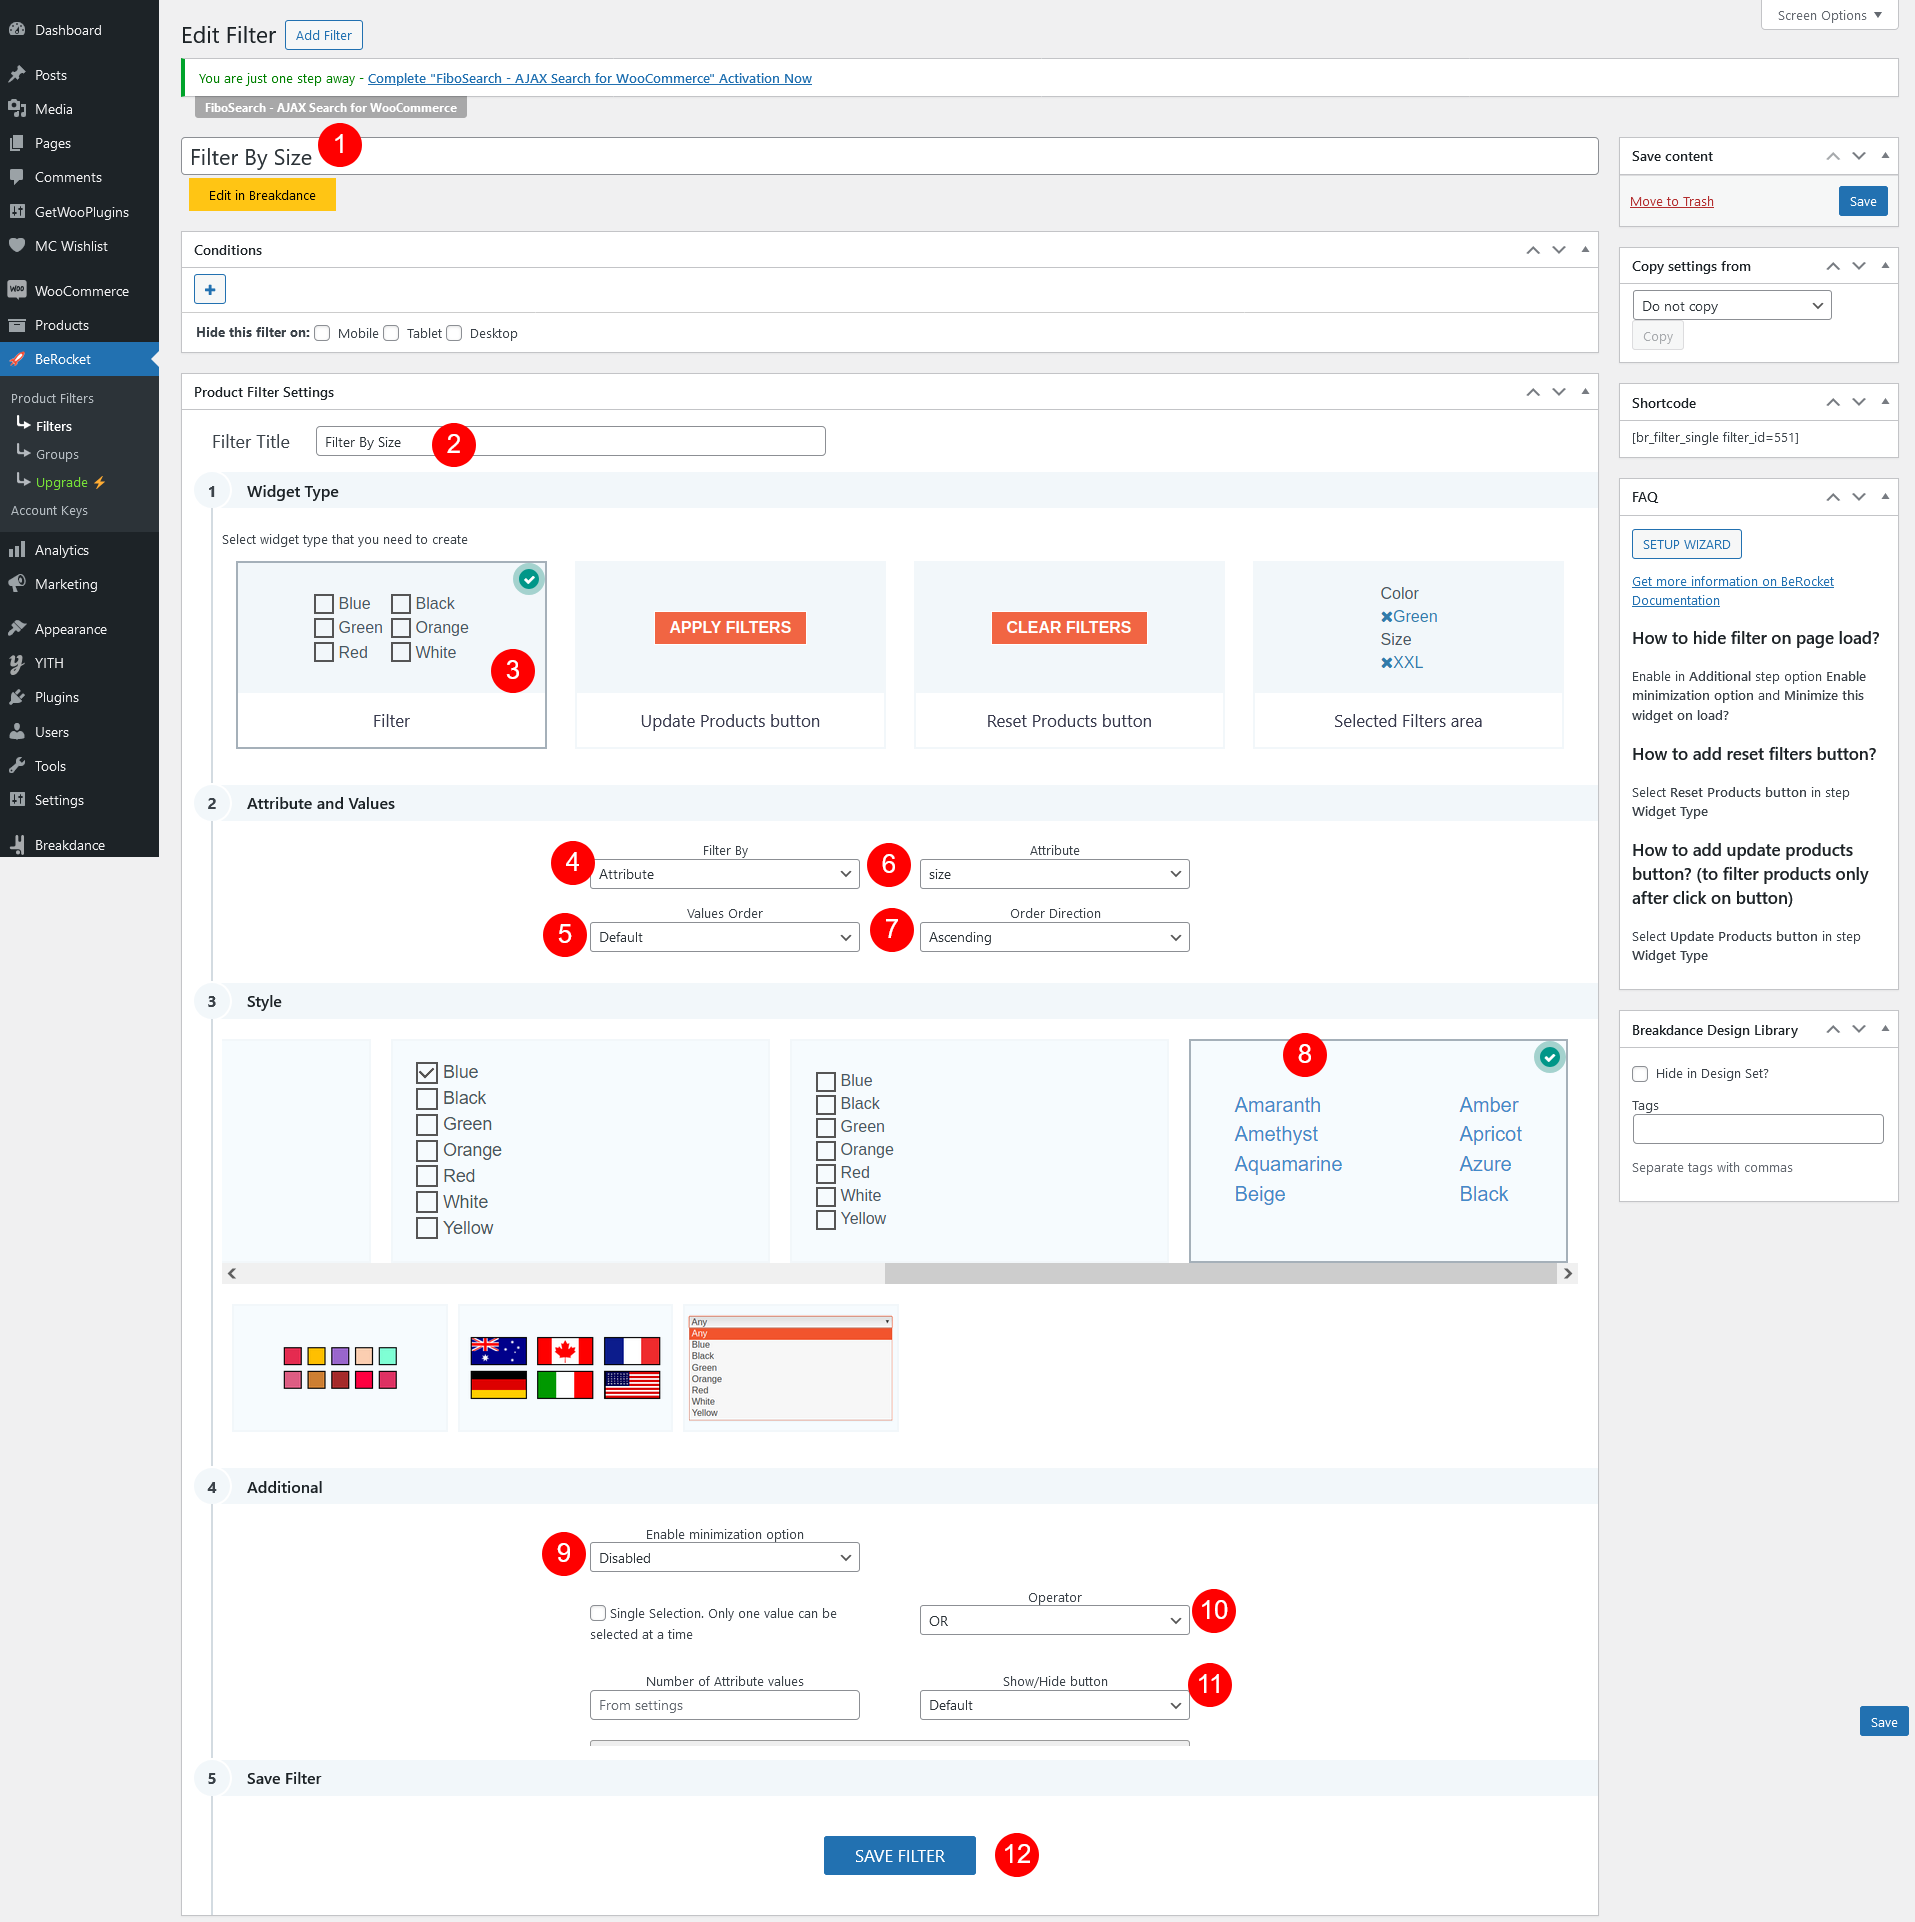
Step 10.5 -> See “Filter By Size” and click on “Edit” Link.After click on edit please do settings as per below image
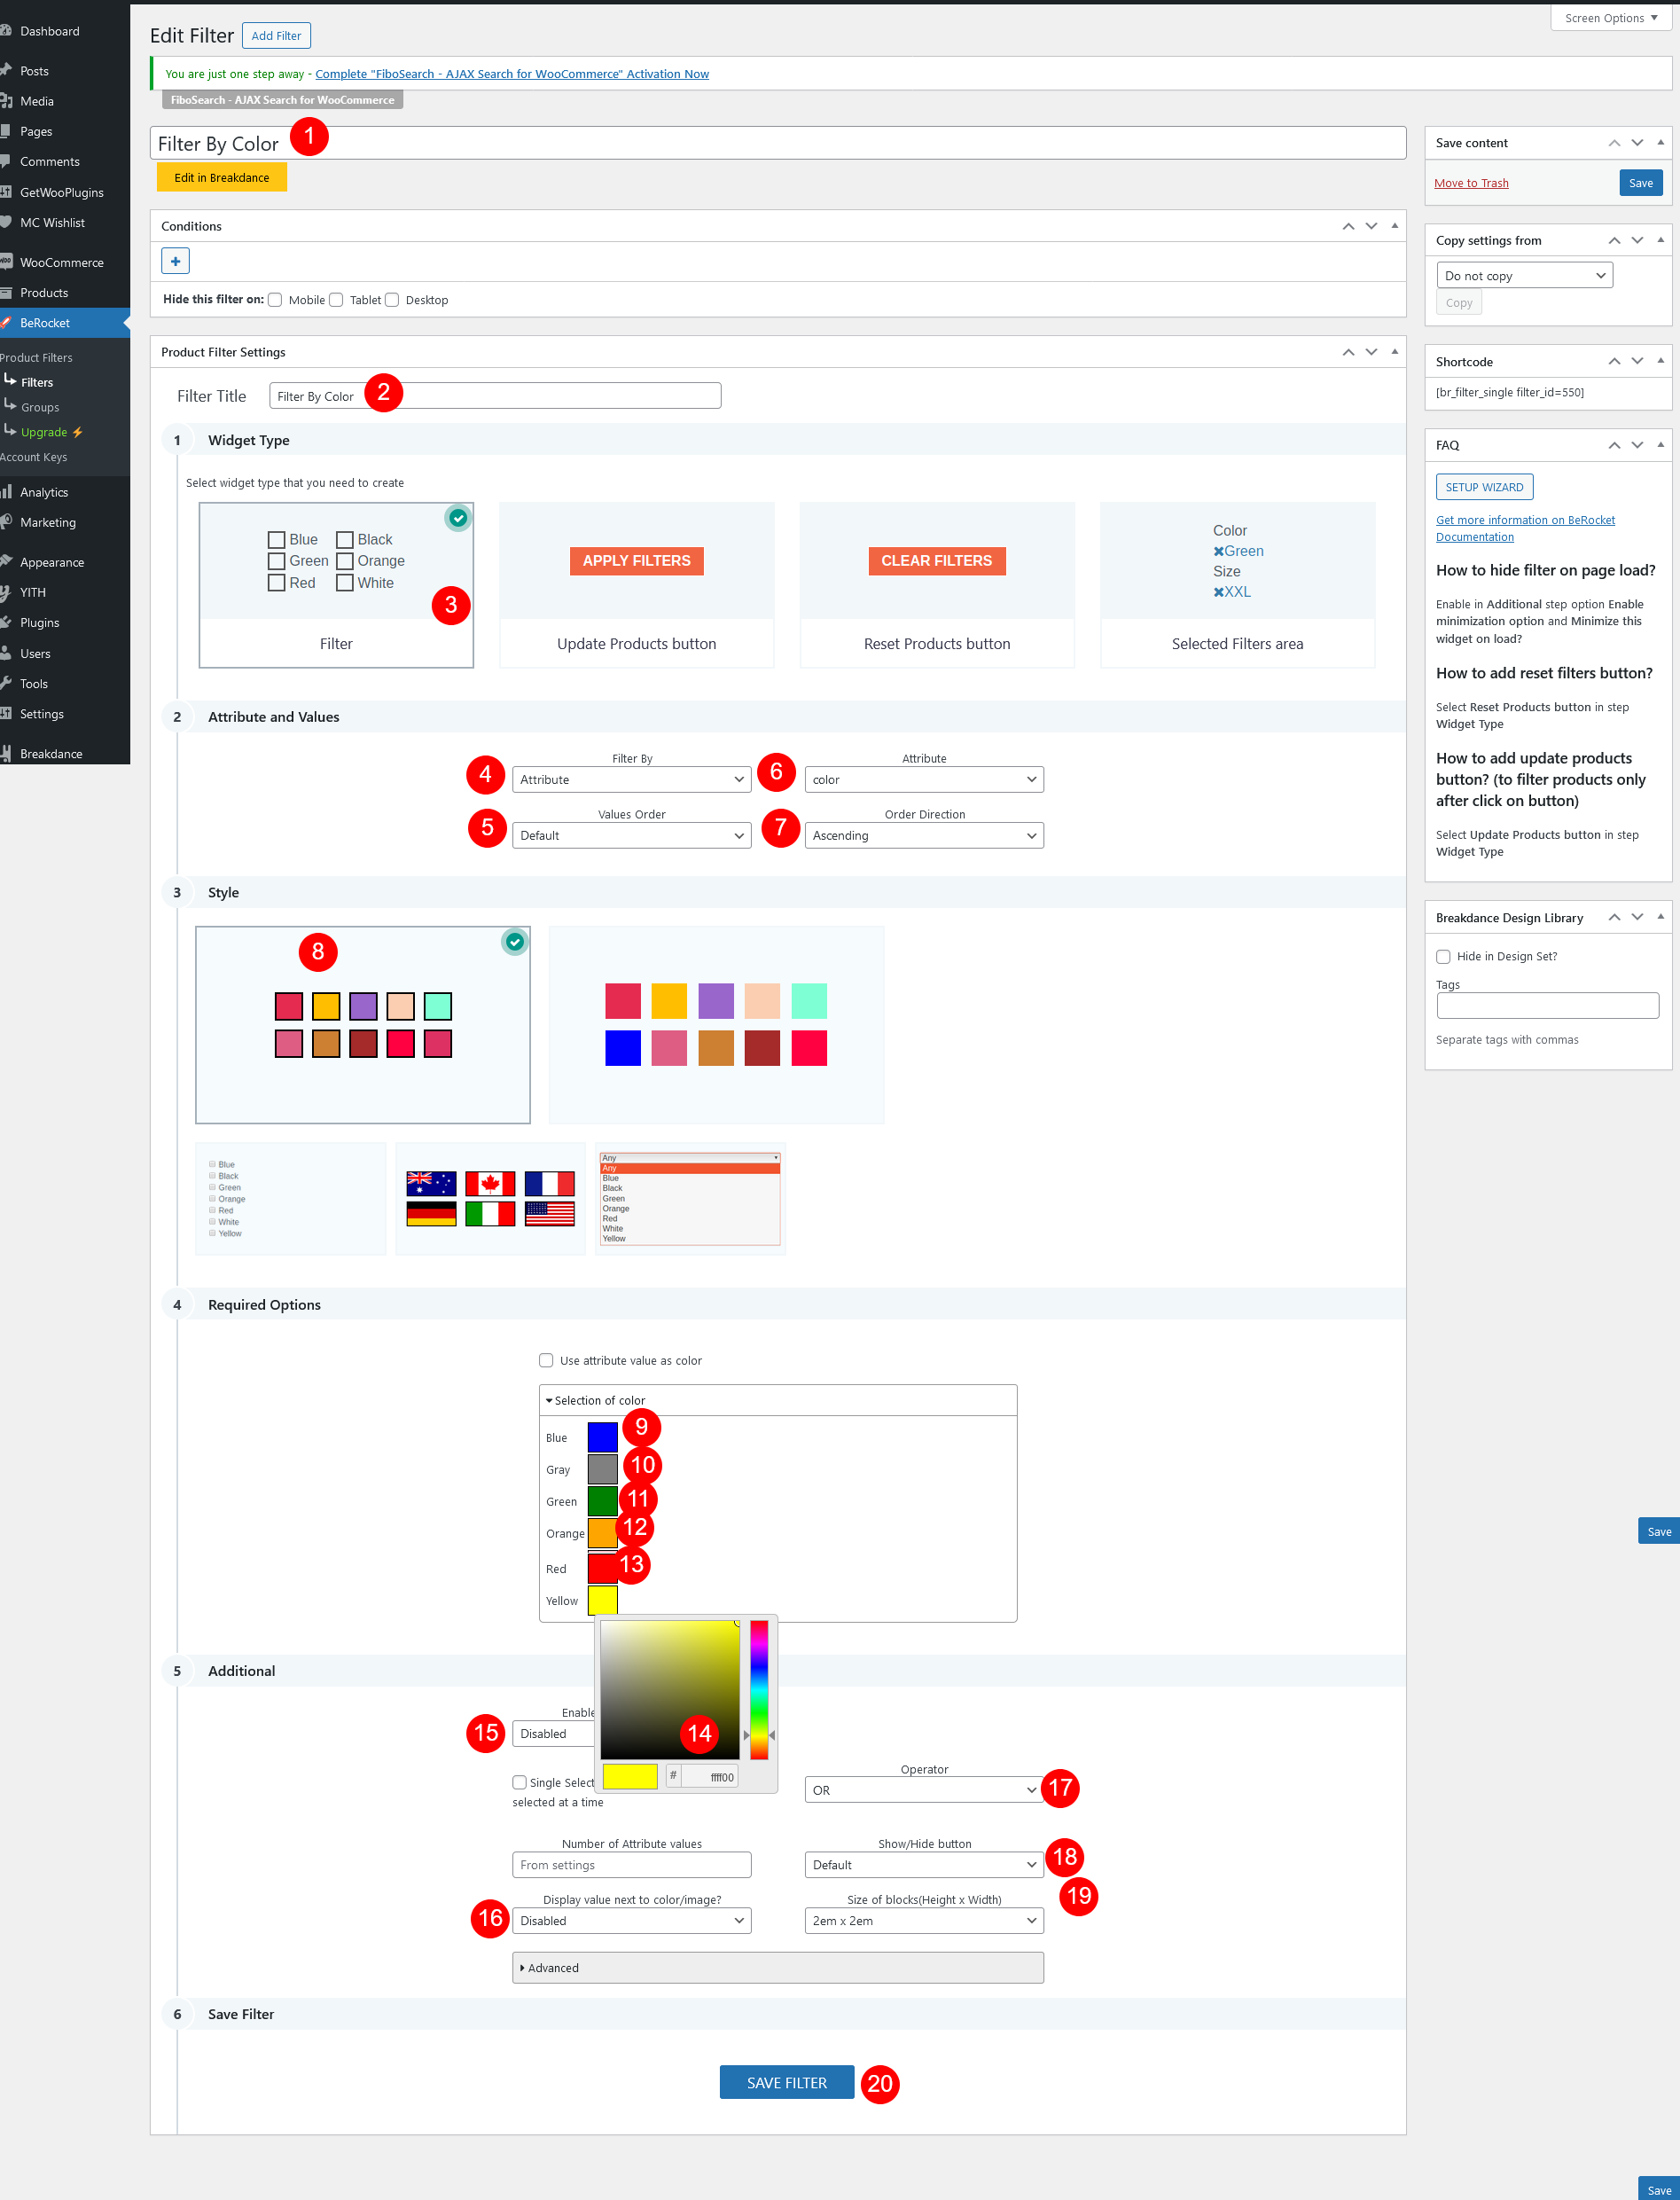
Step 10.6 -> See “Filter By Color” and click on “Edit” Link.After click on edit please do settings as per below image
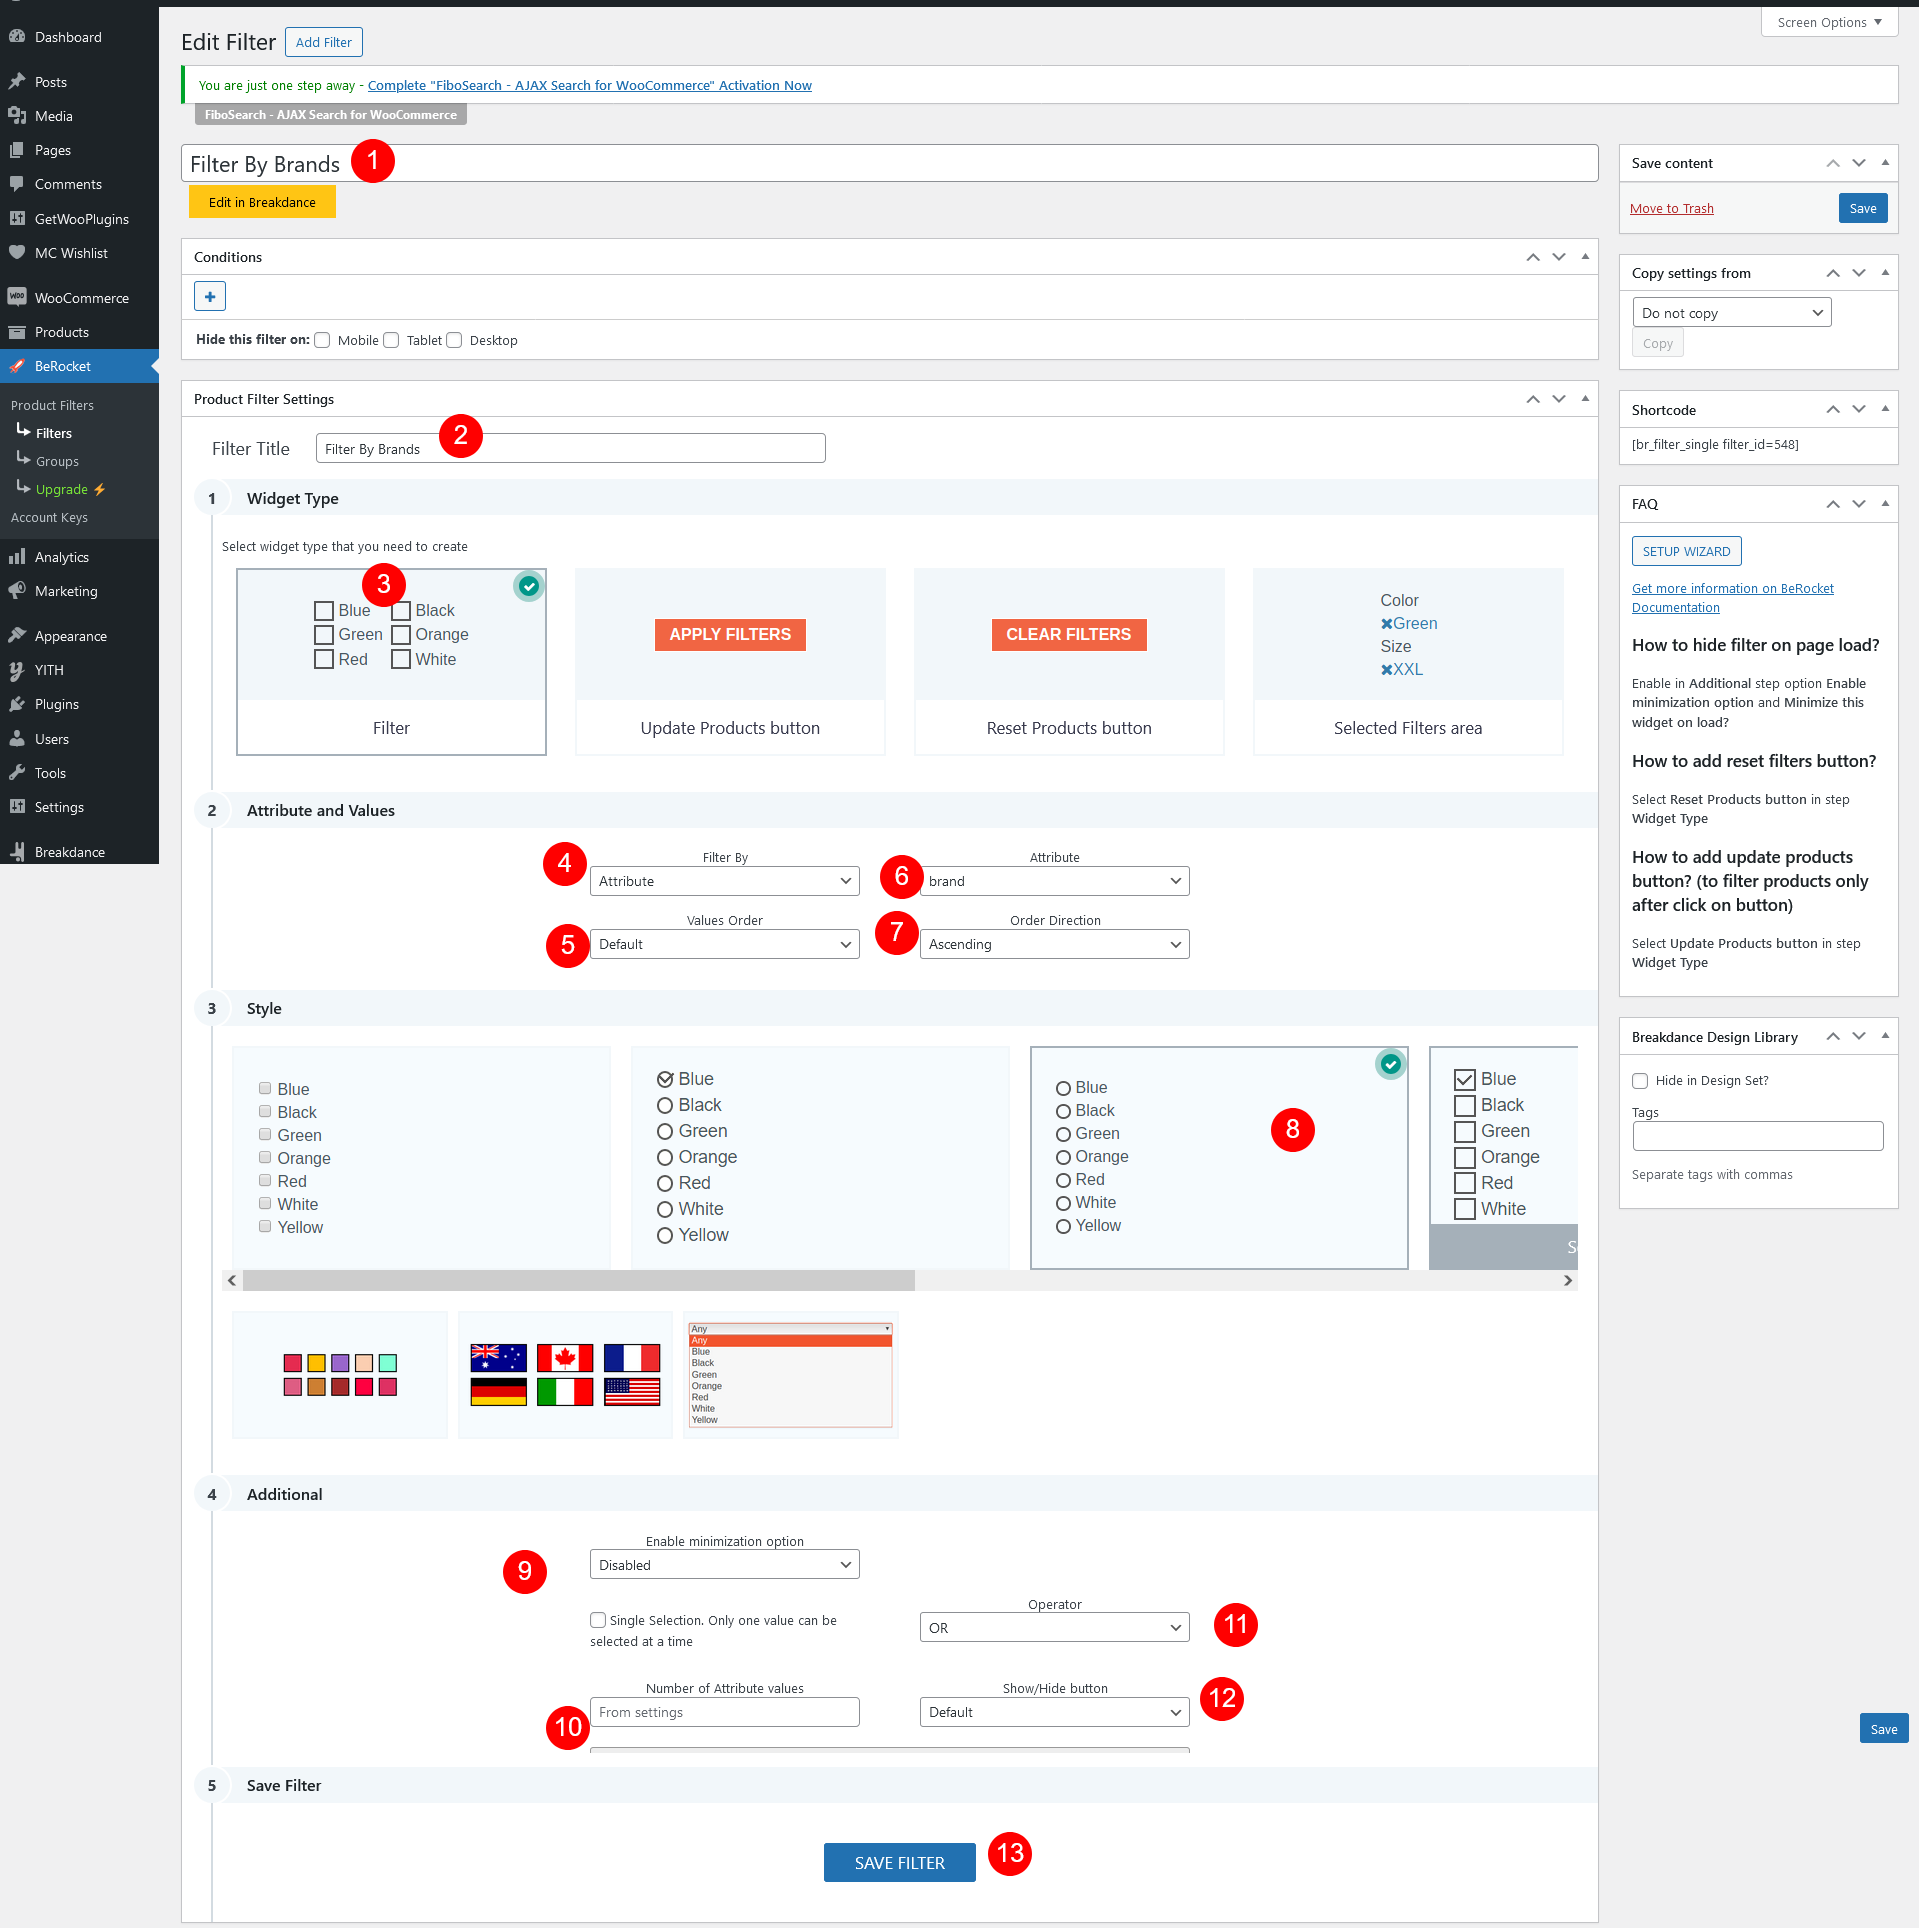
Step 10.7 -> See “Filter By Brands” and click on “Edit” Link.After click on edit please do settings as per below image
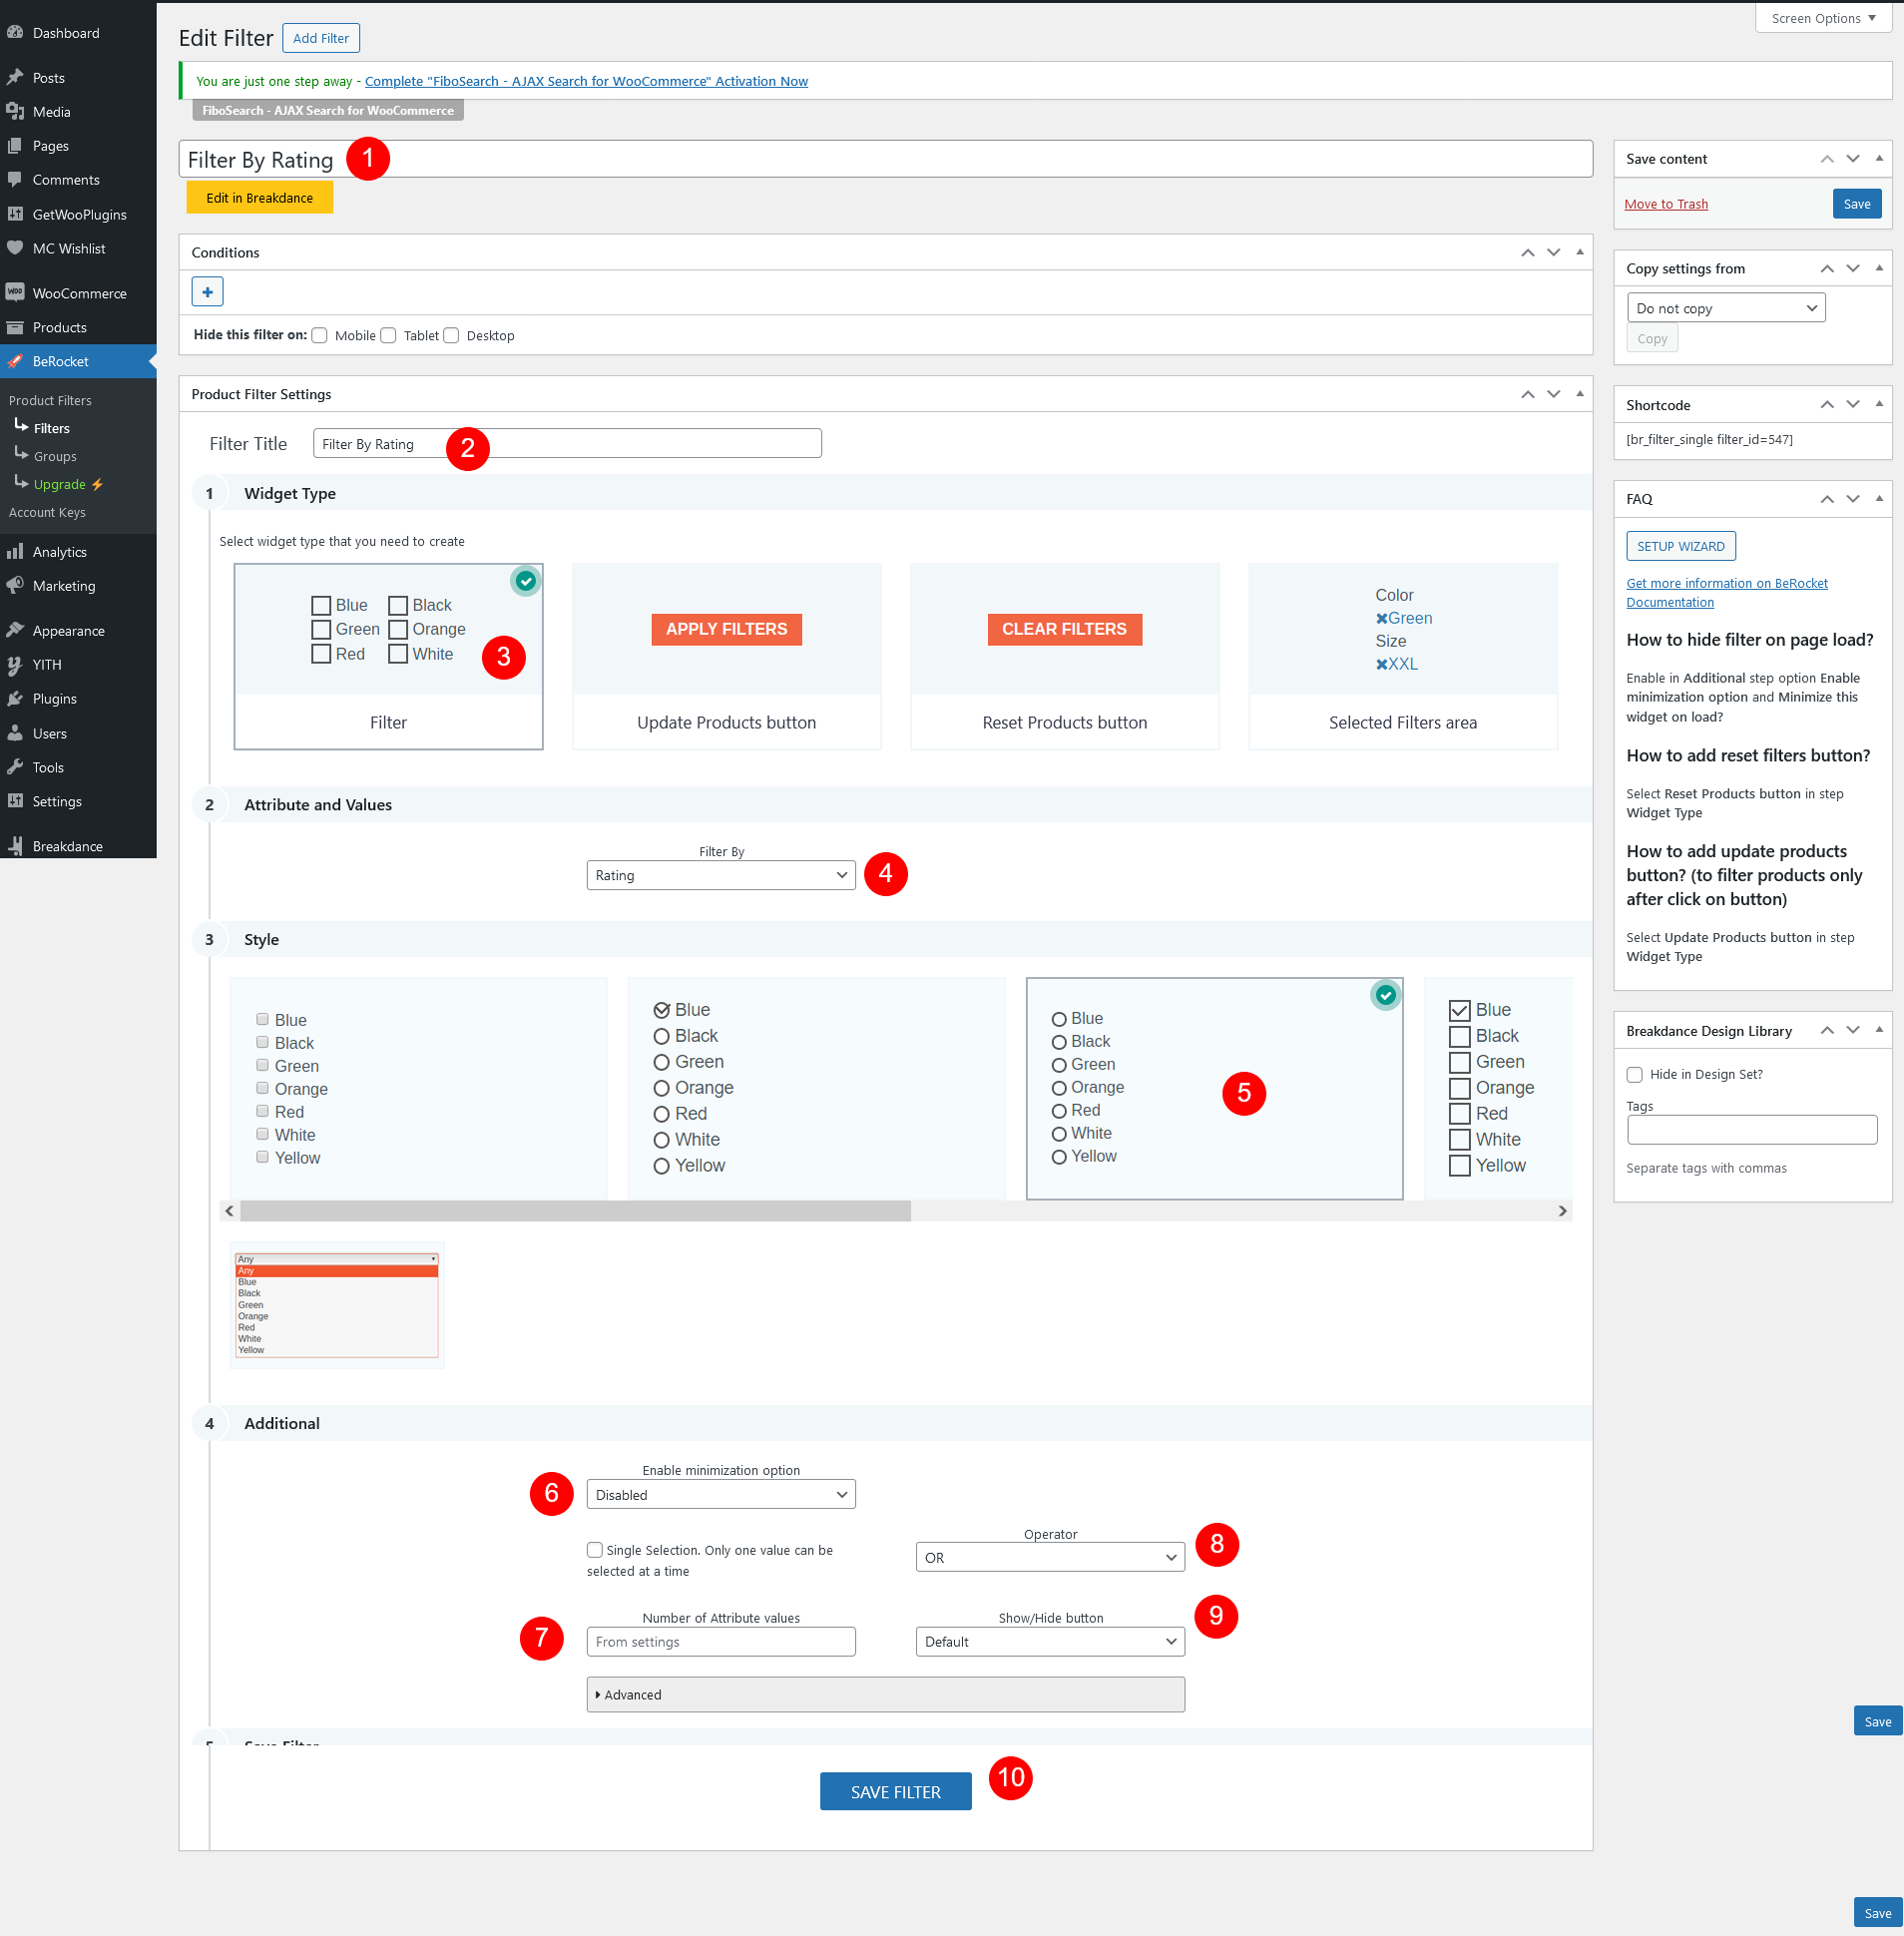
Step 10.8 -> See “Filter By Rating” and click on “Edit” Link.After click on edit please do settings as per below image
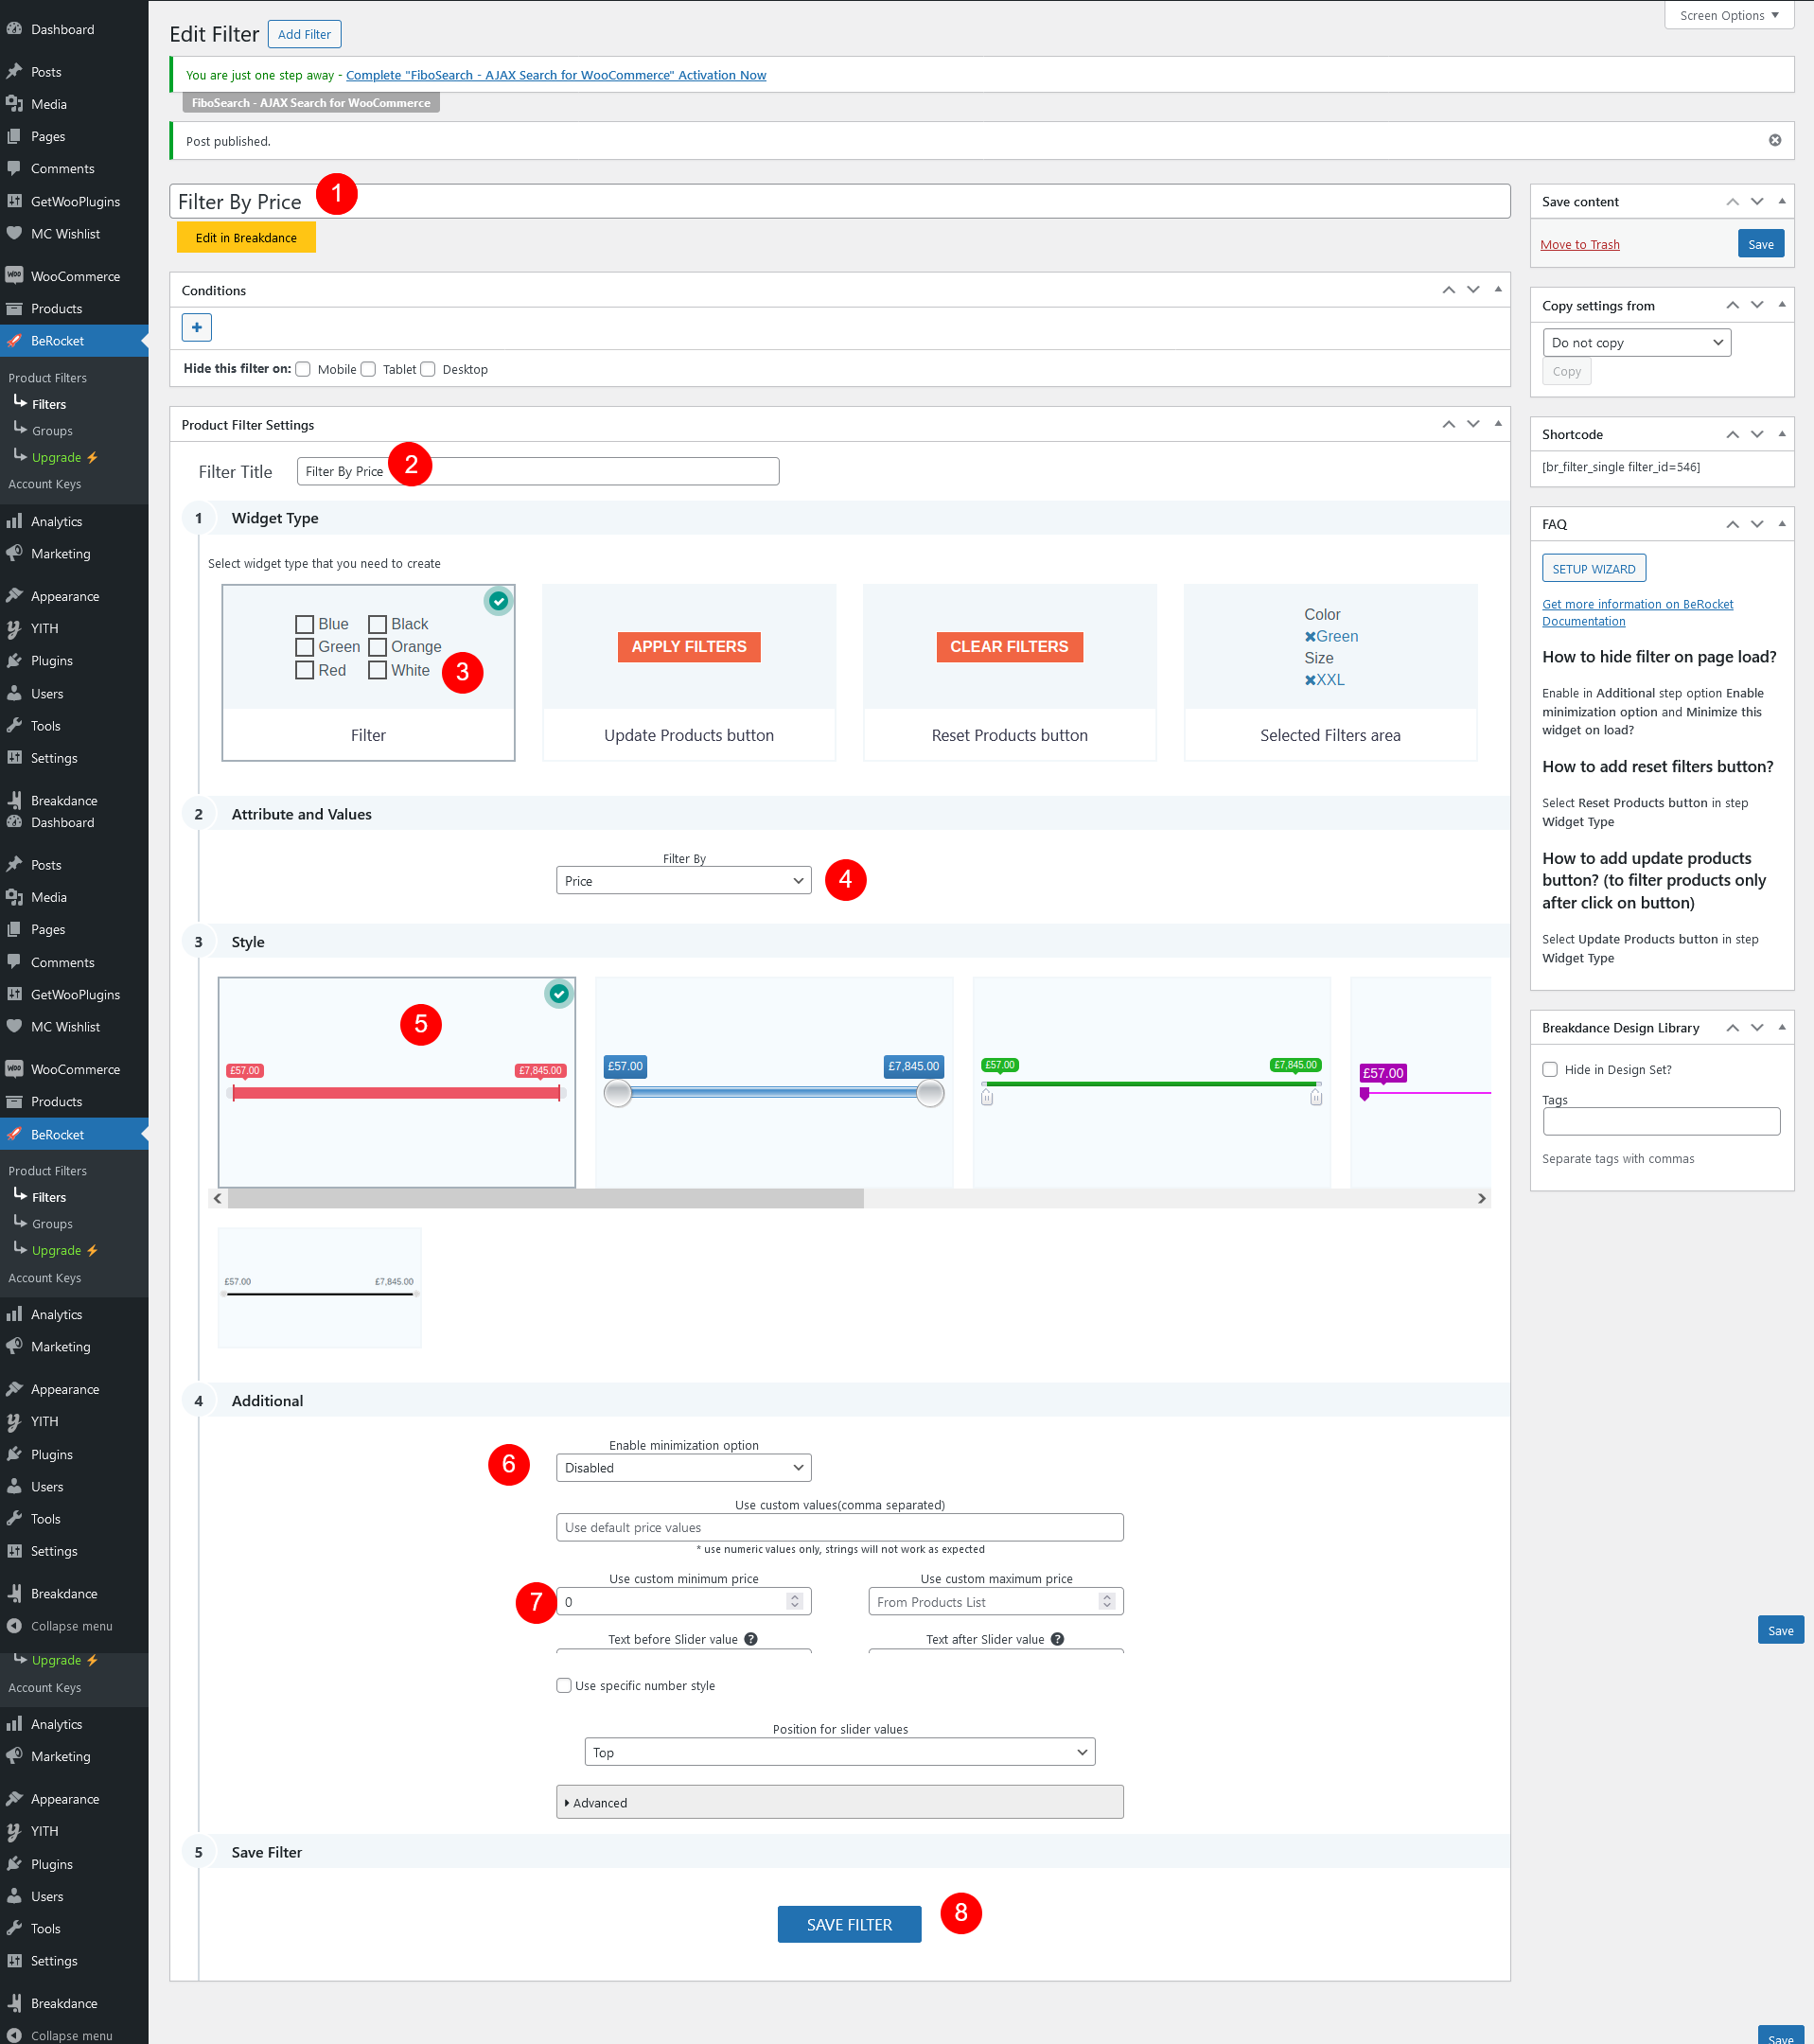
Step 10.9 -> See “Filter By Price” and click on “Edit” Link.After click on edit please do settings as per below image
Step 10.10 -> See “Filter By Category” and click on “Edit” Link.After click on edit please do settings as per below image
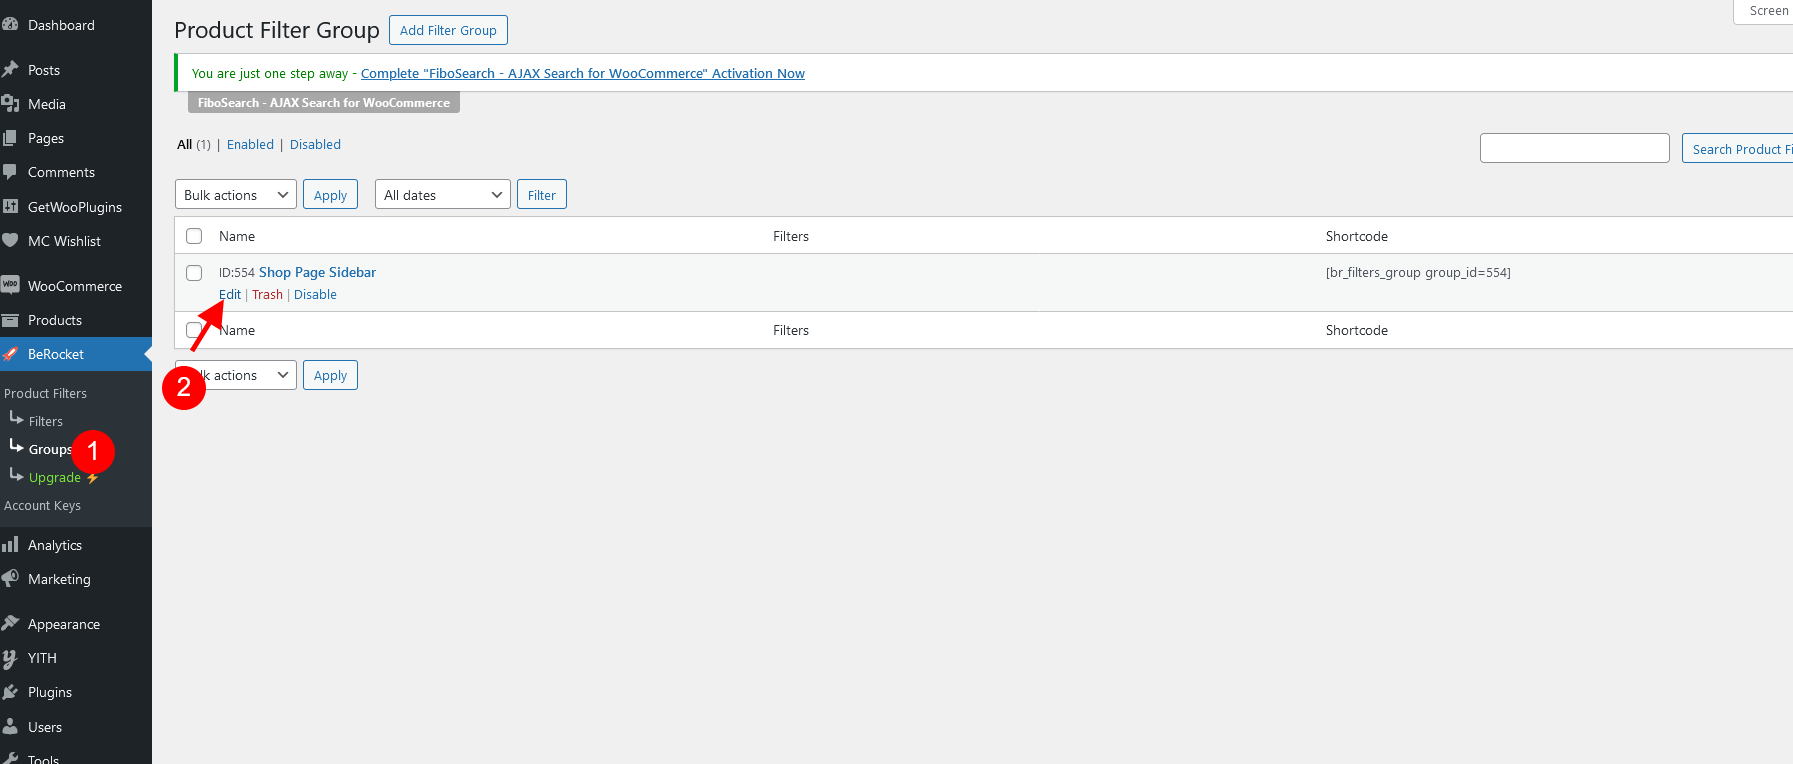
Go to BeRocket -> Groups
Step 10.11 -> Click on Edit Link
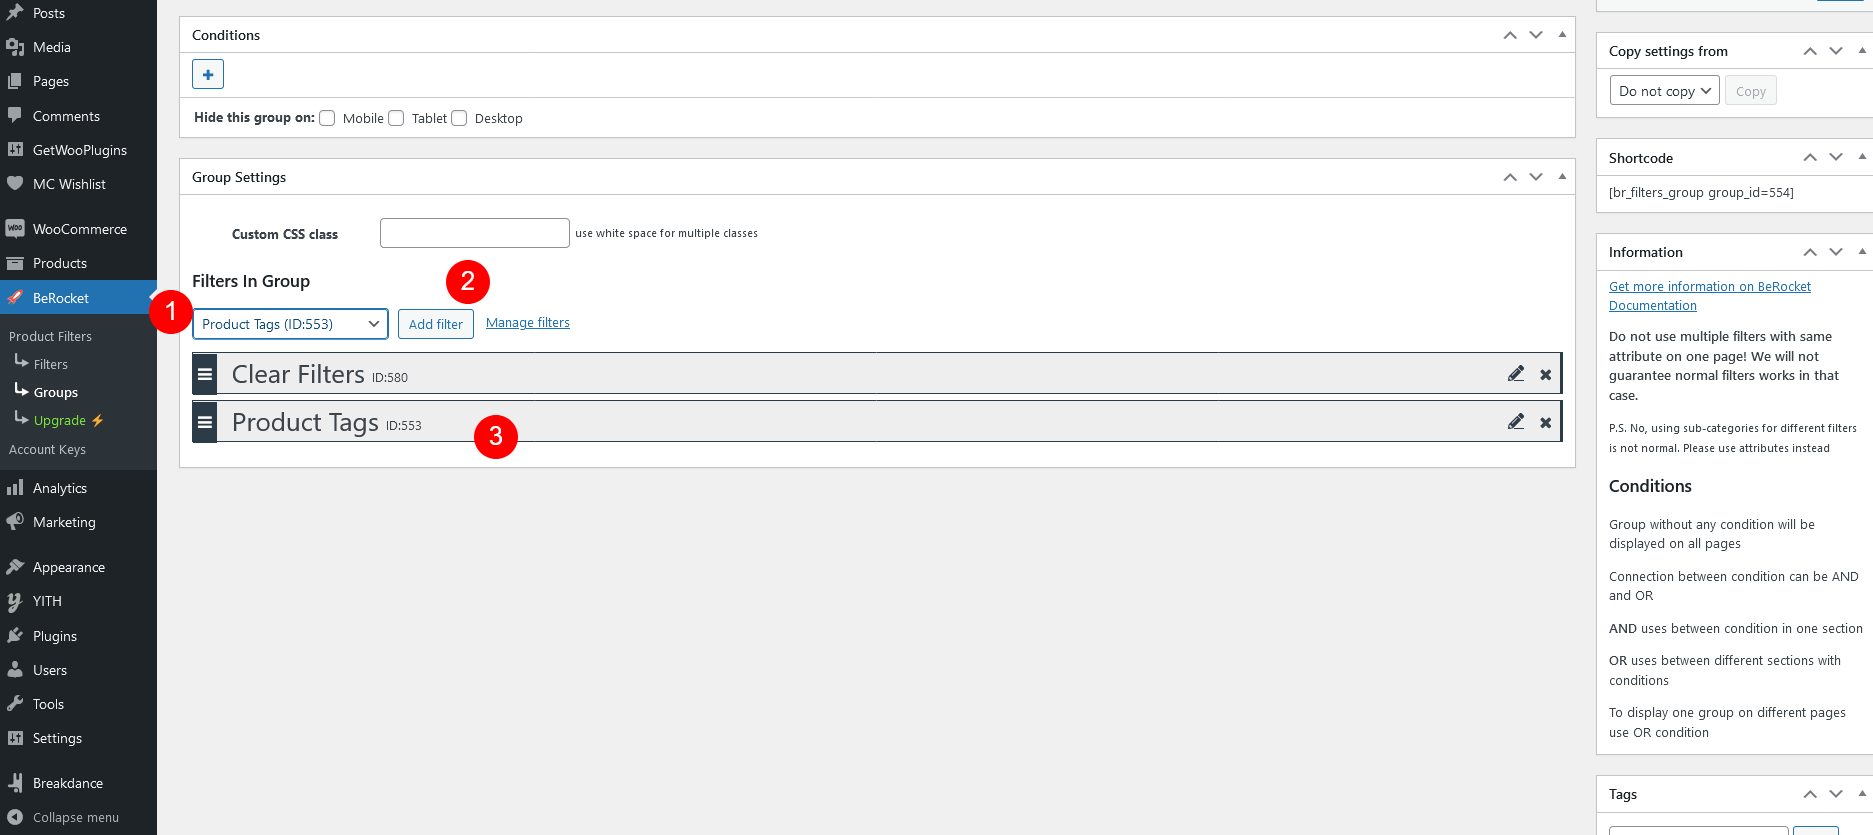
Step 10.12 -> Now check dropdown and add all filters which we created
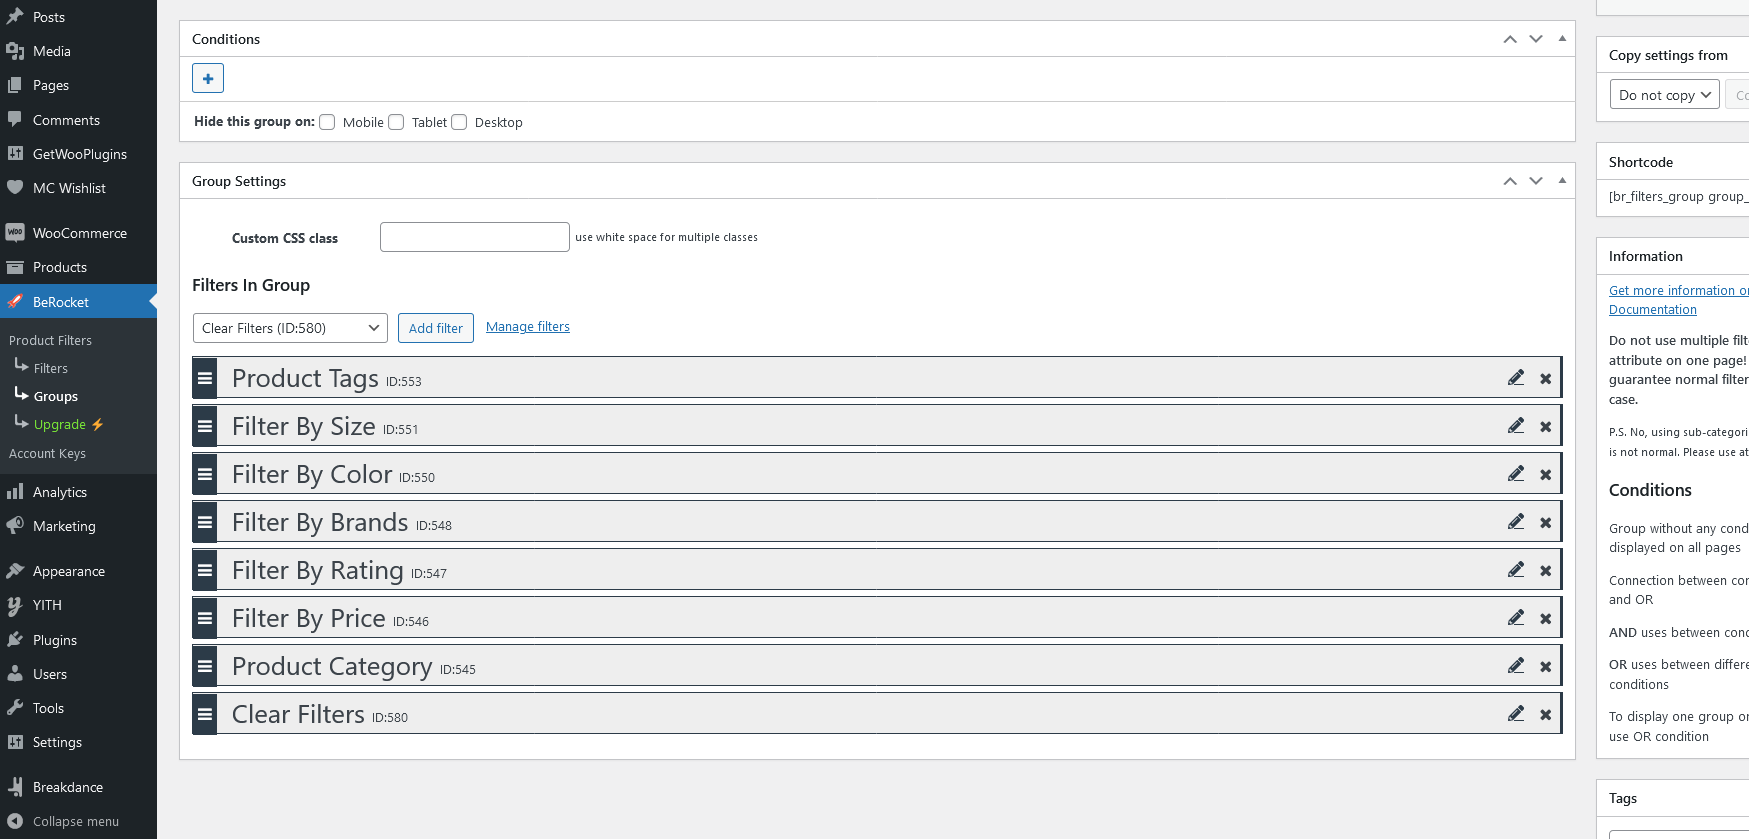
Step 10.13 -> You can see we have added all filters
Step 10.14 -> Now on shop page filter is displayed
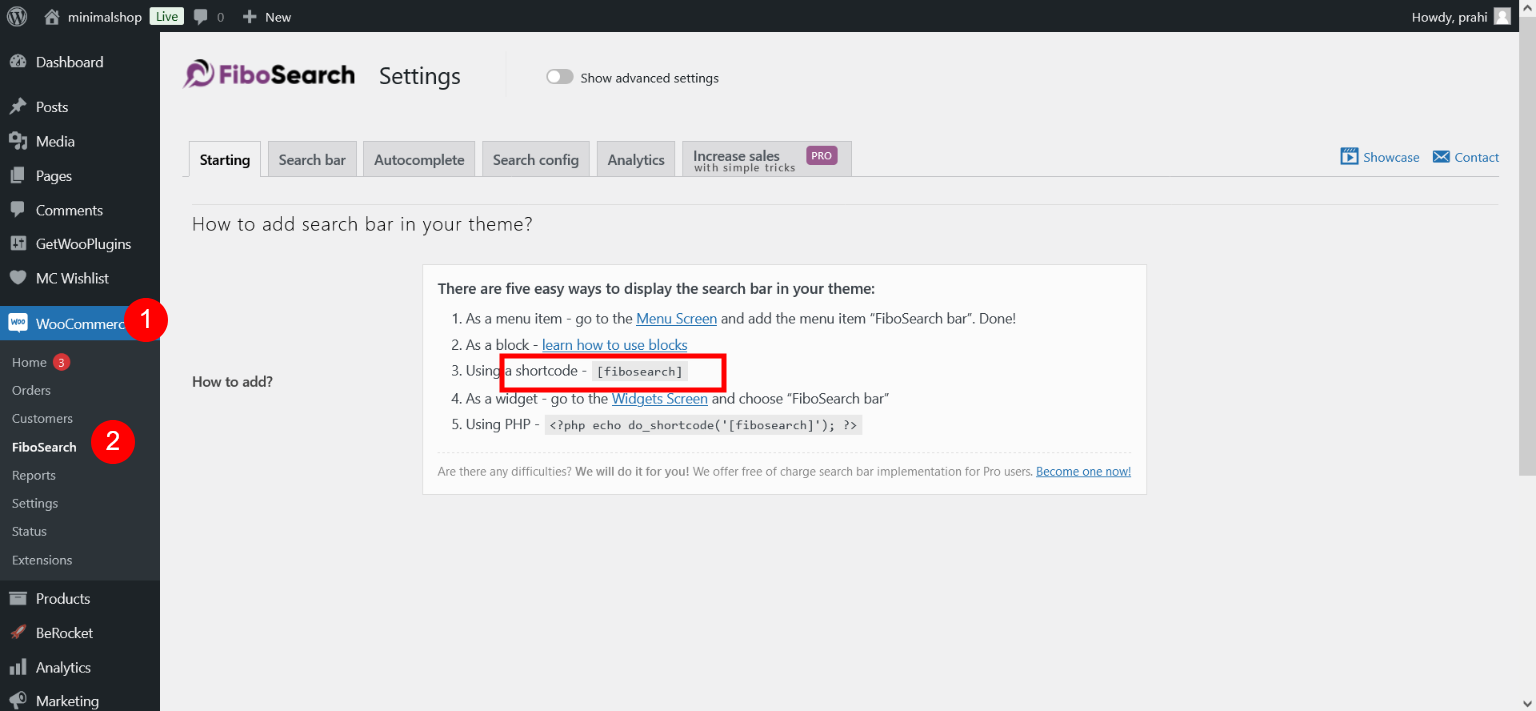
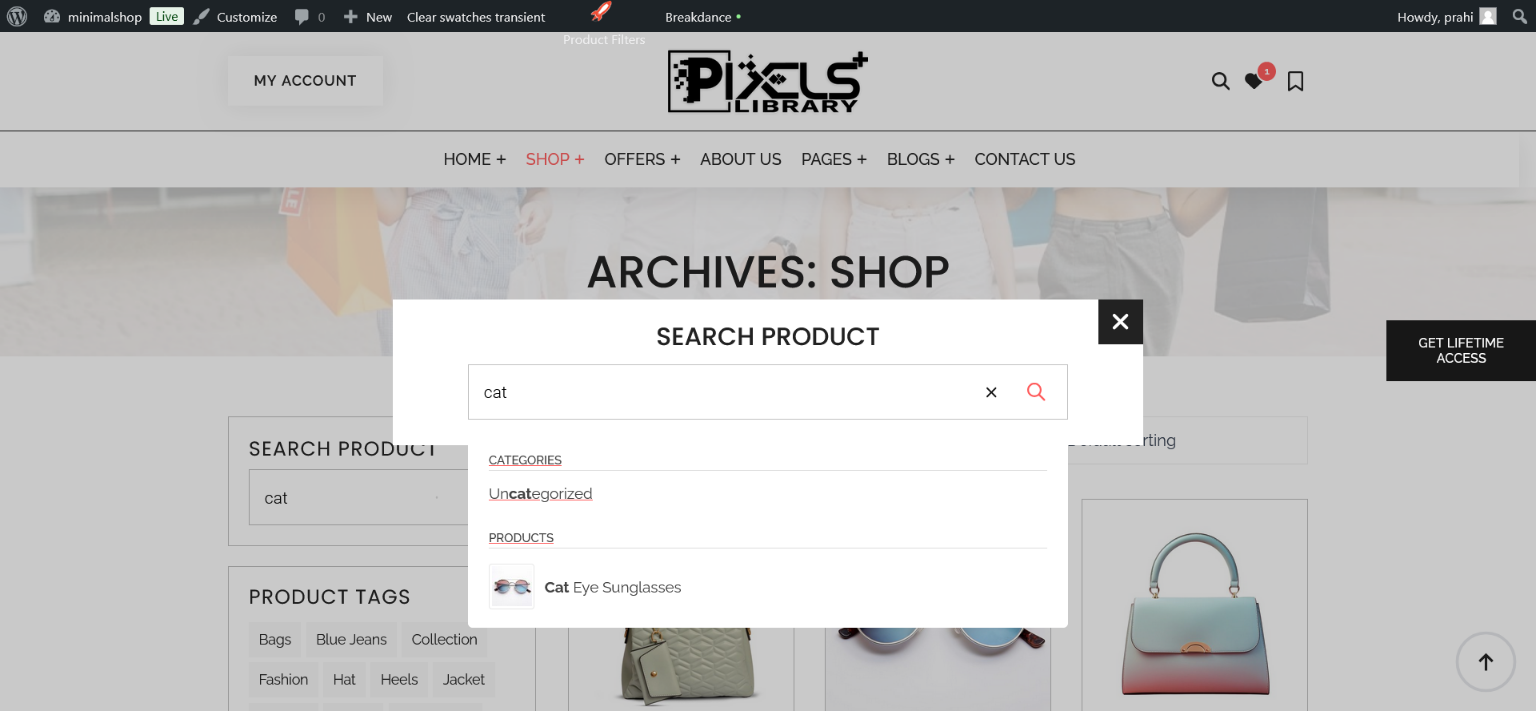
Now you need to setup Fibo Search plugin settings.
Step 11
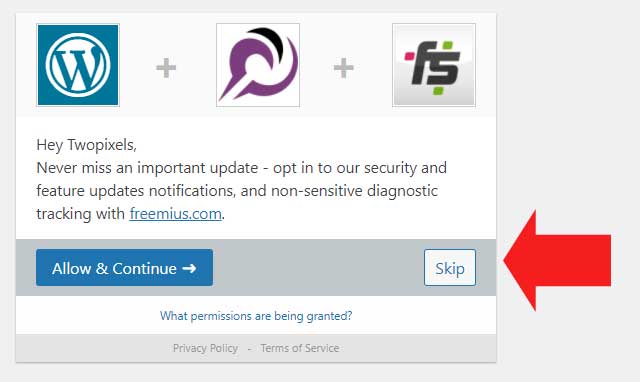
Step 11.1 -> After installing and activating the plugin you should get redirected to this. Just click on skip
Step 11.2 -> Go to WooCommerce >> FiboSearch and set your preferences.

Step 11.3 -> Purpose of used “FiboSearch – AJAX Search for WooCommerce” Plugin
After Select settings please click on “Save changes” Settings Button
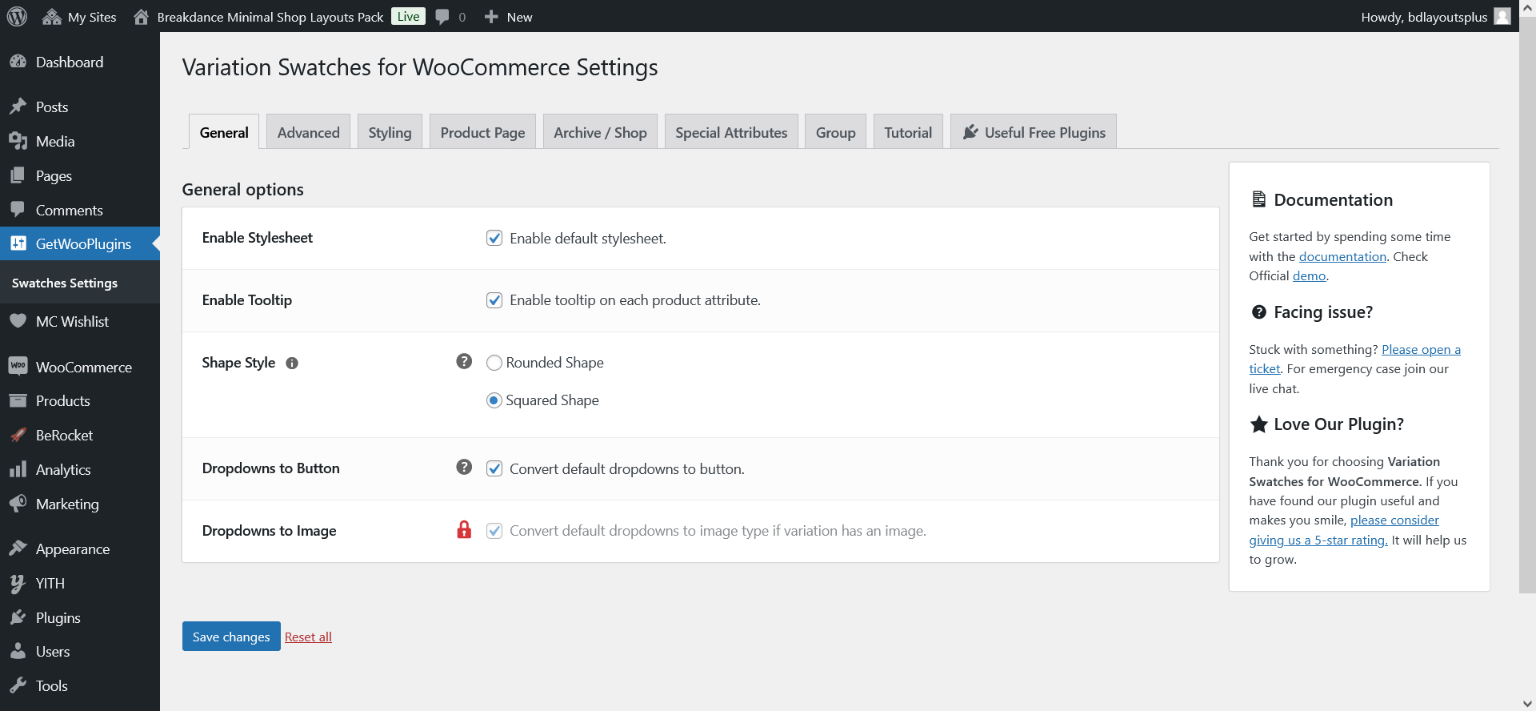
Now you need to setup Variation Swatches for WooCommerce plugin settings.
Step 12
With this plugin, your users create Beautiful Color, Image and Buttons Variation Swatches For WooCommerce Product Attributes.
Step 12.1 -> Configure General Settings
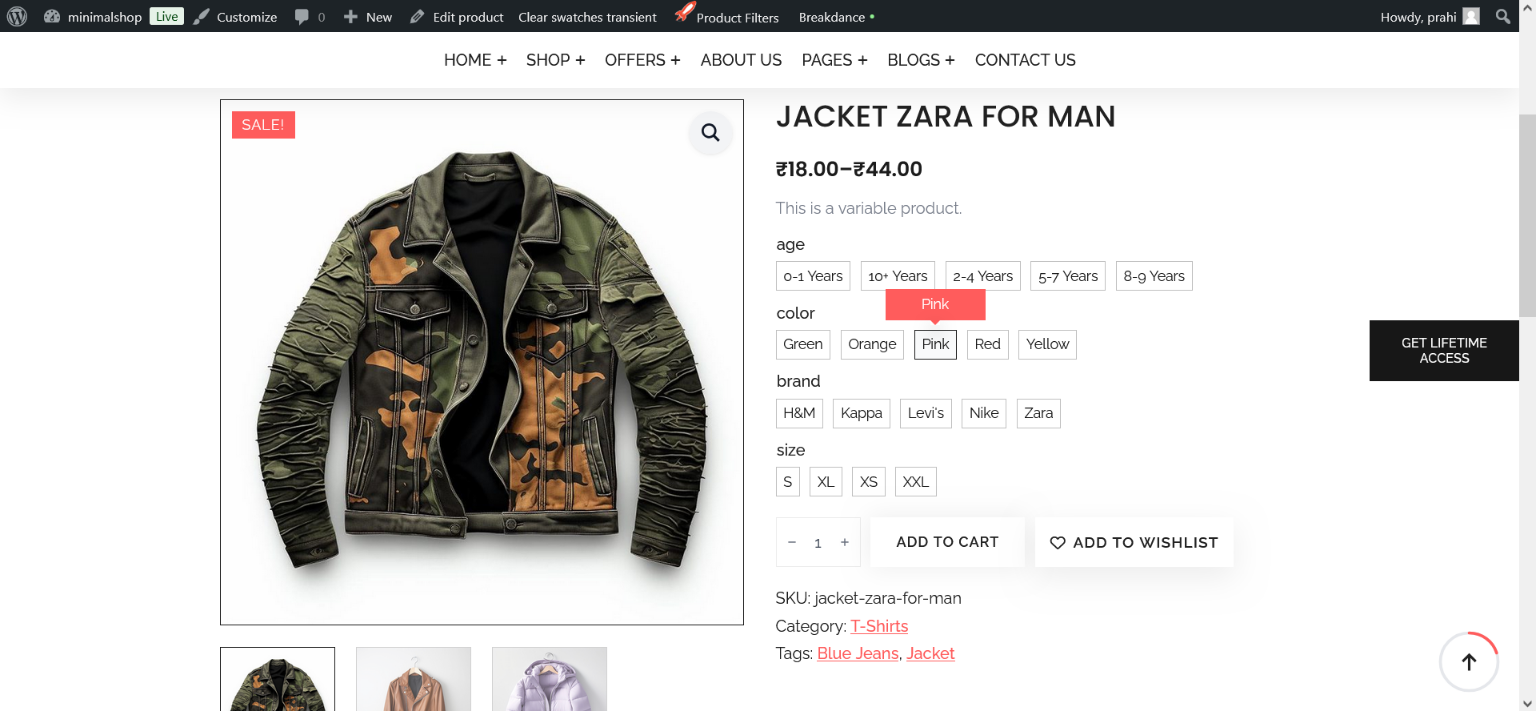
You can see attributes on your product page.
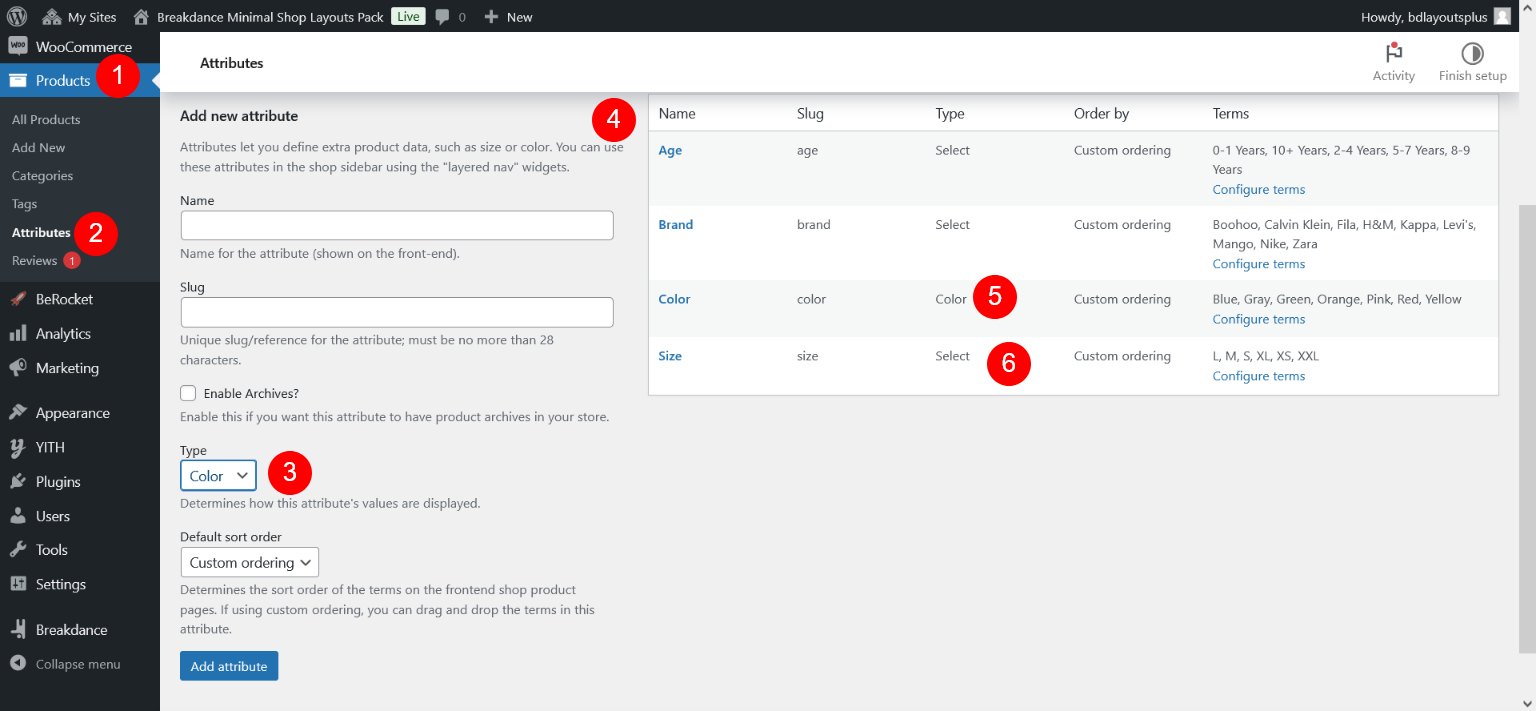
Step 12.3 -> You can edit attributes here
Now you need to setup Variation Swatches for WooCommerce plugin settings.
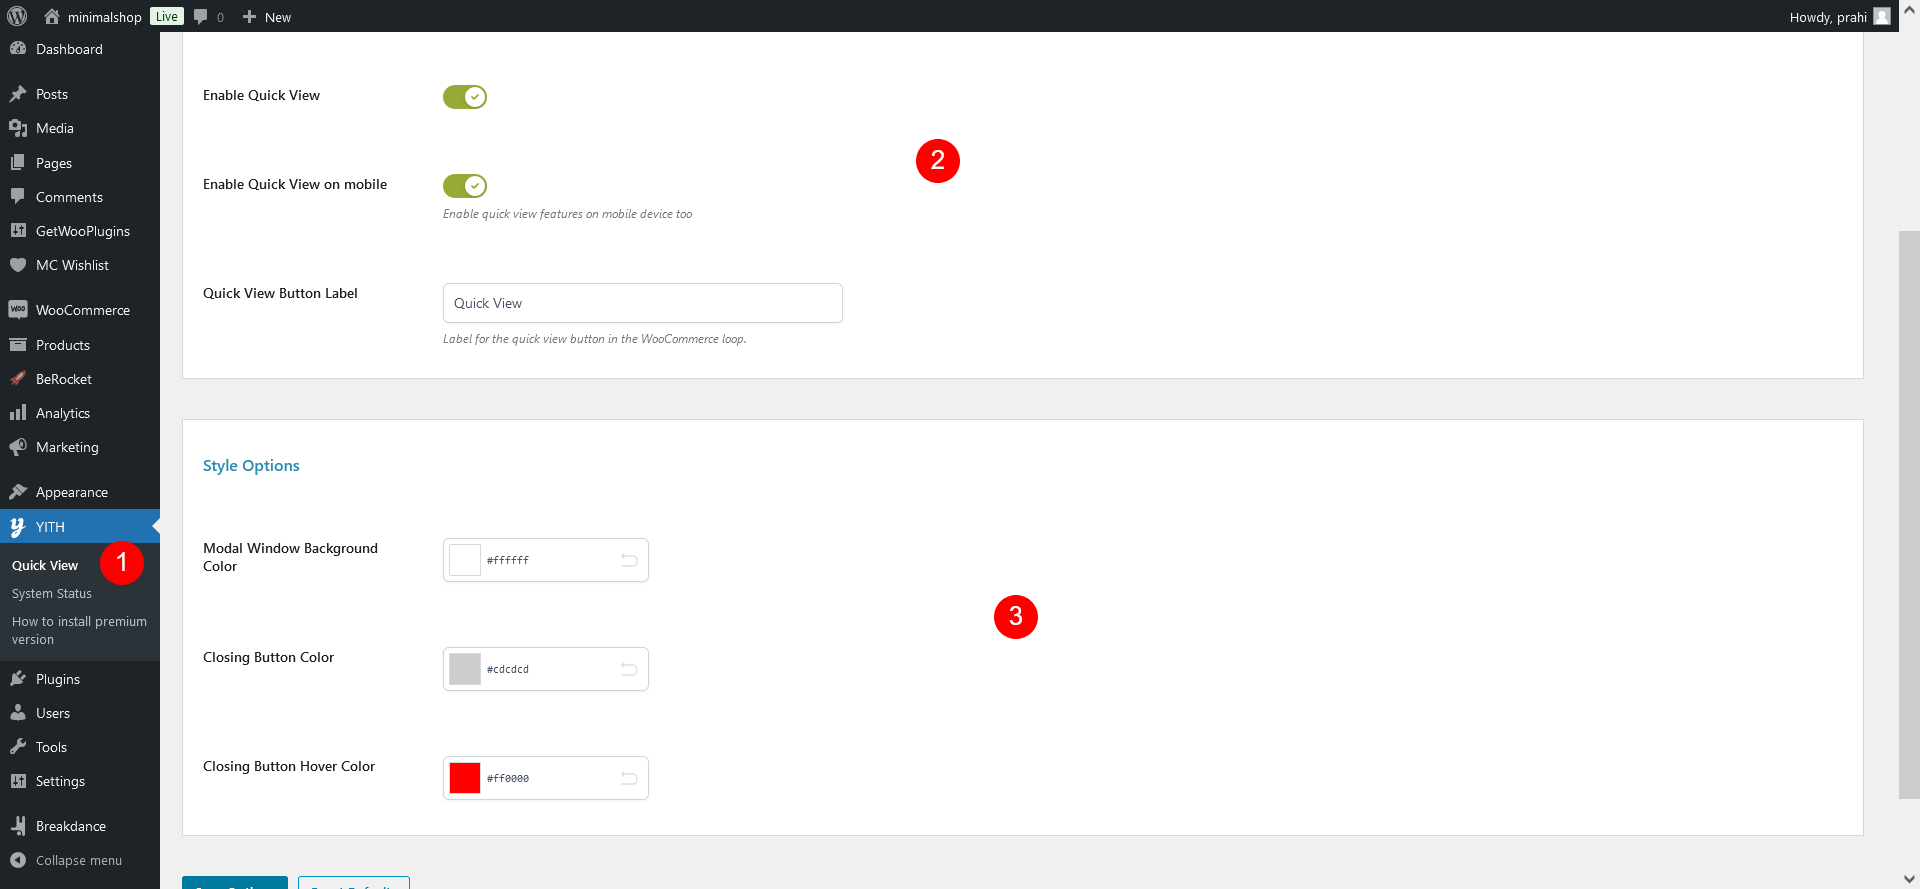
Step 13
With this plugin, your users can see small details of products without redirect to other page
Step 13.1 -> Configure General Settings
That’s It…


