If you’re looking to import Bricks Templates Packs effortlessly,
the video titled “How to Import Bricks Templates Pack Easily (Step-by-Step Tutorial)” provides a comprehensive guide.
I’ll show you how to quickly and easily import our Bricks Templates Pack using Bricks Builder’s built-in feature, just a few simple clicks. Let’s get started!
🧰 Requirements
Before you install the template pack! please make sure that Bricks Builder is activated on your website.✅ Bricks Builder installed and activated
✅ The Bricks Library Plus Layouts Pack JSON file (downloaded from our website)
✅ WordPress Admin access
This guide will show you how to easily install a complete Bricks template pack
Step 1
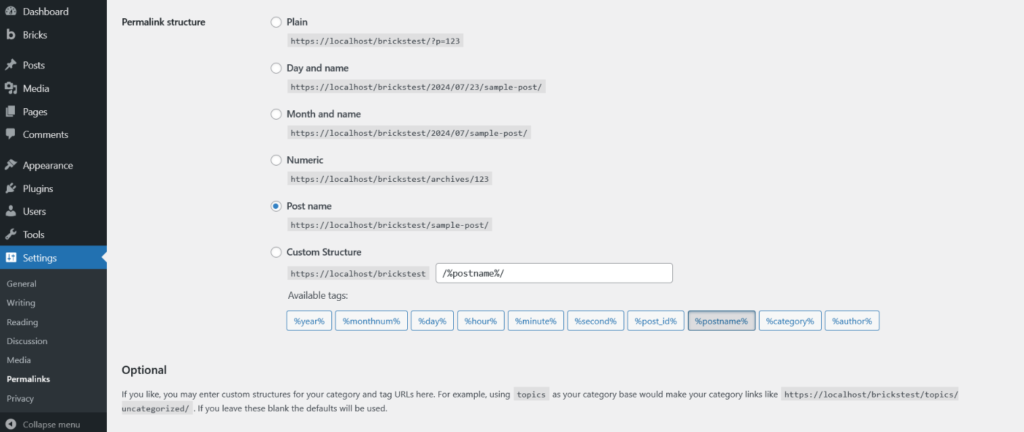
First, you need to set your website’s permalink settings. To do this, go to your WordPress dashboard,
Step 1.1 -> navigate to Settings → Permalinks, select Post name, and click Save Changes. Here’s how you can update the permalink settings
Step 2
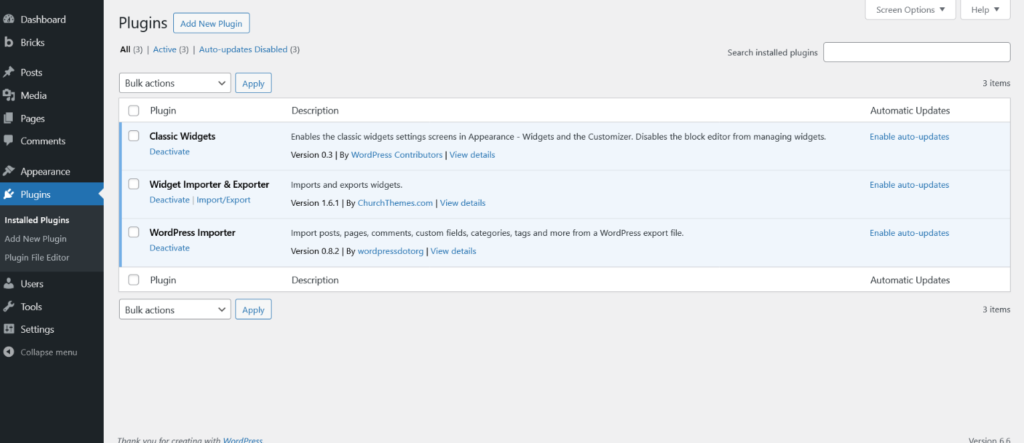
In Step 2, you’ll need to install three required plugins to easily import the demo data. These are: Classic Widgets, Widget Importer & Exporter, and WordPress Importer — all available from the WordPress repository.
Classic Widgets restores the old widget system for easier editing, Widget Importer & Exporter allows you to quickly import widget settings, and WordPress Importer is used to import the XML file containing demo content.
Step 2.1 -> Go to Plugins and add below plugins
Step 3
Once all three plugins are installed, we can proceed to Step 3, where we’ll show you how to import the XML file and load the demo data.
Step 3.1 -> In the WordPress dashboard, go to Tools > Import, select WordPress, and upload the XML file. Once XML file selected, click Upload File and Import.
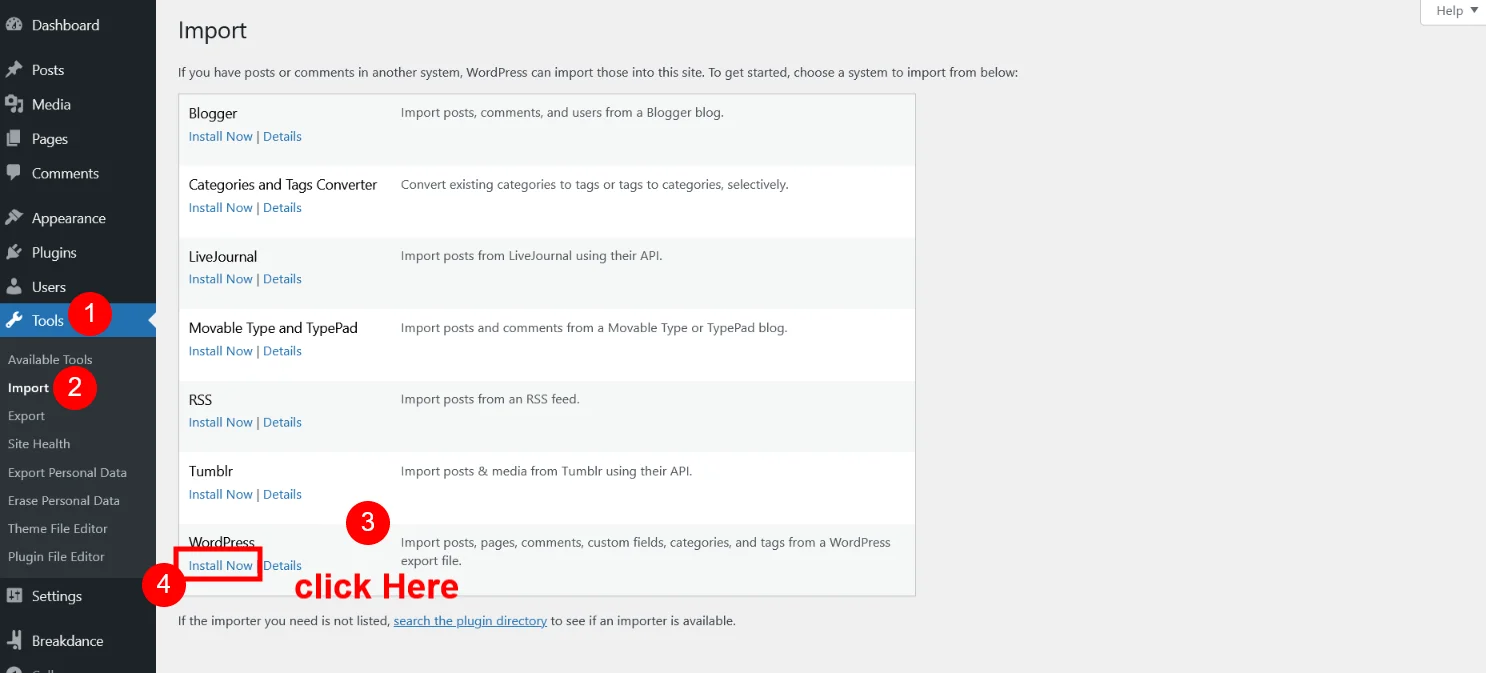
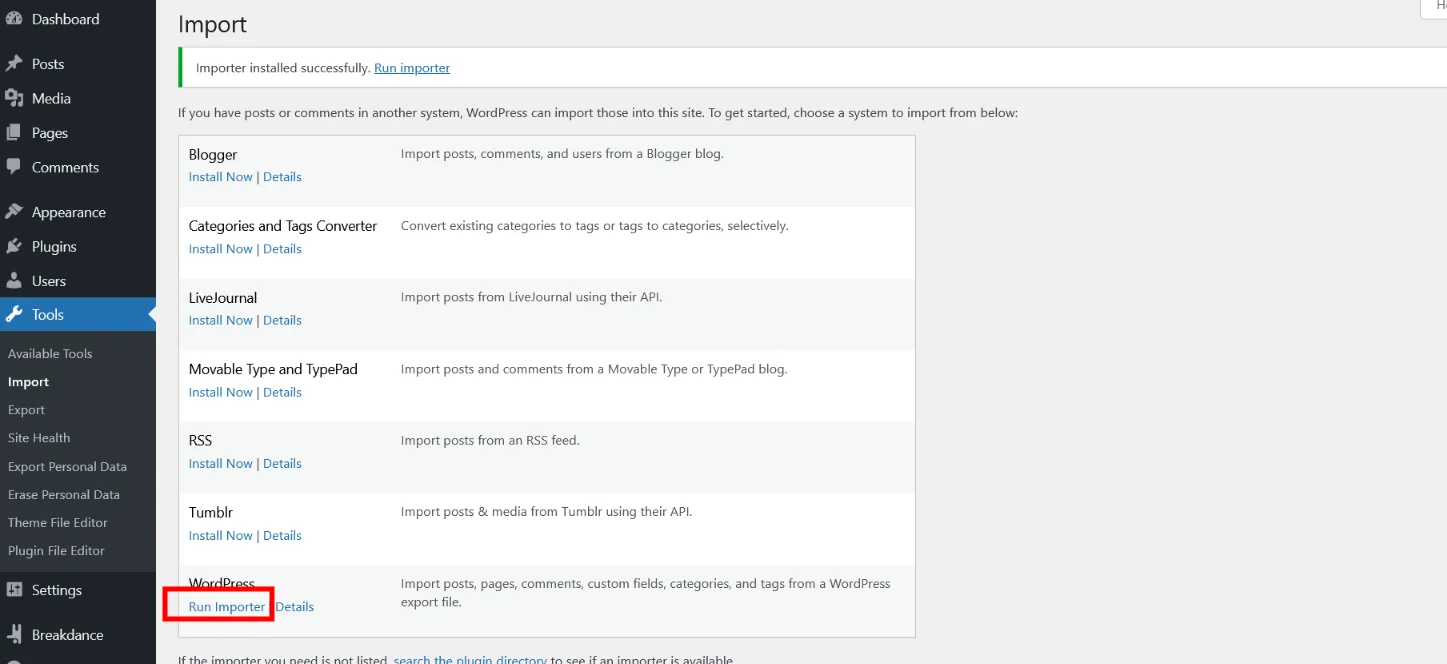
Step 3.2 -> After Install Click on “Run Importer”
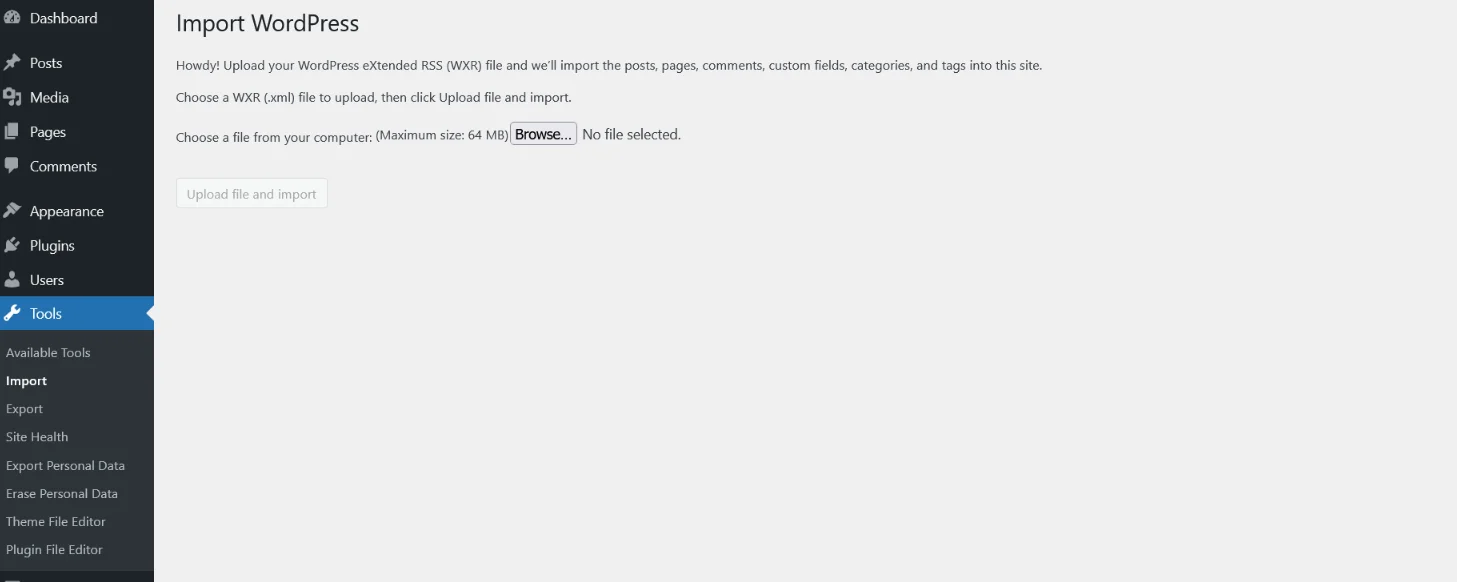
Step 3.3 -> Set XML file to imports data
Step 3.4 -> Go to “Bricks Flooring Services Template Pack” Folder and see “XML Files” Folder
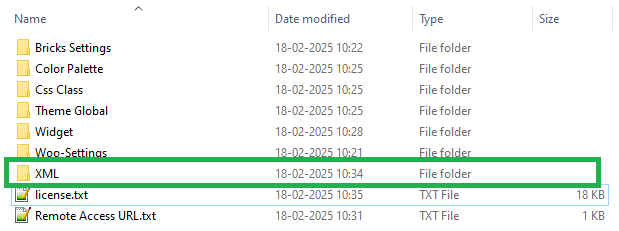
Once you open XML Files Folder you can see “bricks-flooring-services-template-pack.xml ” file for upload to wordpress tools options. folder and you can see below files

Step 3.5 -> Open “Bricks Flooring Services Layouts Pack” Folder and see”XML” Folder and select “bricks-flooring-services-layouts-pack.xml” file [ Downloaded Product Folder Structure ]
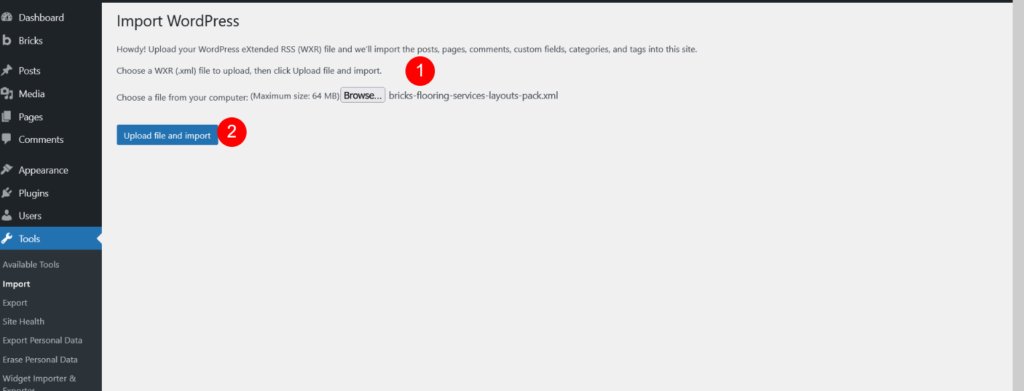
Step 3.6 -> Finally, click the Submit button. you’ll see all pages and media have been imported.
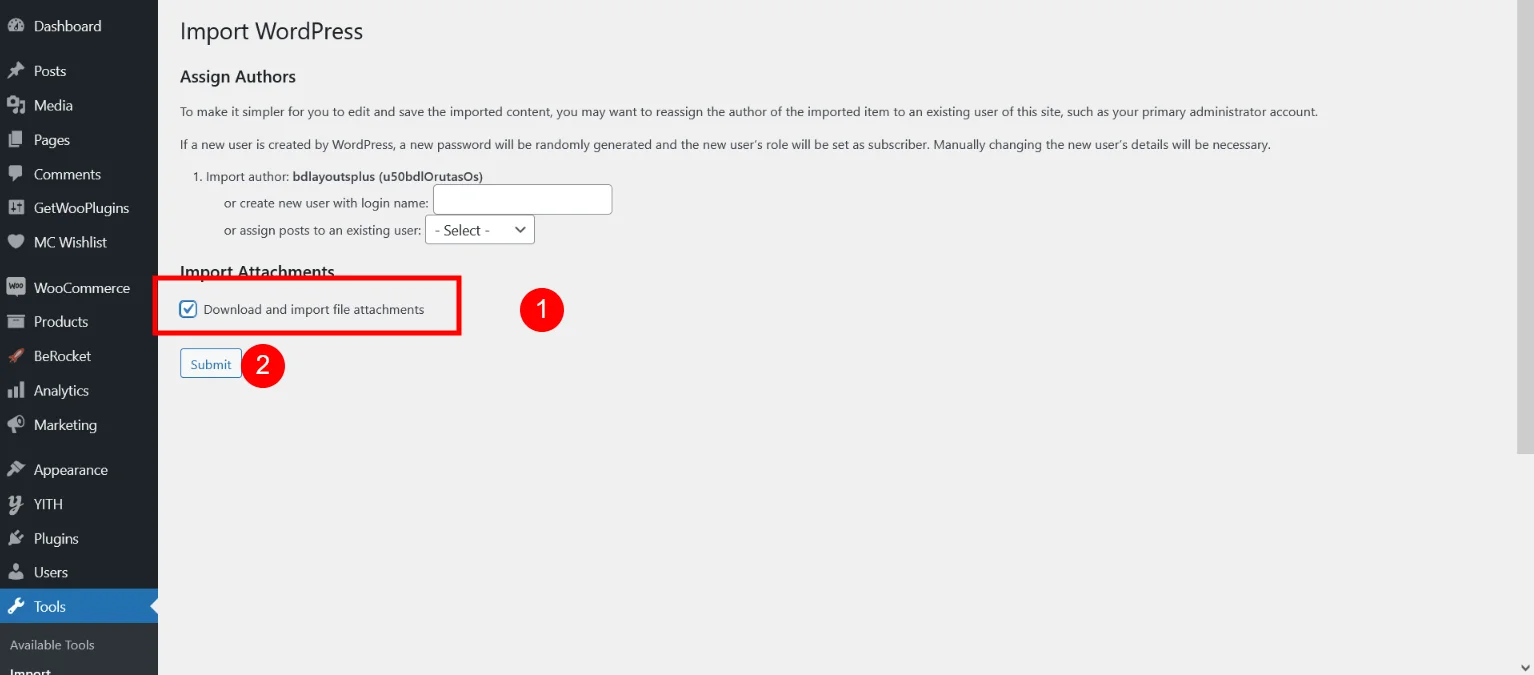
Now XML Data is Imported.
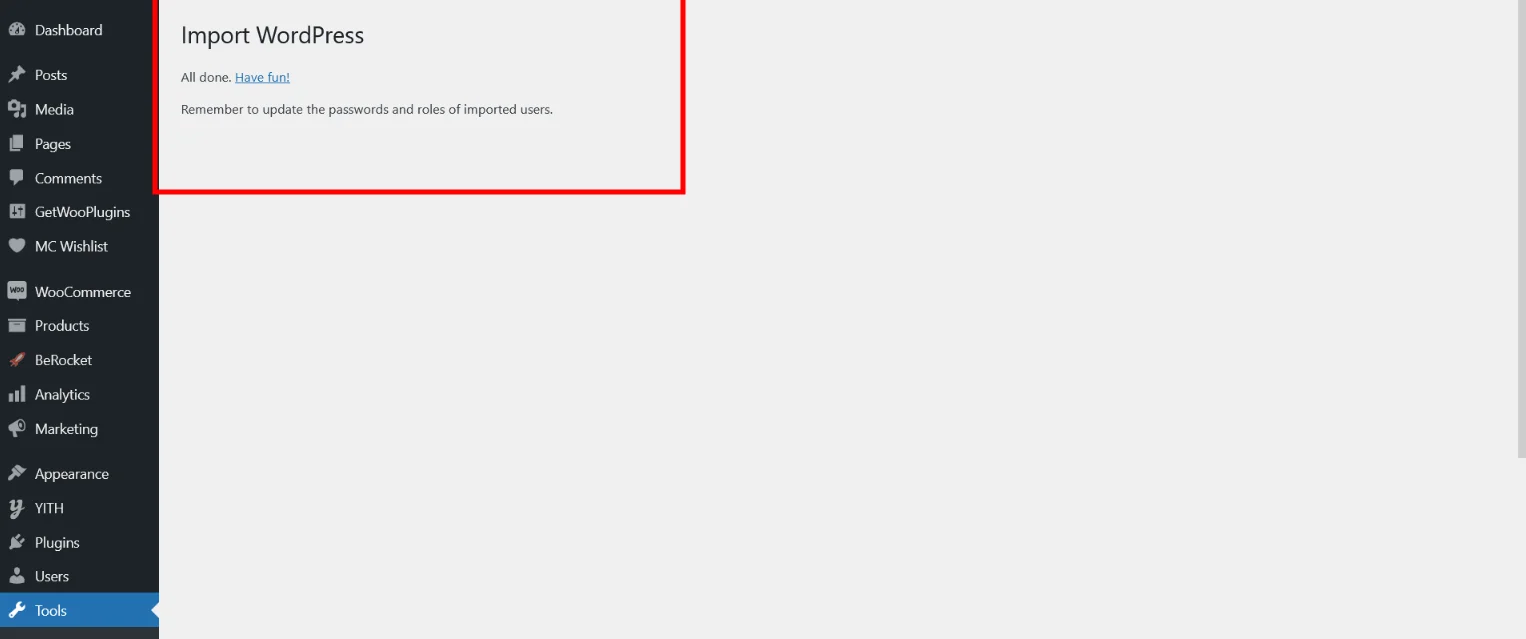
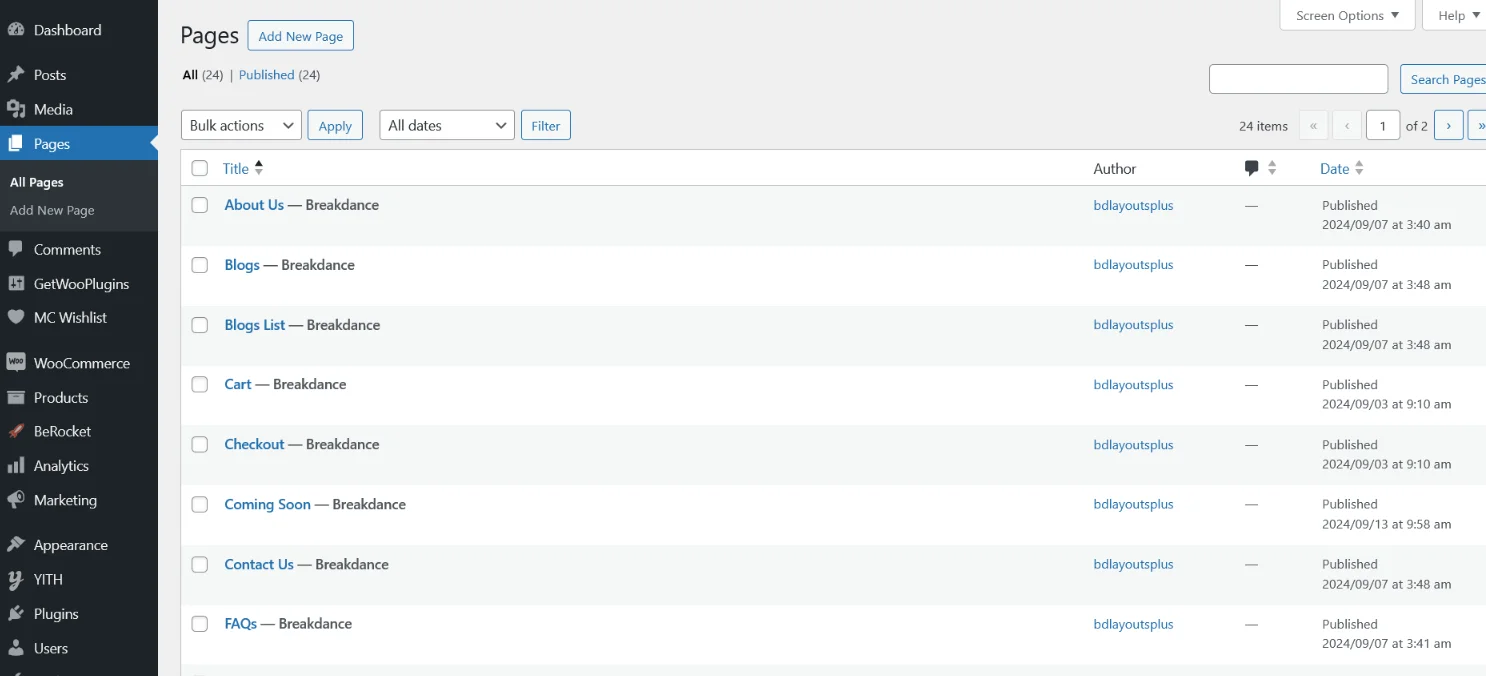
After click on submit it will take few minutes. once data import successfully go to pages and you can see all pages an templates also.
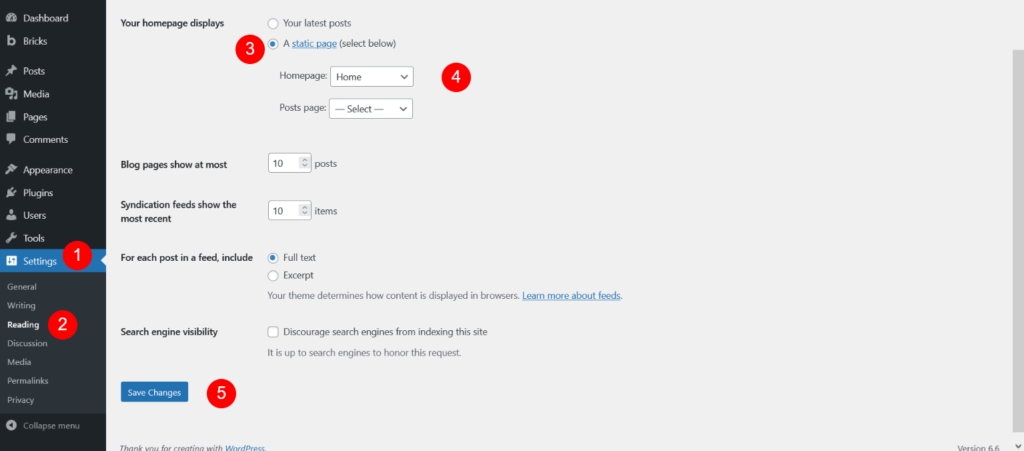
Now, set the front page as the homepage by going to Settings → Reading, selecting the radio button option for Home Page, and choosing Home. Then, click the Save Changes button.
Now import blog detail page sidebar widget data
Step 4
Open “Bricks Flooring Services Layouts Pack” Folder and see “Widget” Folder and open “bricks-flooring-services-layouts-pack-widgets.wie” file [ Downloaded Product Folder Structure ]
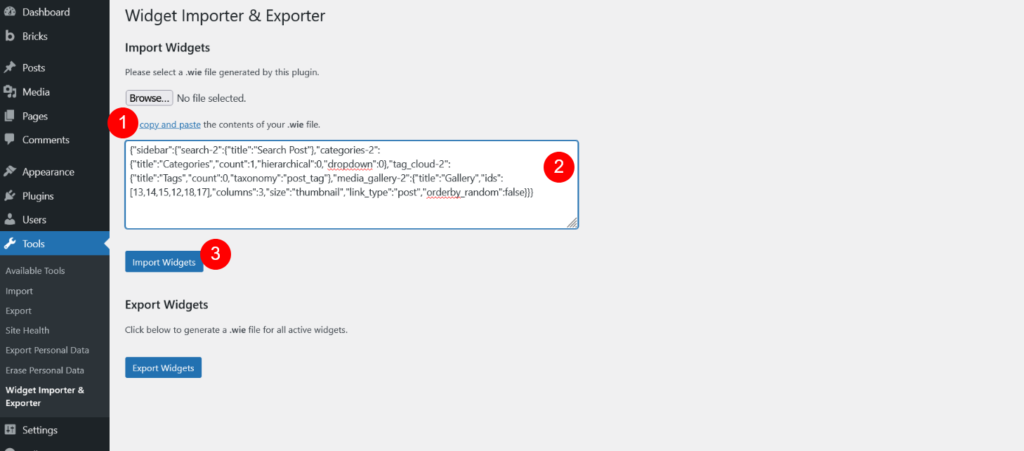
Step 4.1 -> Go to Dashboard > Tools > WordPress Importer & Expoter > Import -> Imports Widget -> Select Widget File or Copy code as mentions below image
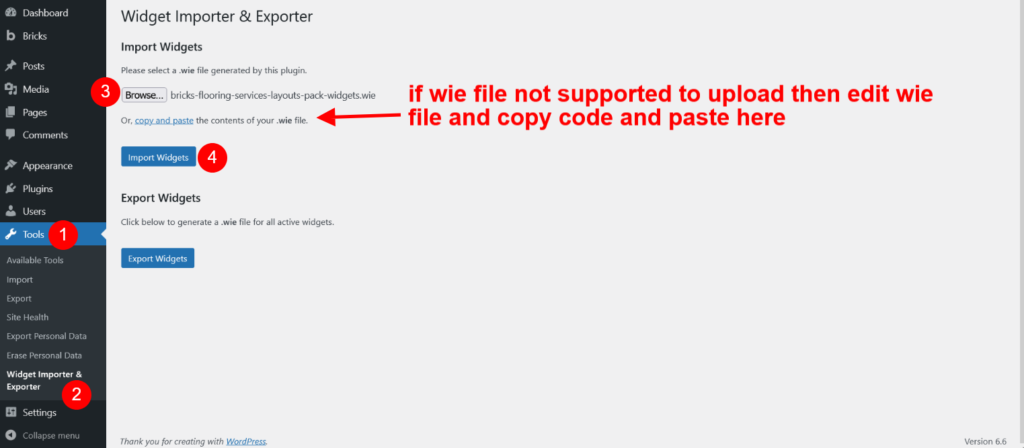
Step 4.2 -> After Copy code or upload widget file Click on “Import Widgets”
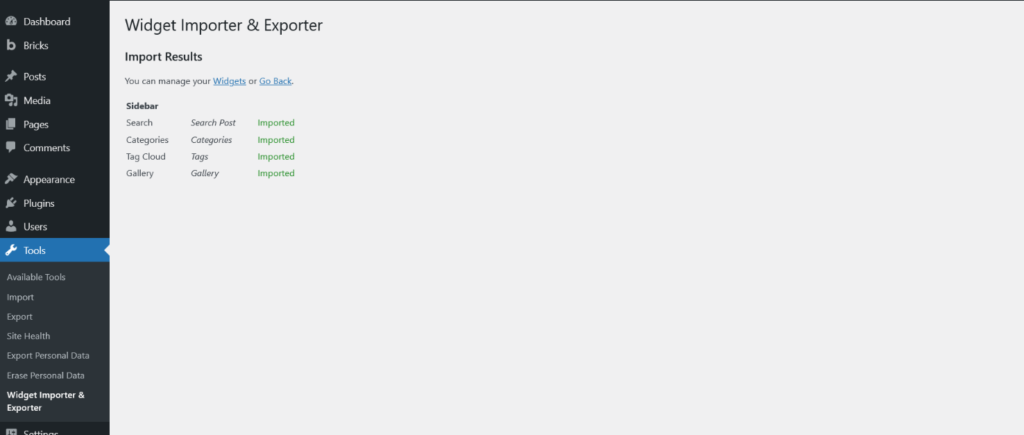
Step 4.3-> If widget data install successfully then you will get below screen
Step 5
Once Step 4 is complete, we need to install the Bricks settings. To do that, proceed to Step 5, where we’ll show you how to import the Bricks settings file.
To do this, go to Bricks → Settings, click the Import Settings button, select the Bricks settings file located in the template pack folder
Step 5.1 -> Open “Bricks Flooring Services Layouts Pack” Folder and see “Bricks Settings” Folder and Seelct “bricks-settings.json” file [ Downloaded Product Folder Structure ]
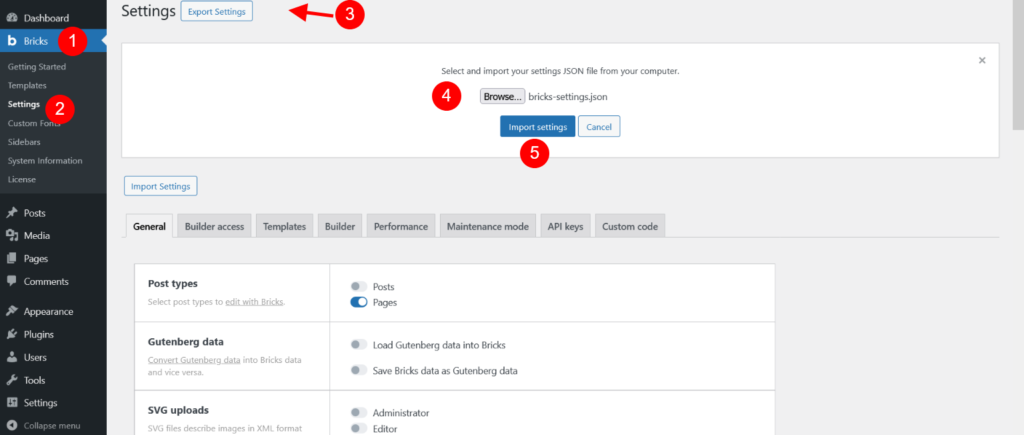
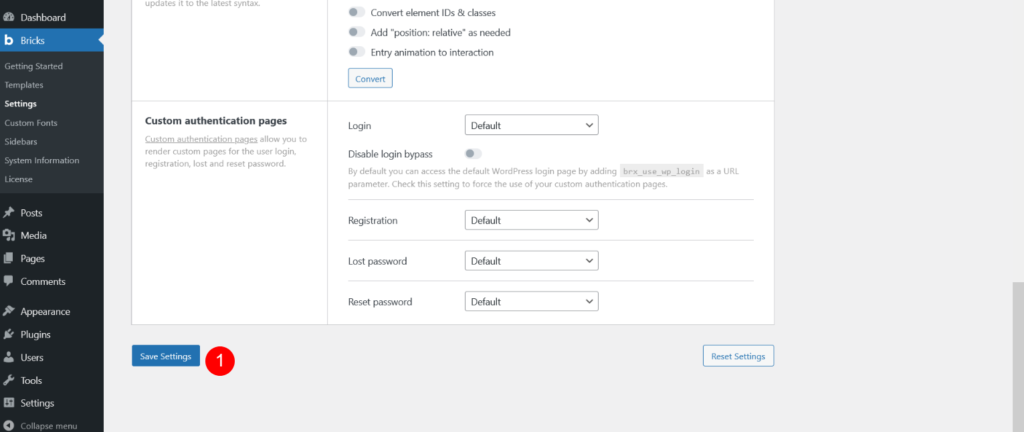
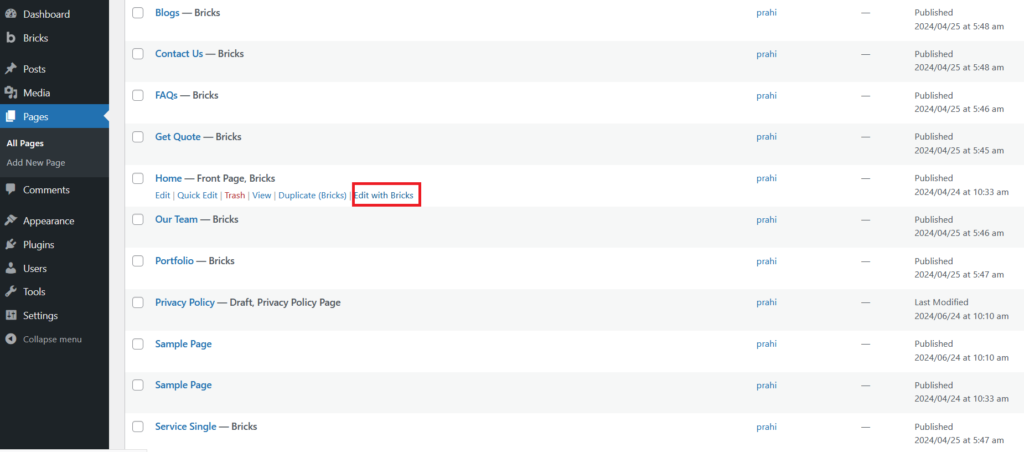
Step 5.2 -> Once the changes are applied, continue to Step 5.2, where we’ll show you how to apply the theme settings. To do this, go to Pages → All Pages, select the Home page, and click Edit with Bricks.
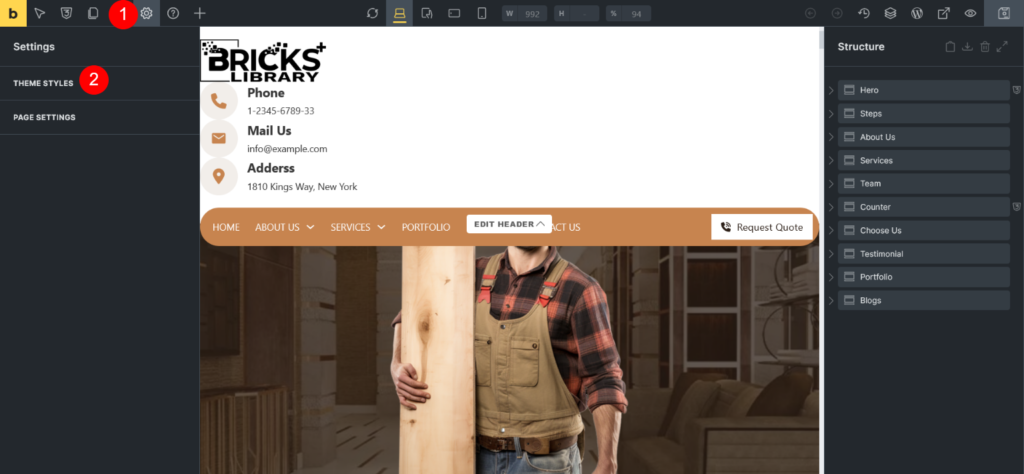
Step 5.3 -> Go to Theme Styles and click on ‘+’ Icon

Step 5.4 -> Now Click on Import Icon

Step 5.5 -> Open “Bricks Flooring Services Layouts Pack” Folder and see “Theme Global” Folder and Select “bricks-theme-style-px_fs__theme__style.json” file [ Downloaded Product Folder Structure ]
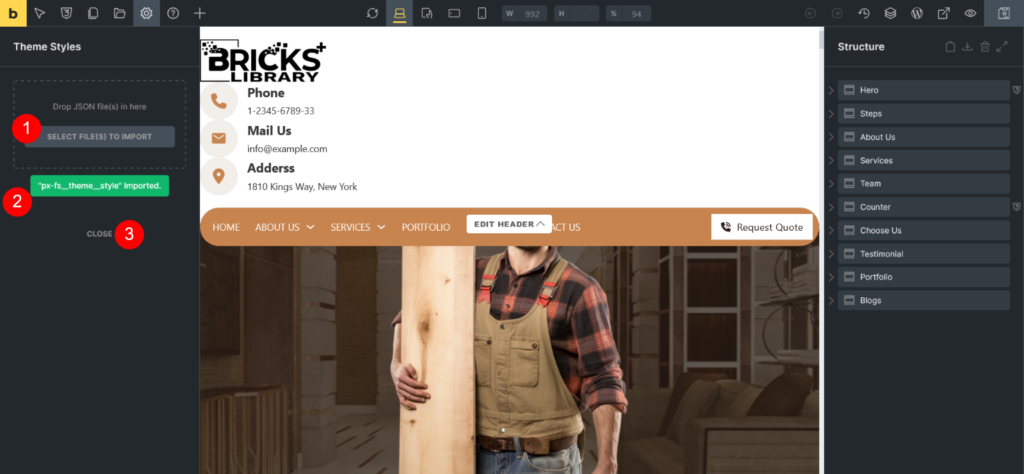
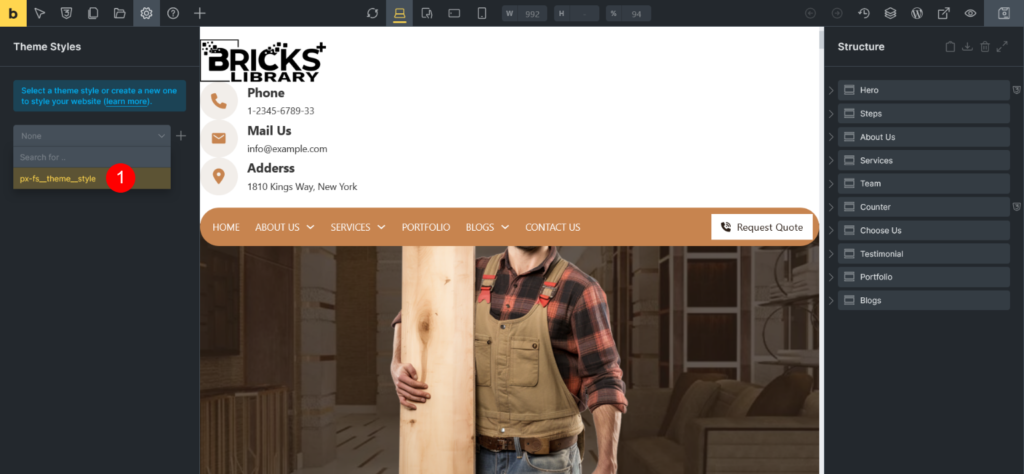
Step 5.6 -> Once file is imported then select that global style and save
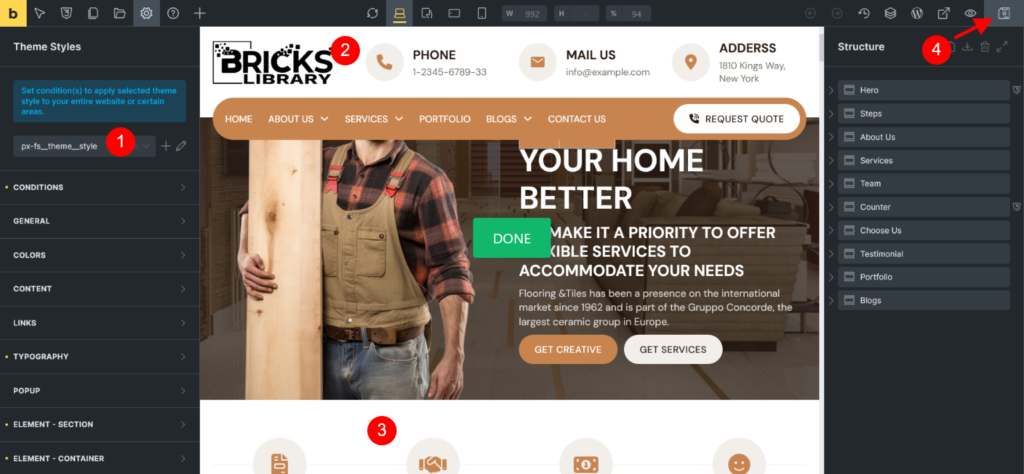
Now in theme style go to color tab
Step 6
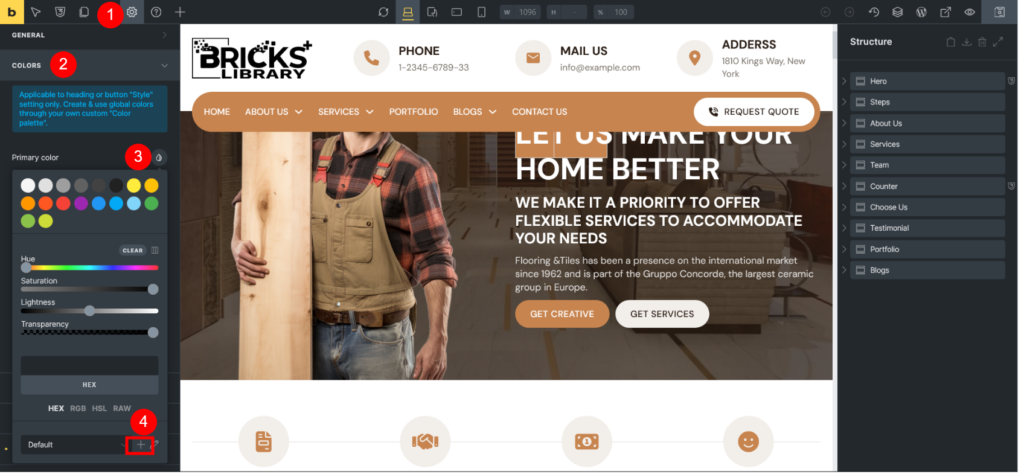
Sometimes, the color settings may be missing. In that case, proceed to Step 6, where we’ll show you how to apply the color settings. Now, in the Theme Style panel, go to the Colors tab.
Step 6.1 ->Now in theme style go to color tab.Open primary color and see ‘+’ Icon see Number 4
Step 6.2 -> Click on Import Icon
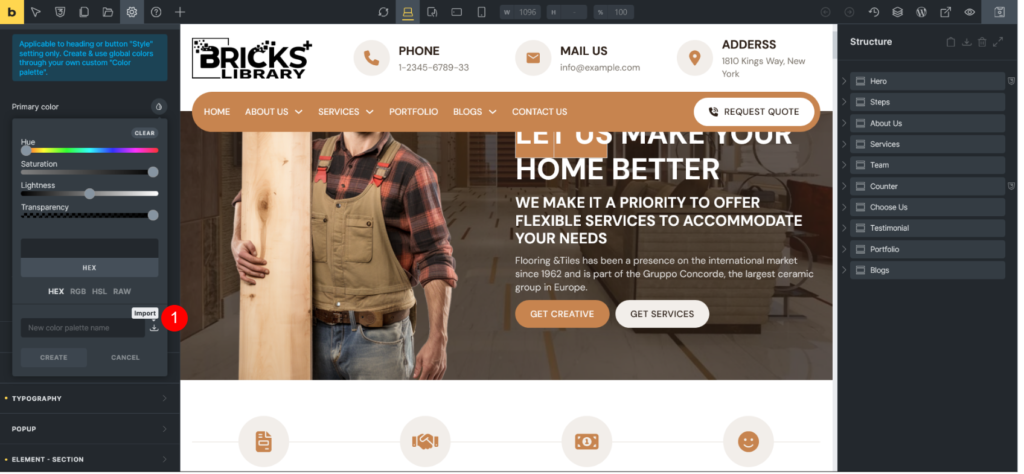
Step 6.3 -> Open “Bricks Flooring Services Layouts Pack” Folder and see “Color Palette” Folder and Select “bricks-color-palette-px_fs__color__set.json” file [ Downloaded Product Folder Structure ]
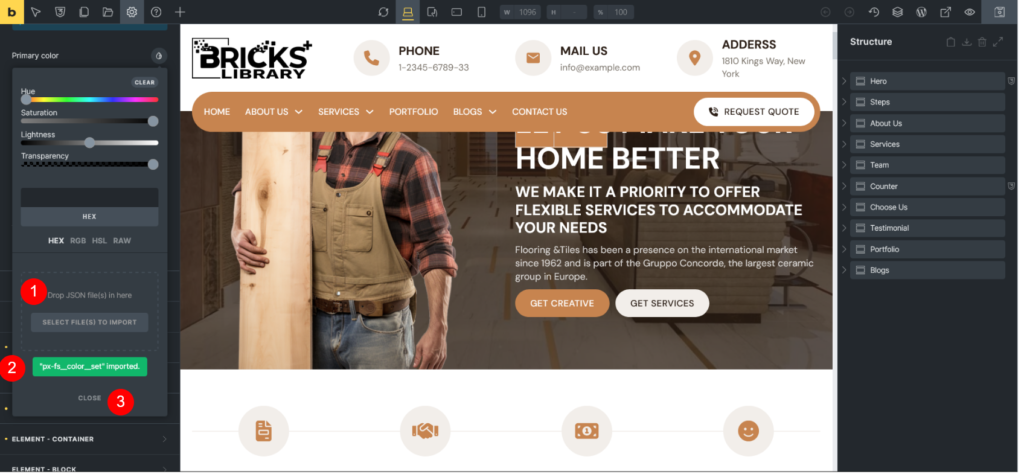
Now Save and close your website is ready.
Now, we proceed to Step 7, where we’ll show you how to import all CSS classes and variable CSS classes. To do this, click the button as shown in the attachment.
Step 7
Step 7.1 ->Click on classes/variable button as mention below image
A popup will appear for classes and variables.A popup will appear for classes and variables. Click the Import button to import the CSS classes file.
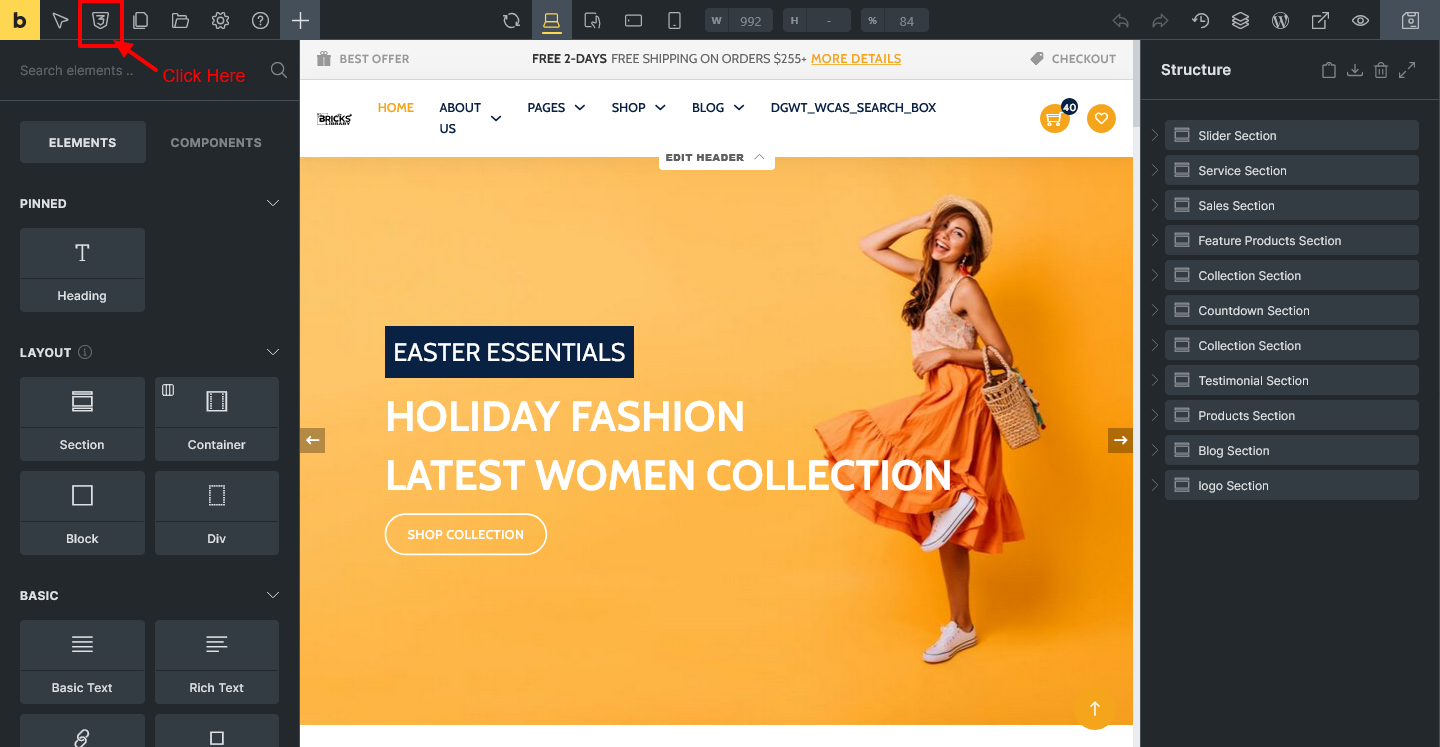
Step 7.2 -> -> Now click on Classes tab and Click on Import Icon
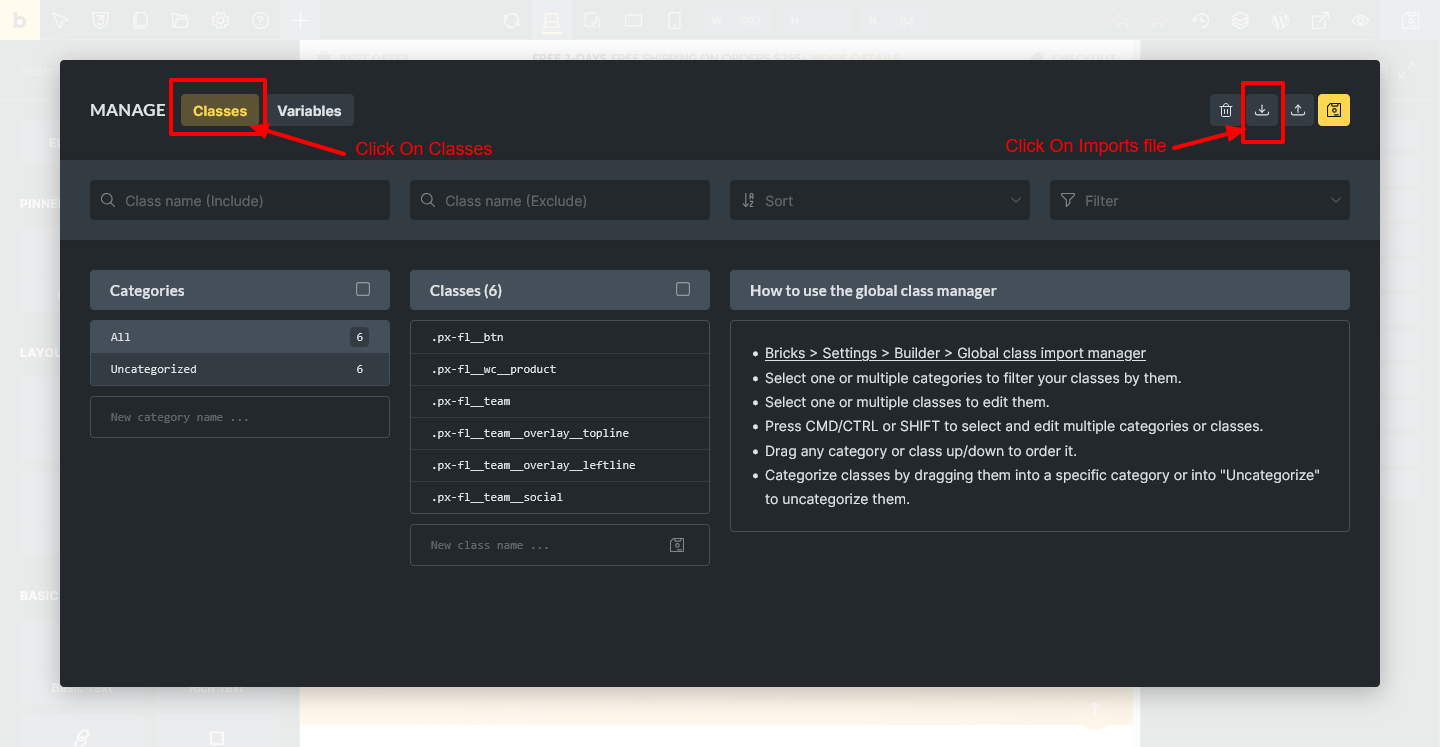
Step 7.3 -> Open “Bricks-Flooring-Services-Template-Pack” Folder and see “Css Class” Folder and Select “bricks-css-classes.json” file [ Downloaded Product Folder Structure ]
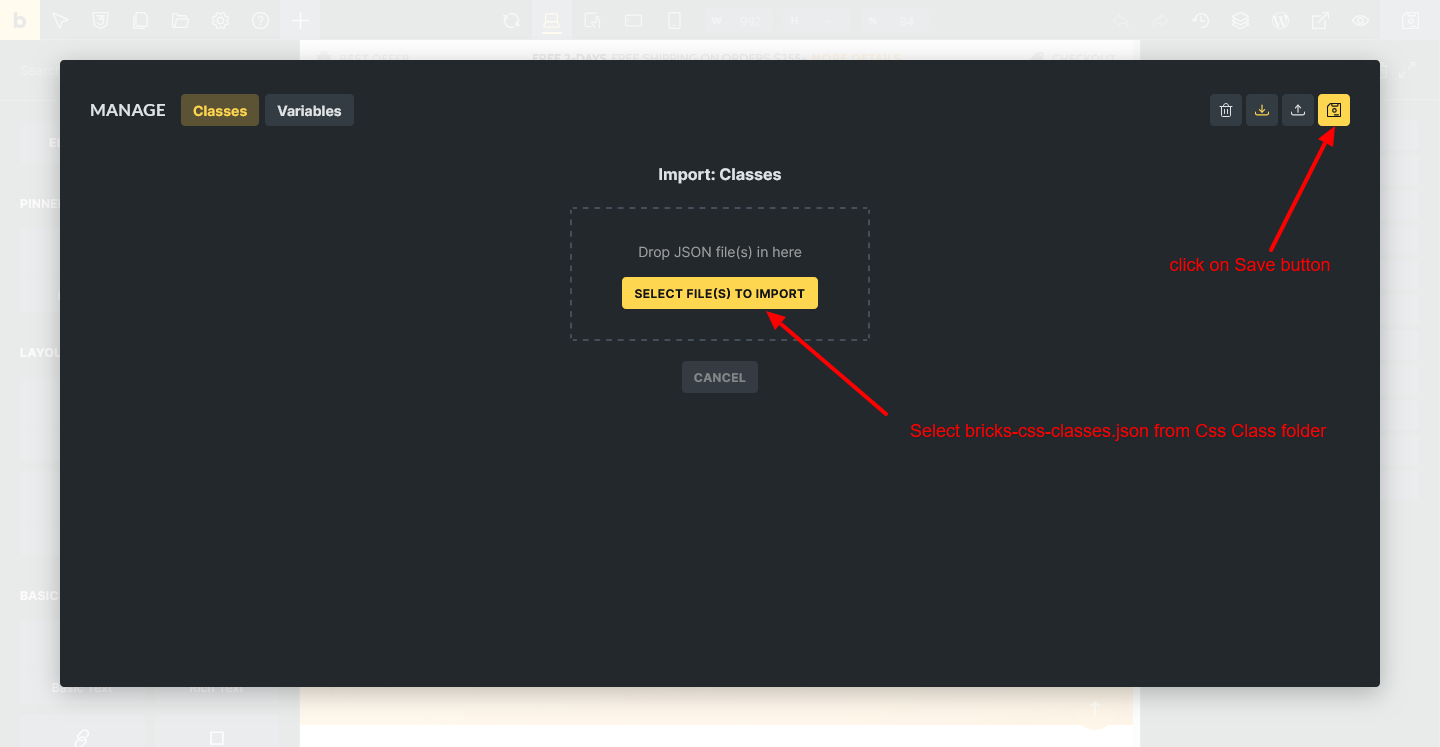
Now Save.
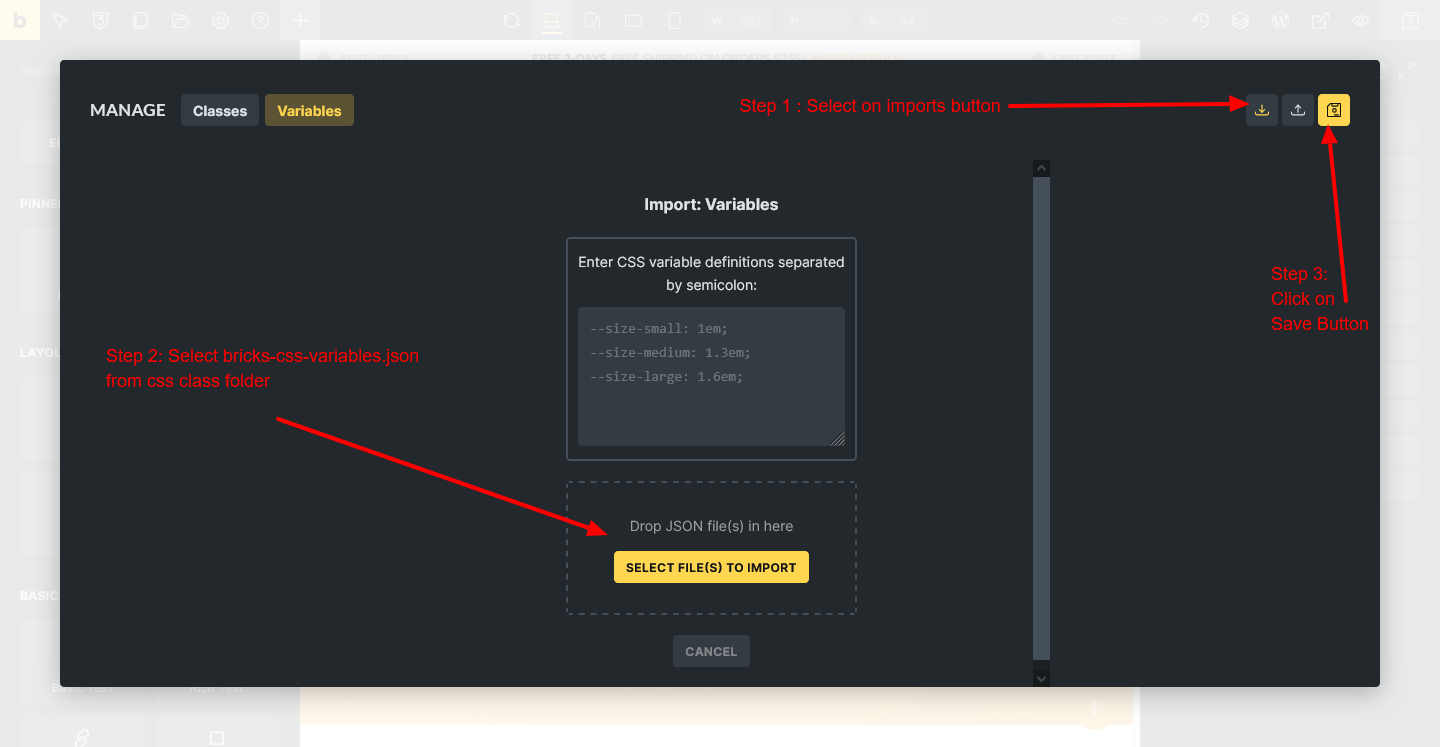
Step 7.4 ->Now click on variable tab and Click on Import Icon
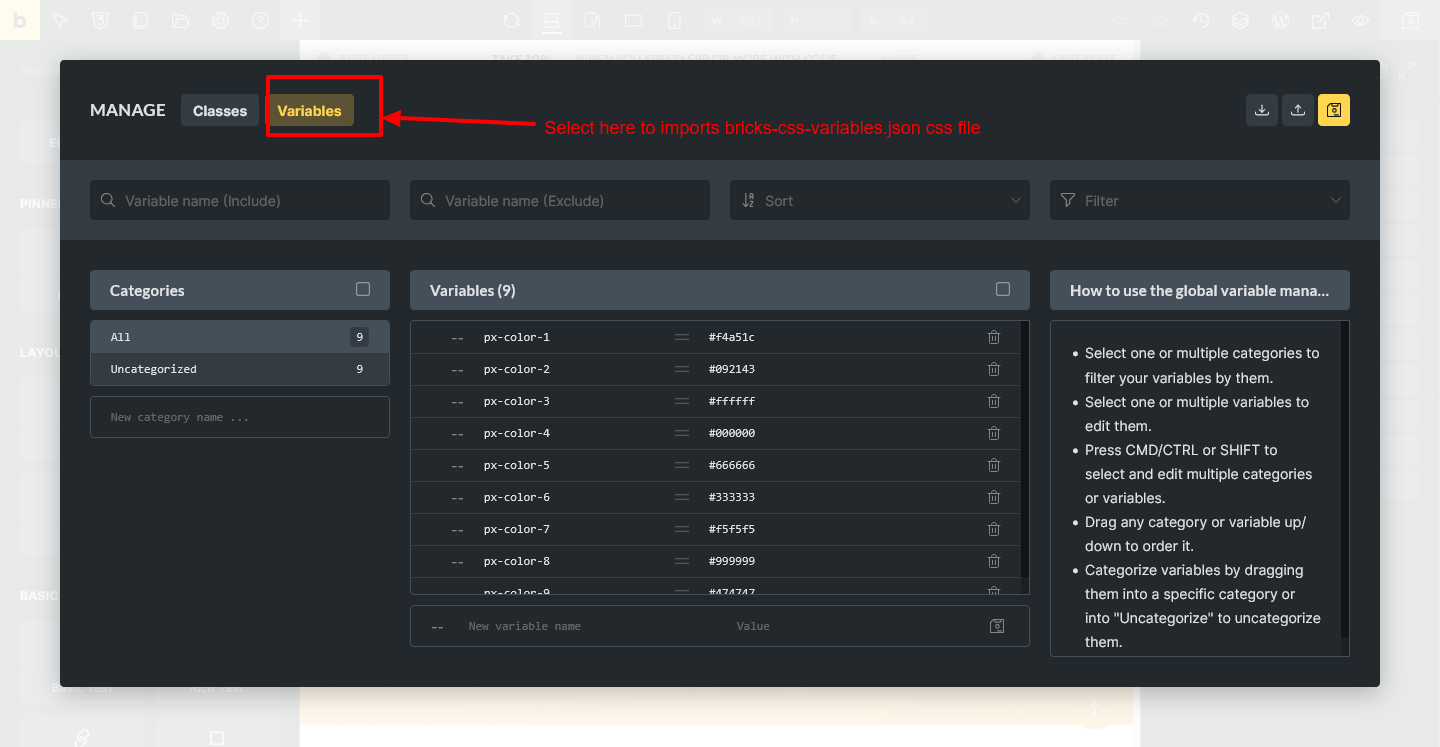
Step 7.5 -> Open “Bricks-Flooring-Services-Template-Pack” Folder to see “Css Class” Folder and Select “bricks-css-variables.json” file [ Downloaded Product Folder Structure ]
